DIY | Preserved Flower Hoop Wreath
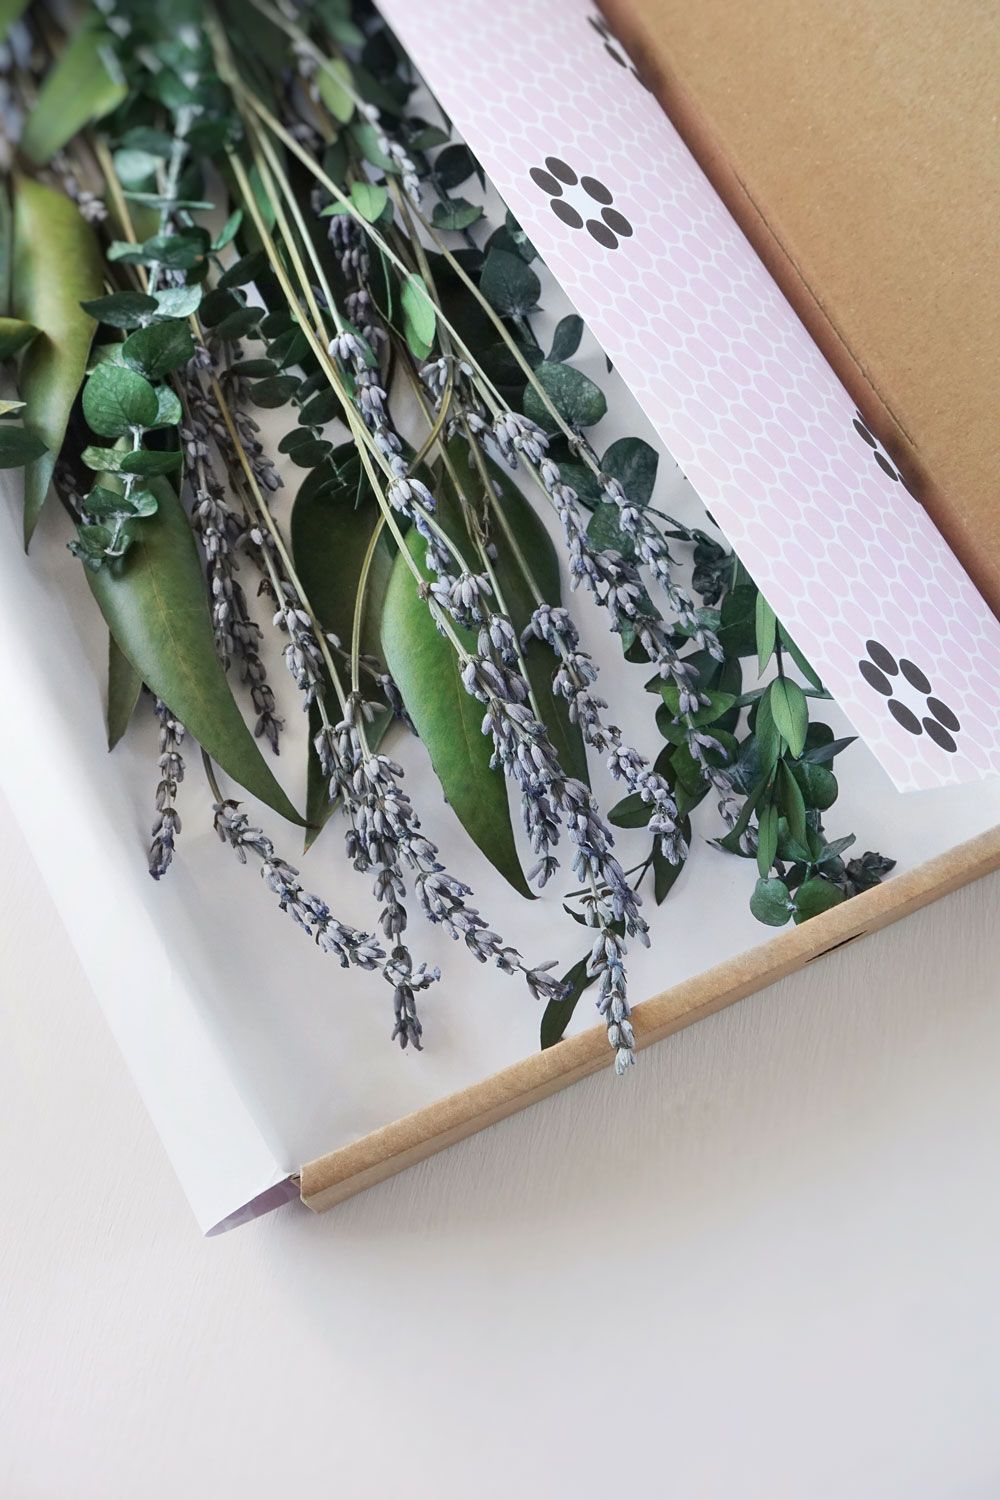
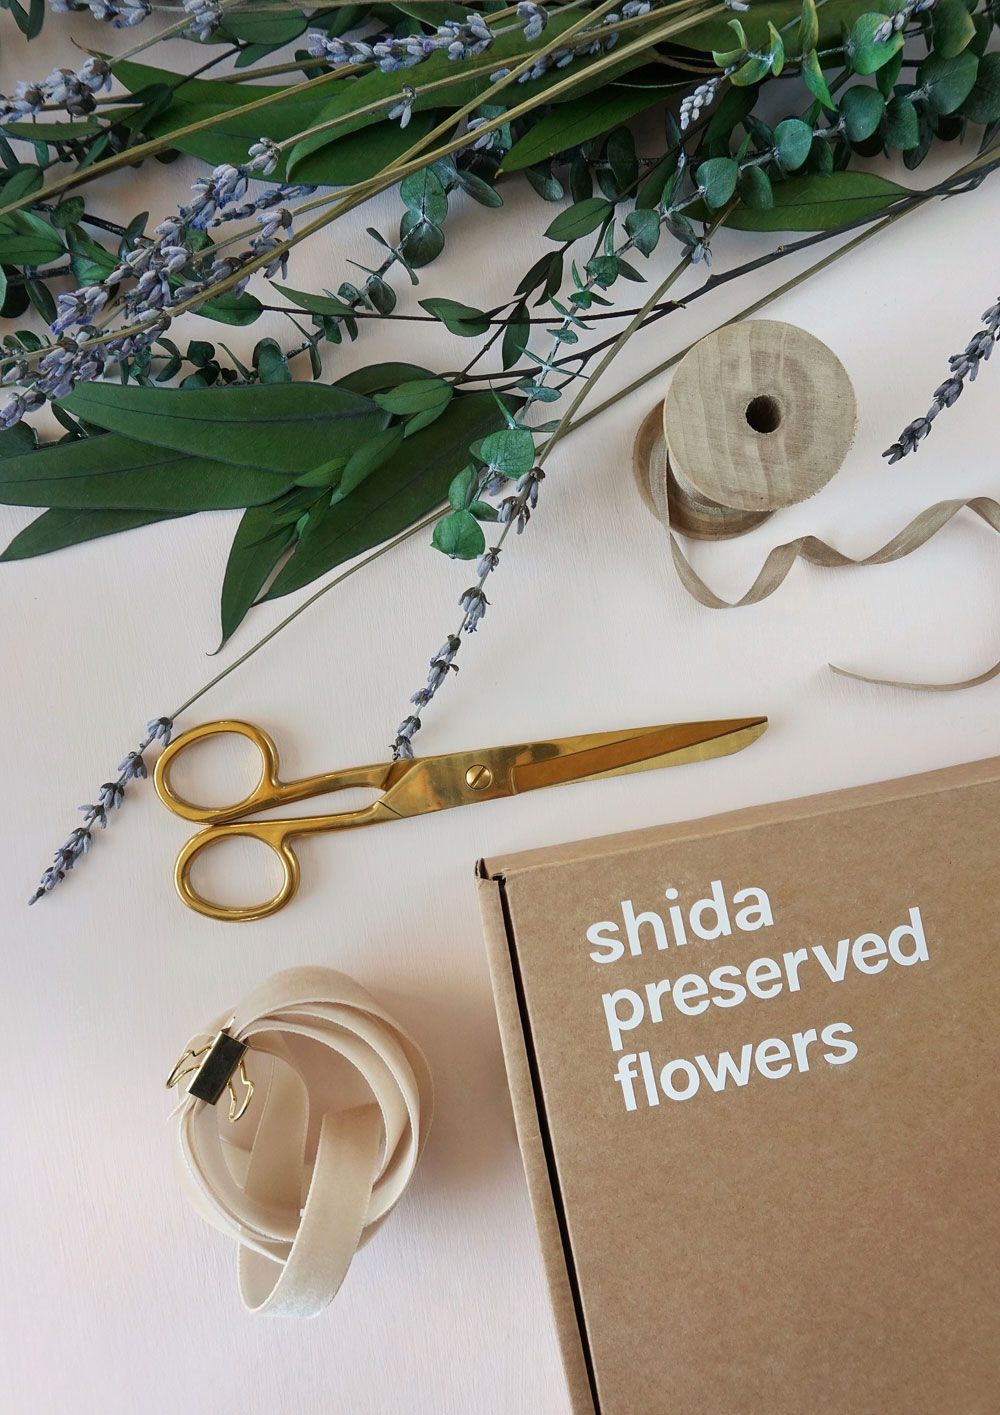
I was rather excited when this letterbox delivery of wreath making foliage, landed on my doorstep! It’s the latest product by Katherine of Shida Preserved Flowers and I had the pleasure of making a wreath to style and photograph ahead of the launch.
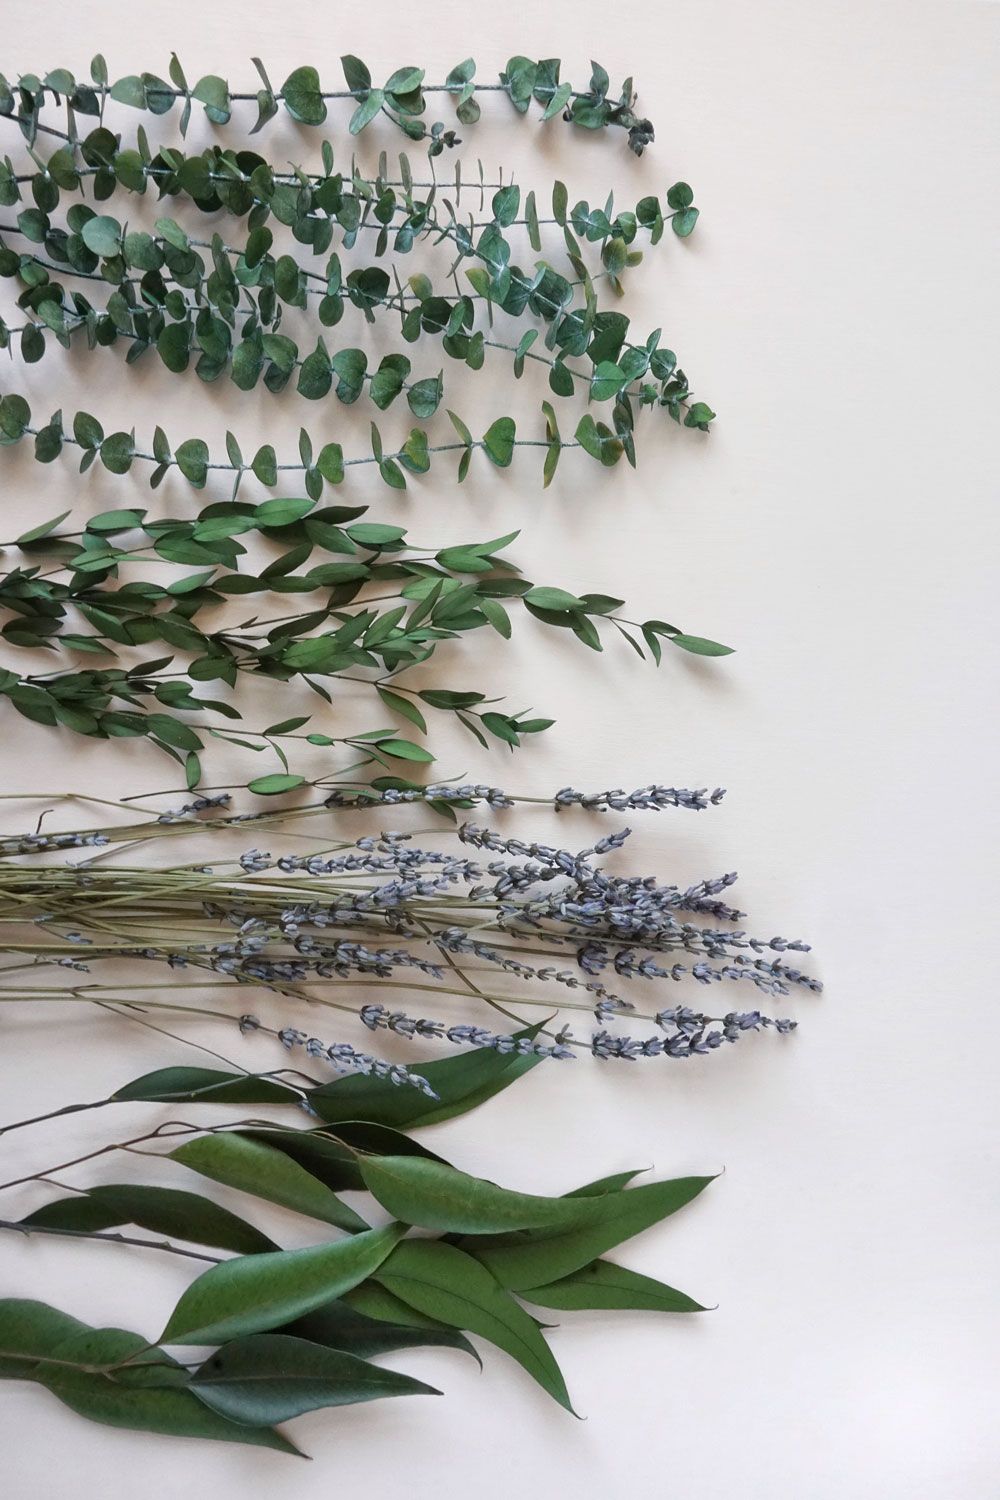
The box contains a mixed selection of preserved eucalyptus foliage and preserved lavender. The gorgeous fragrance on opening the box really caught me by surprise as did how malleable the foliage was - I had assumed it would be similar to dried greenery but I couldn’t have been more wrong! It’s really supple and therefore perfect for wreath making.
I’ve put together a little step by step guide on how I made the wreath below … I am certainly no expert but if I can do it then so can you!
You will need …
A box of preserved foliage from Shida Preserved Flowers
A hoop/ring. I used a 35cm gold metal ring but you could use an embroidery hoop.
Floristry wire, ideally in green so it blends in.
Ribbon, I’ve used a mix of silk and velvet.
Scissors
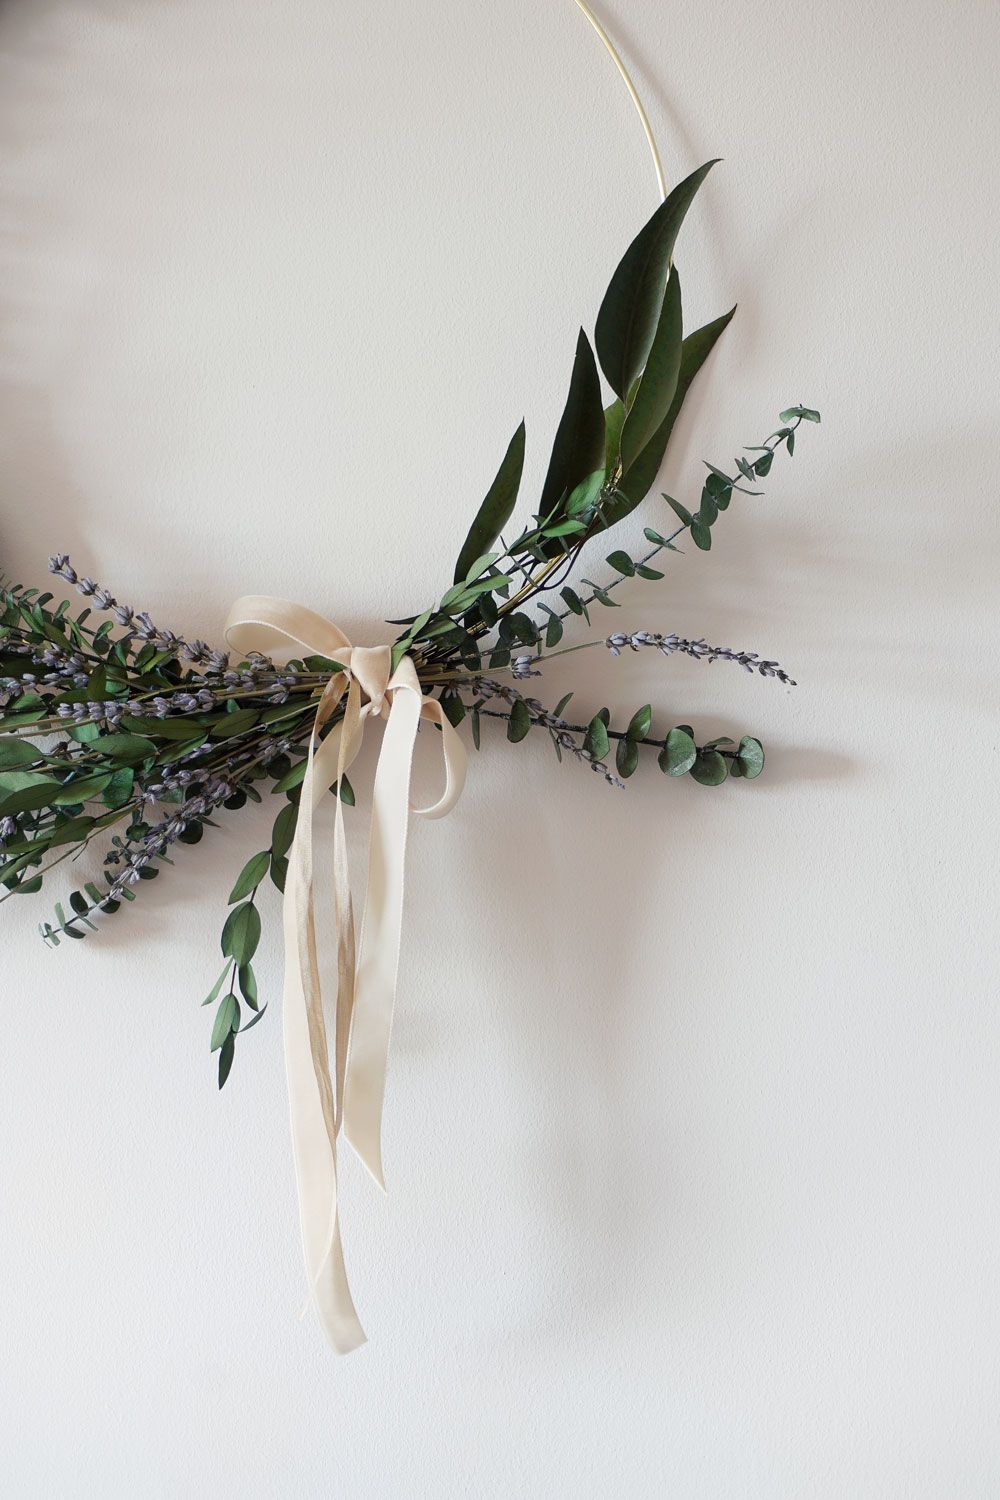
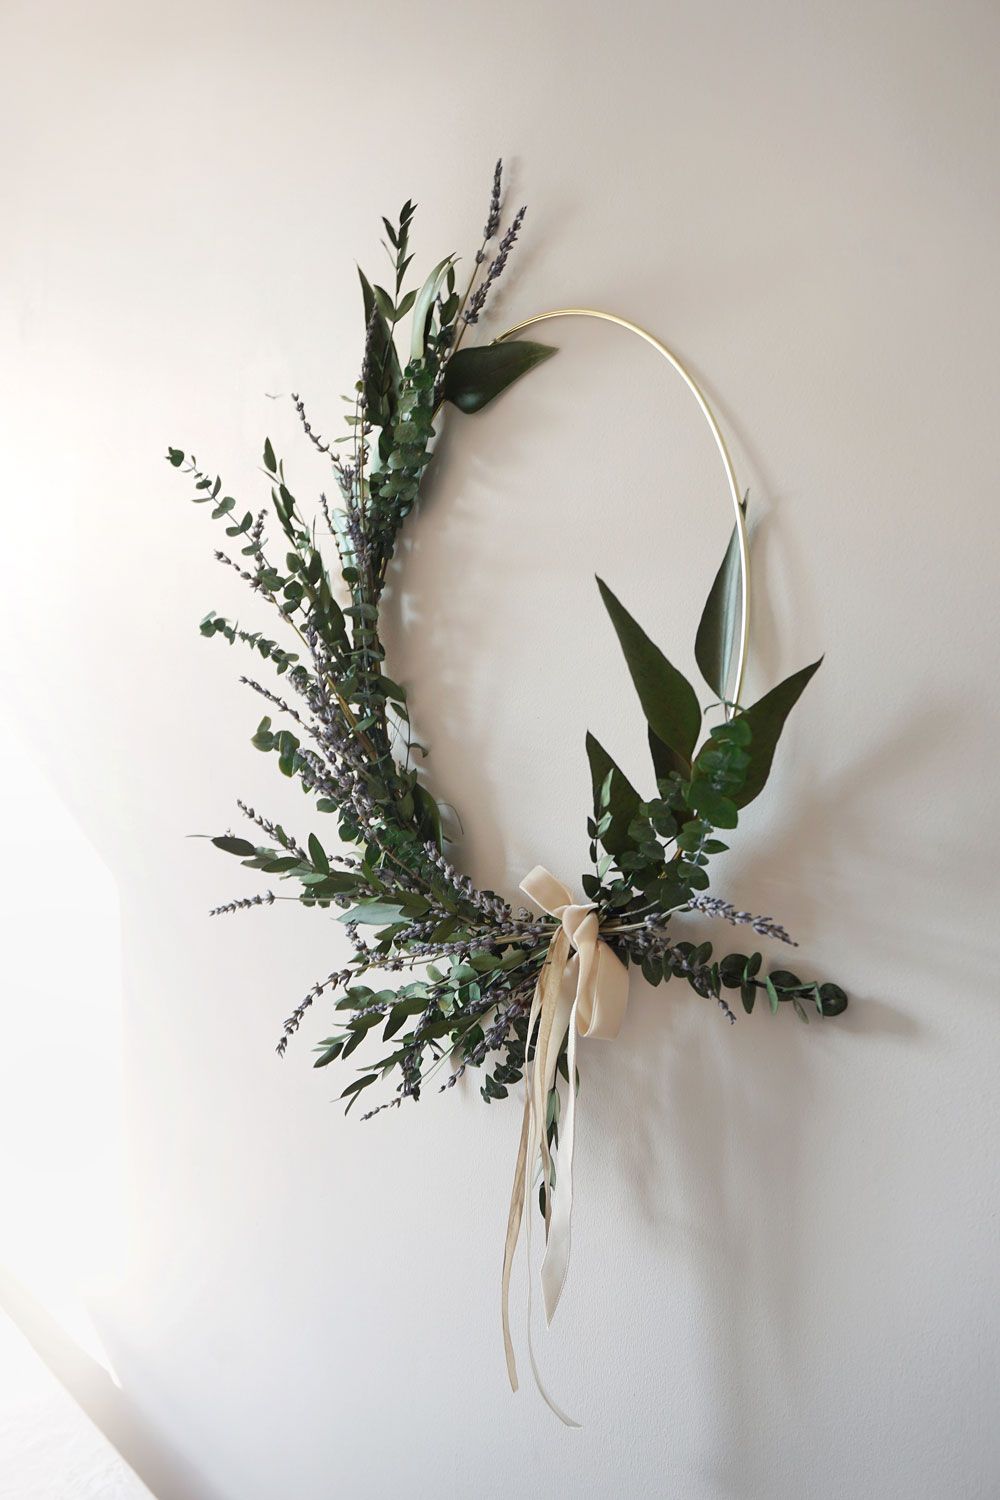
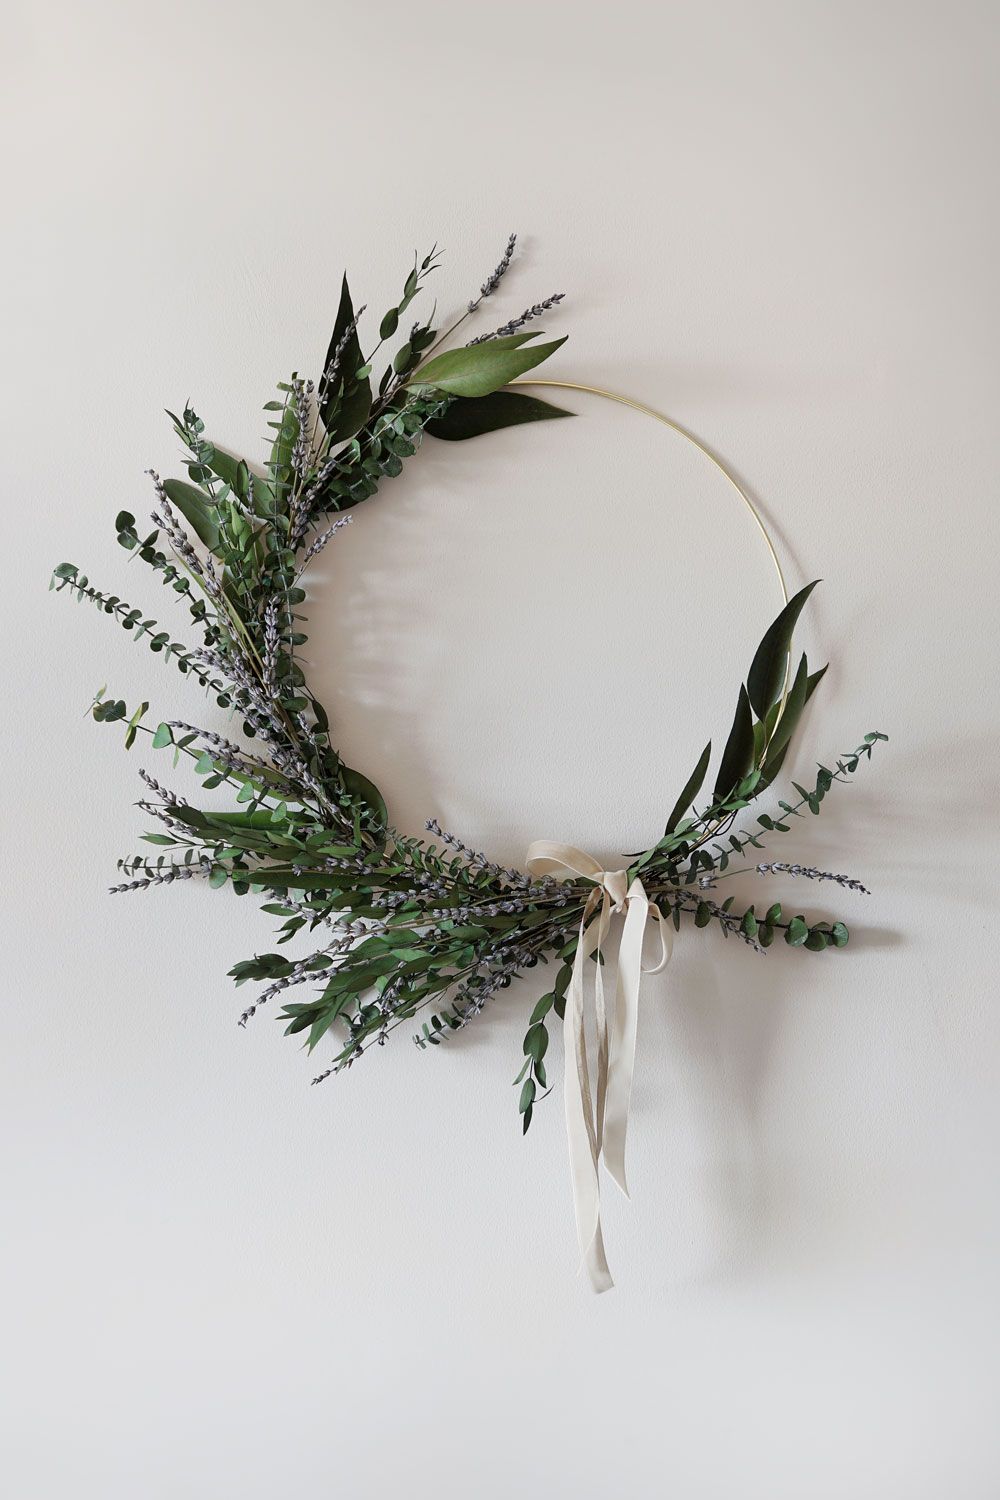
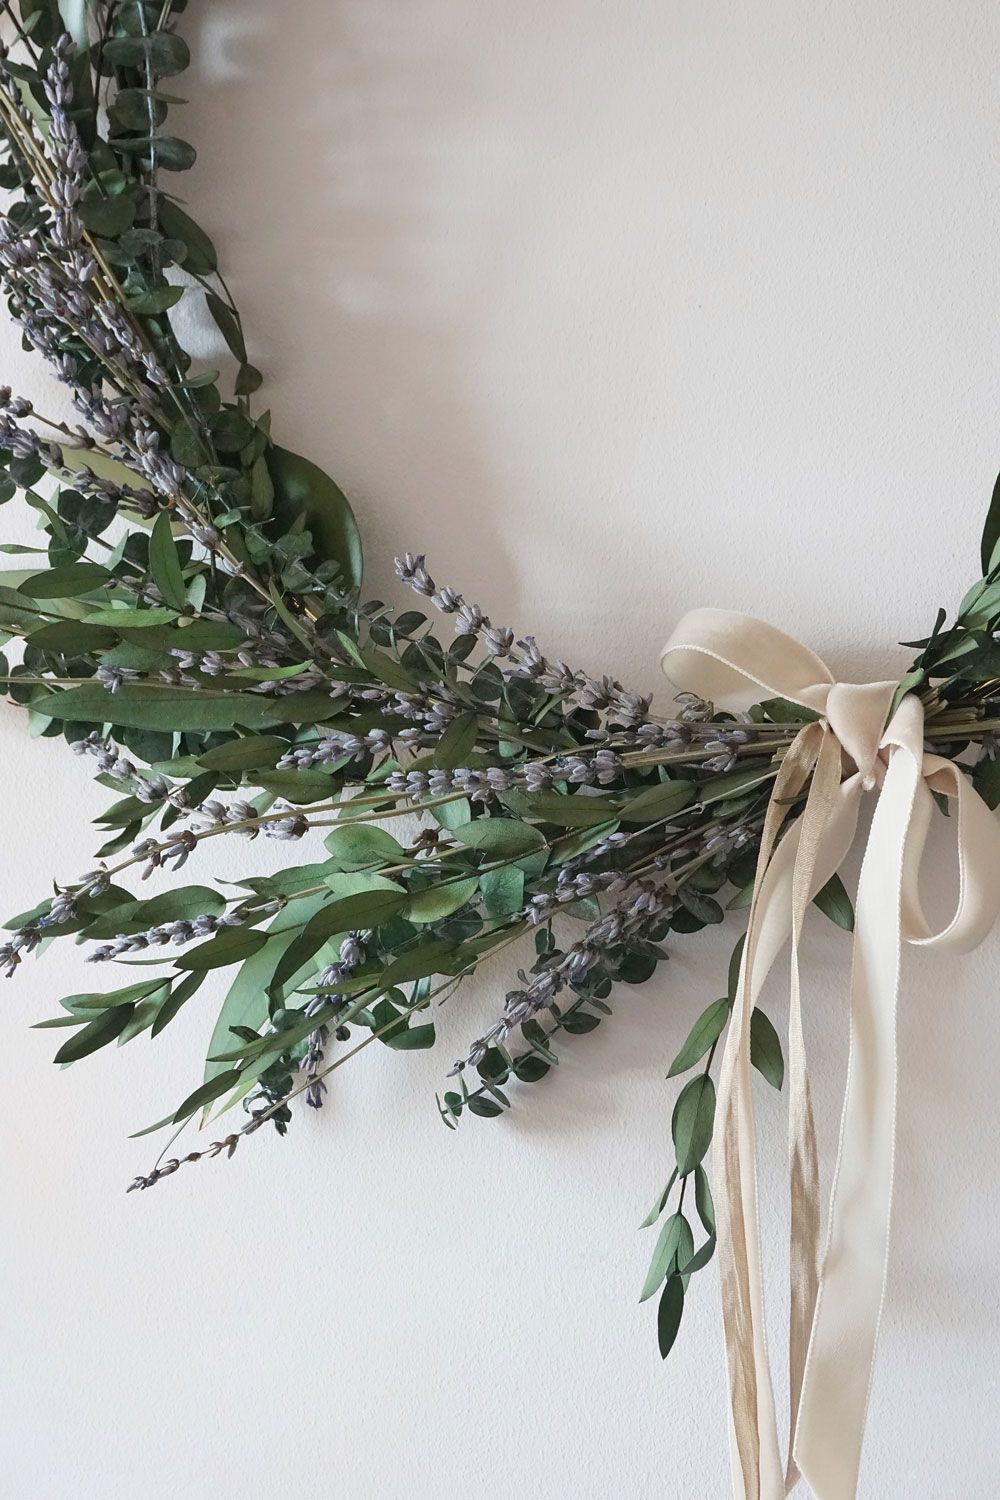
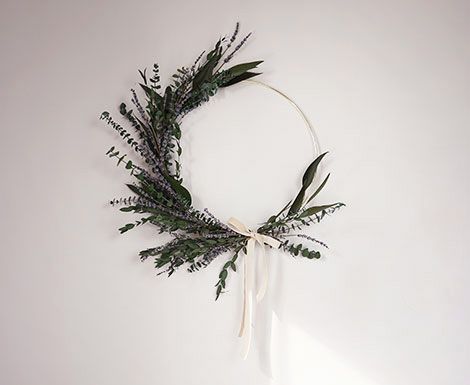
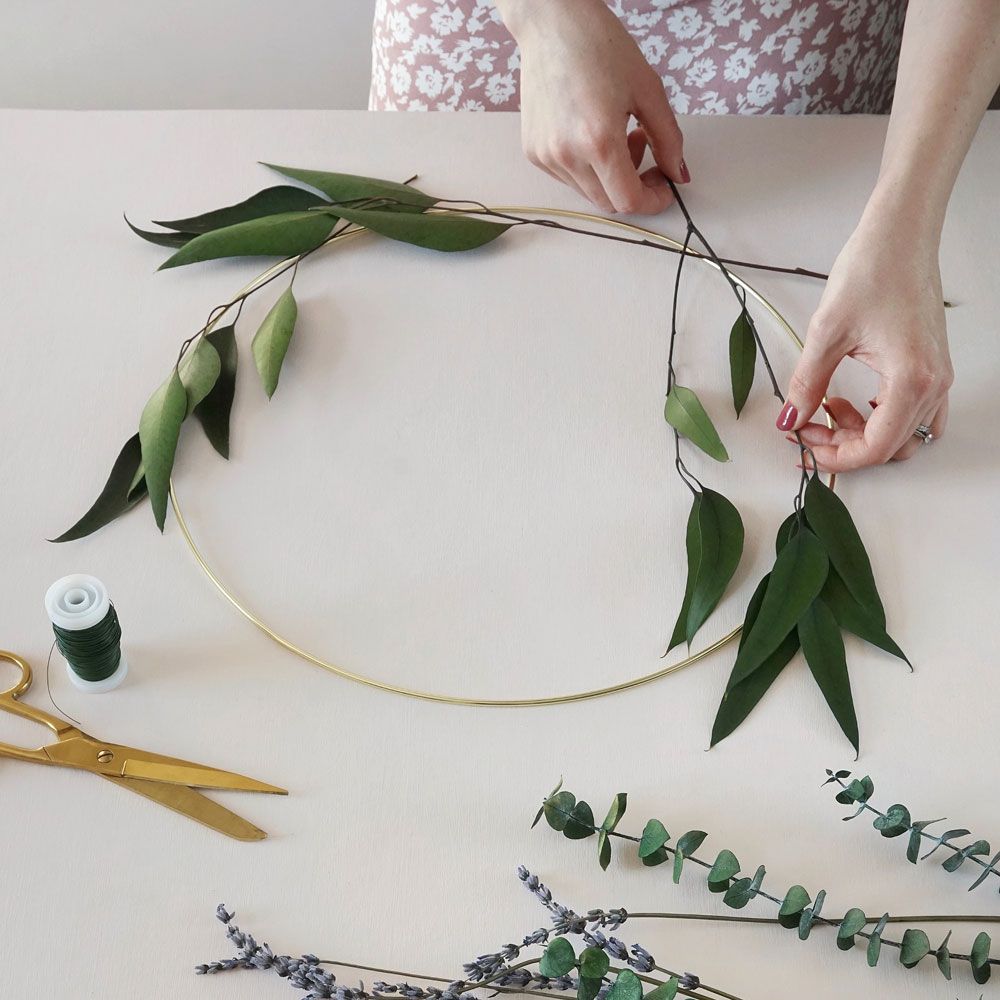
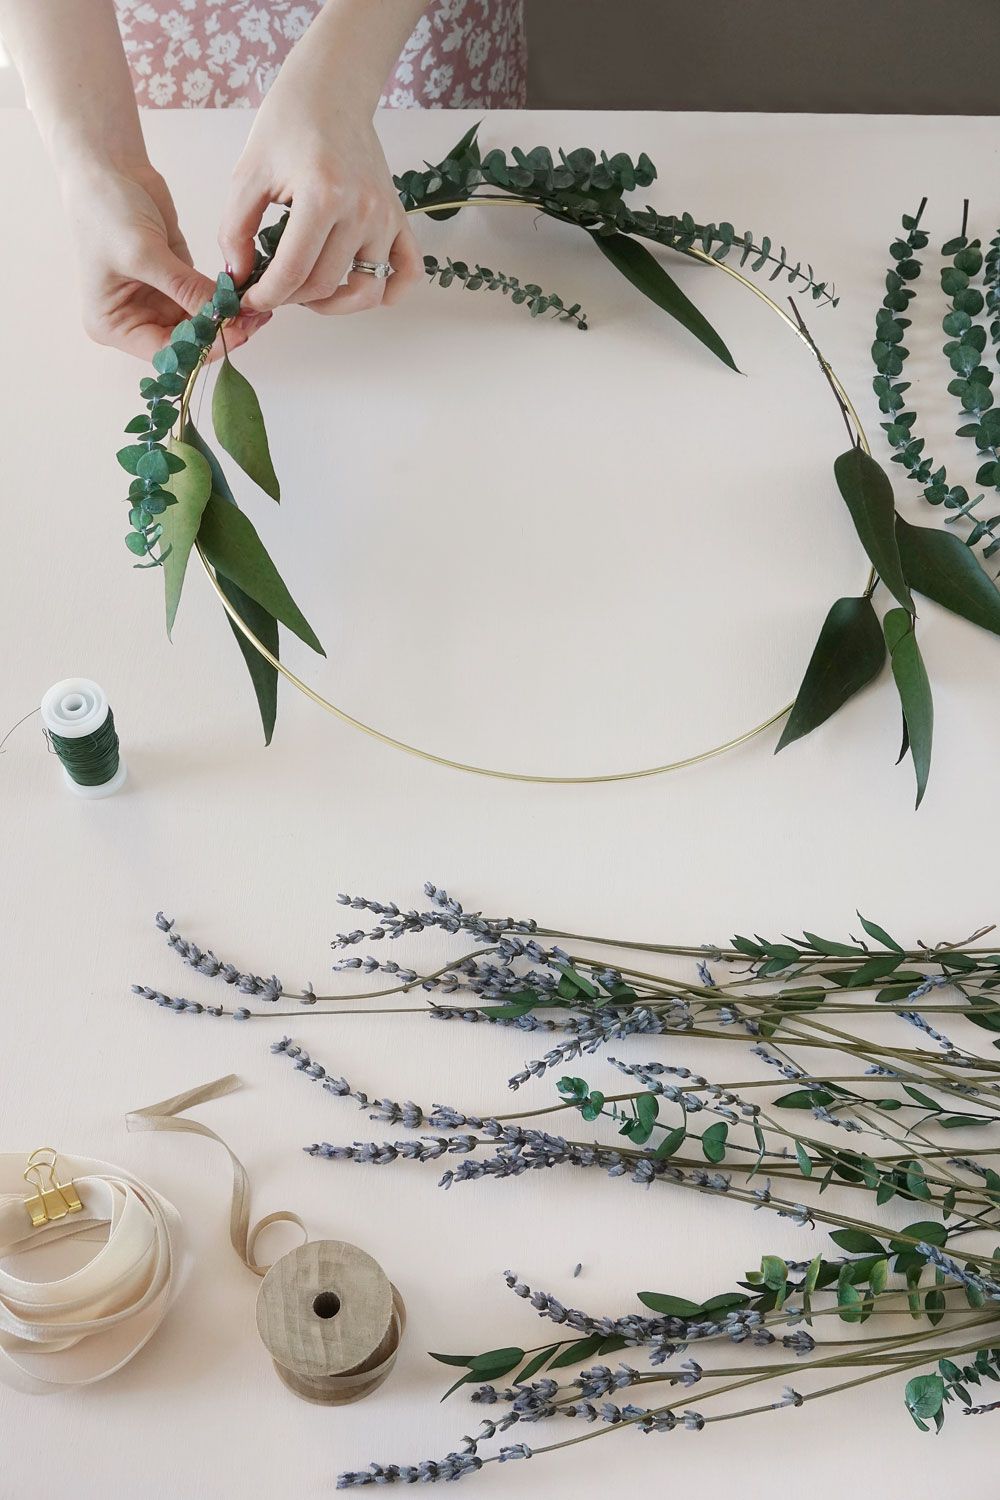
I believe the traditional method of wreath making is to create little bunches of foliage and then tie them onto your hoop. This gives a very neat and uniformed look. I wanted this wreath to have more of a natural feel … some might say messy … so I wired some of my foliage in place individually as this allowed me to create a more organic shape.
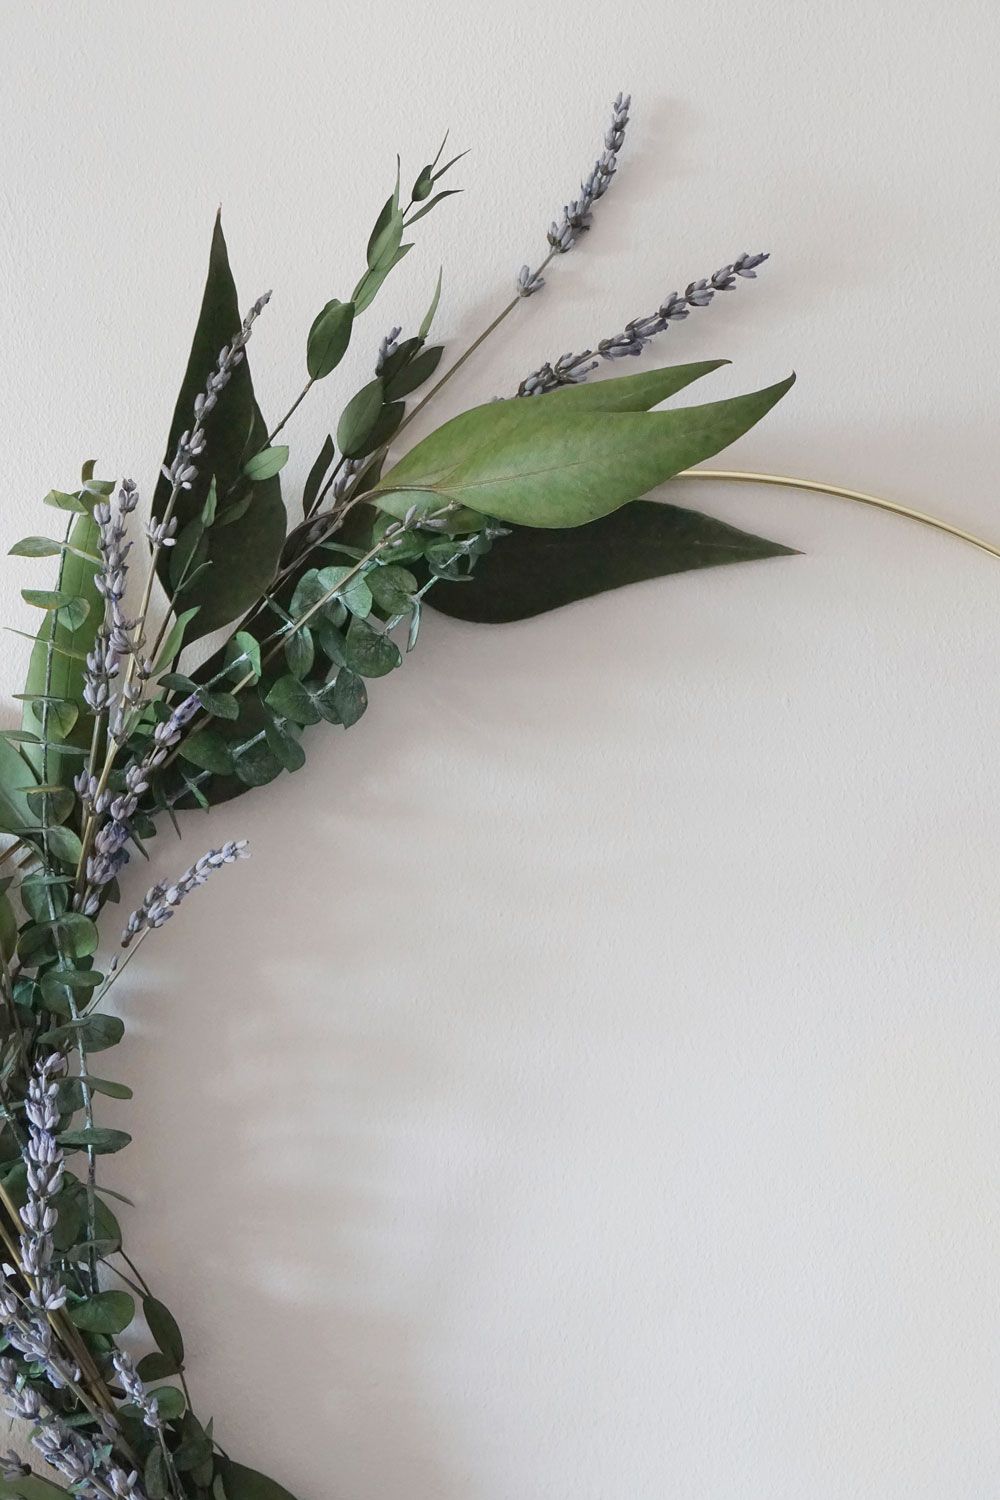
To start, take the largest pieces of foliage (the Willow eucalyptus) and have a play with positioning it over your hoop. It’s a good idea to decide where you want your ribbon to go as this will set the direction for your foliage. I wanted my ribbon to be to the side so that the wreath would be asymmetrical. The point at which the foliage crosses, in image one, is where my ribbon will sit. Once you’re happy with the positions, wire the stems into place. Keep the wire neat and make sure the stems are secure.
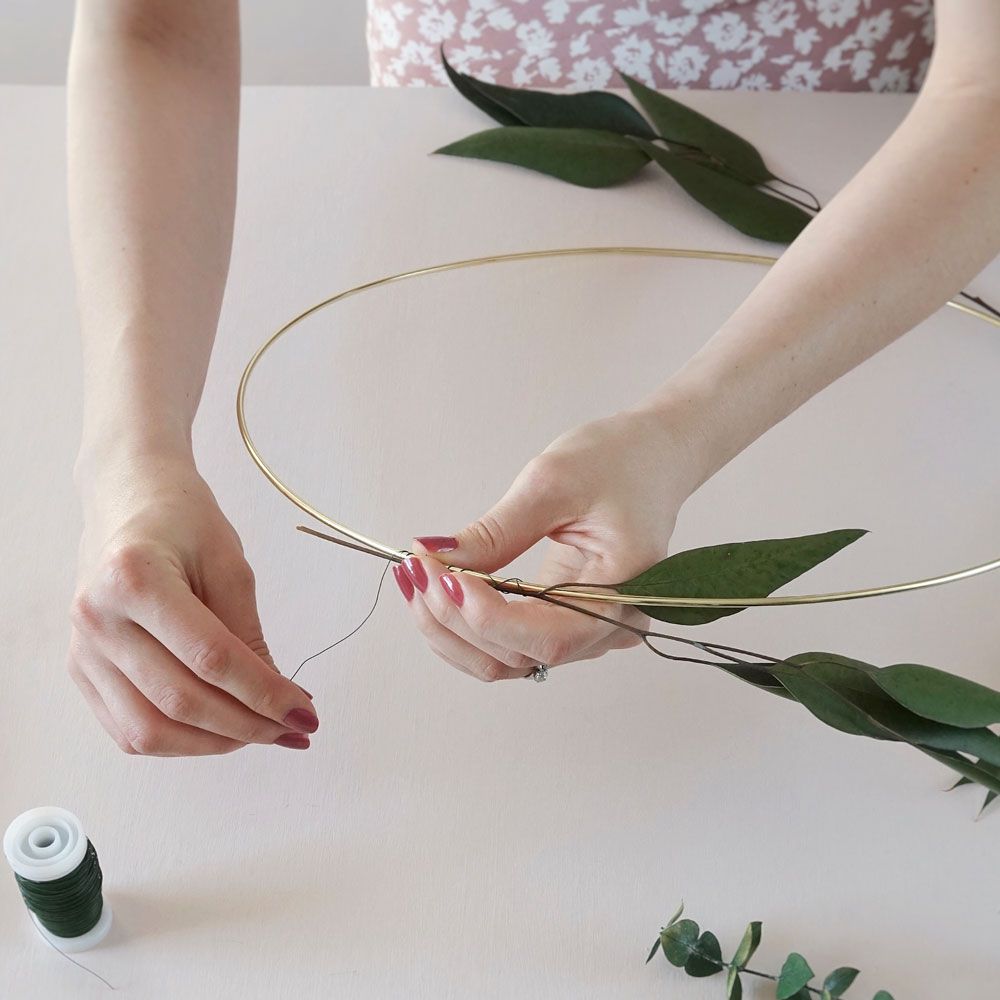
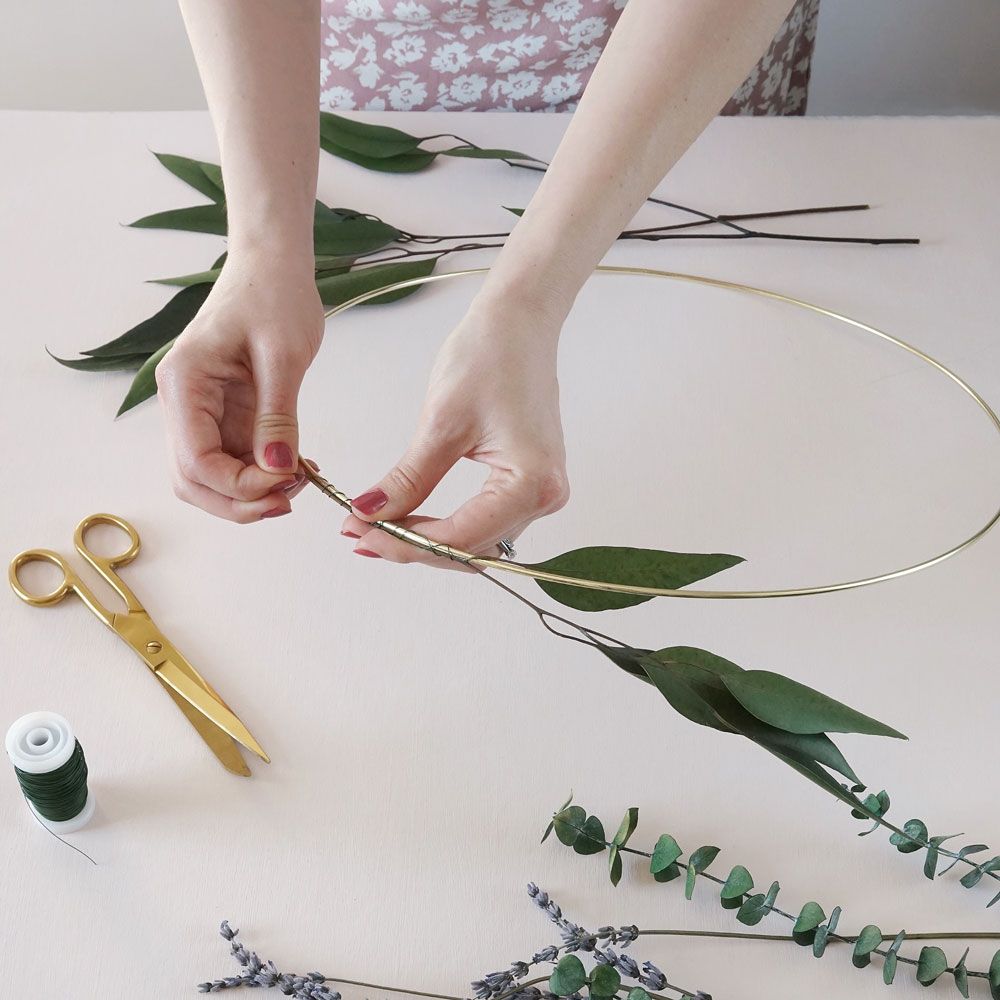
Once your large pieces are wired into place, you can start to build up the shape. I wired in the Baby Blue eucalyptus next. I just gradually created a shape that I liked by wiring in a mix of small bunches and individual stems. Keep the foliage overlapped and all pointing away from the ribbon position to ensure the wire is hidden. Once complete you’ll have a good base to add in the smallest leaf foliage, Parvafolia eucalyptus and finally the lavender. I didn’t need to use much additional wire for this as it weaved in and held securely.
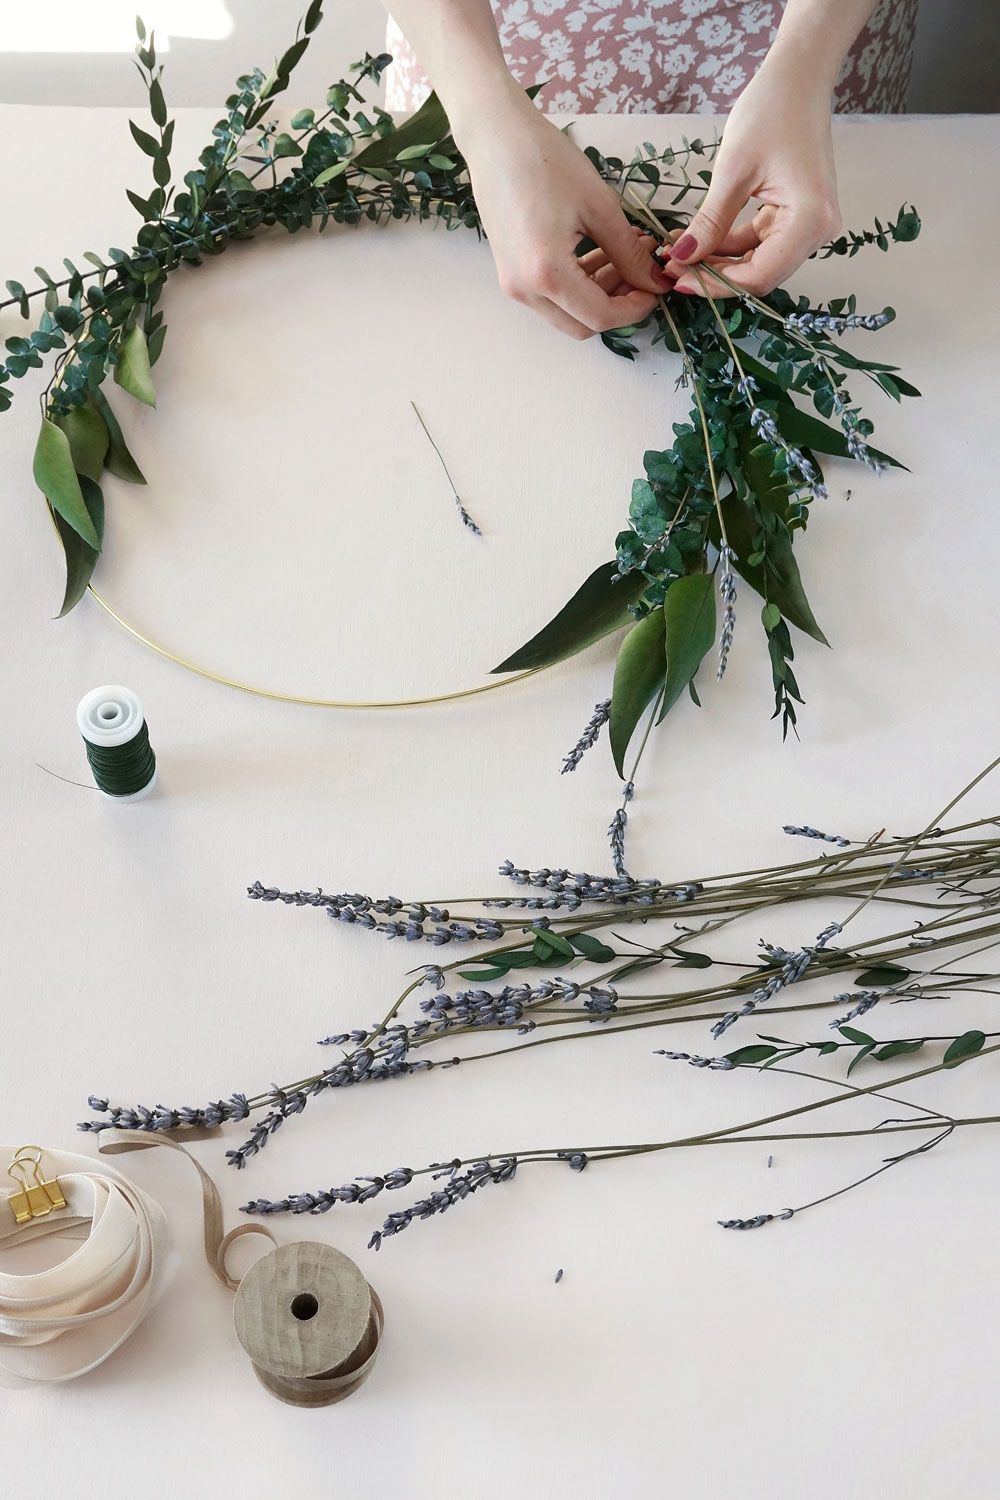
Keep stepping back to review the shape you are building and tweak as needed. Once you’re happy with the wreath, make sure any wire ends are secured / trimmed.
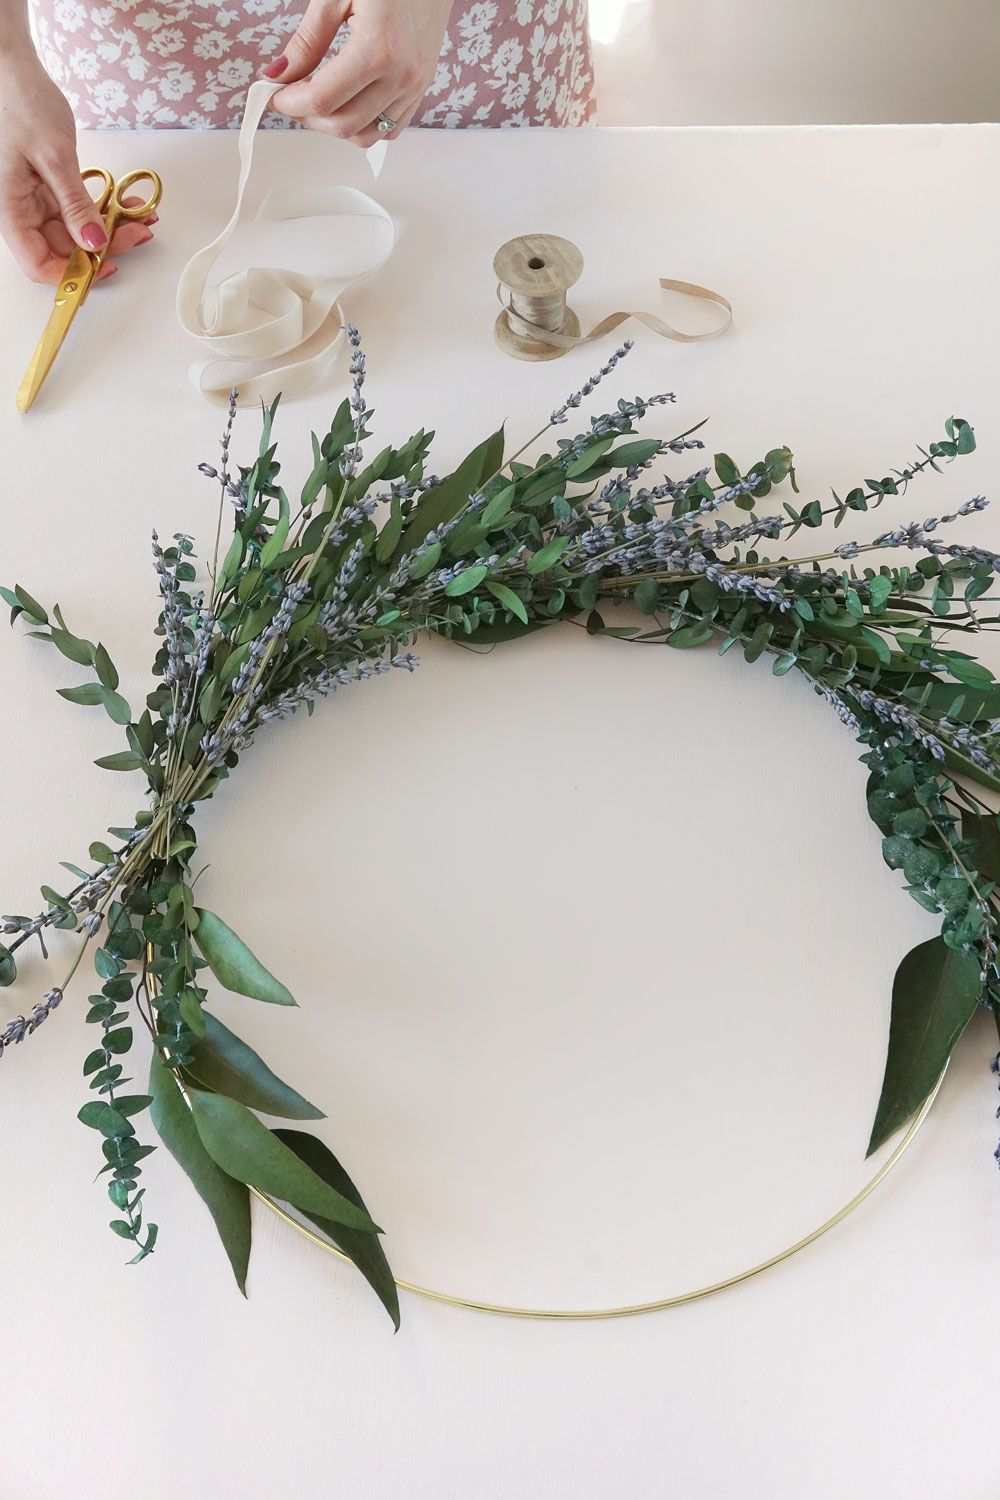
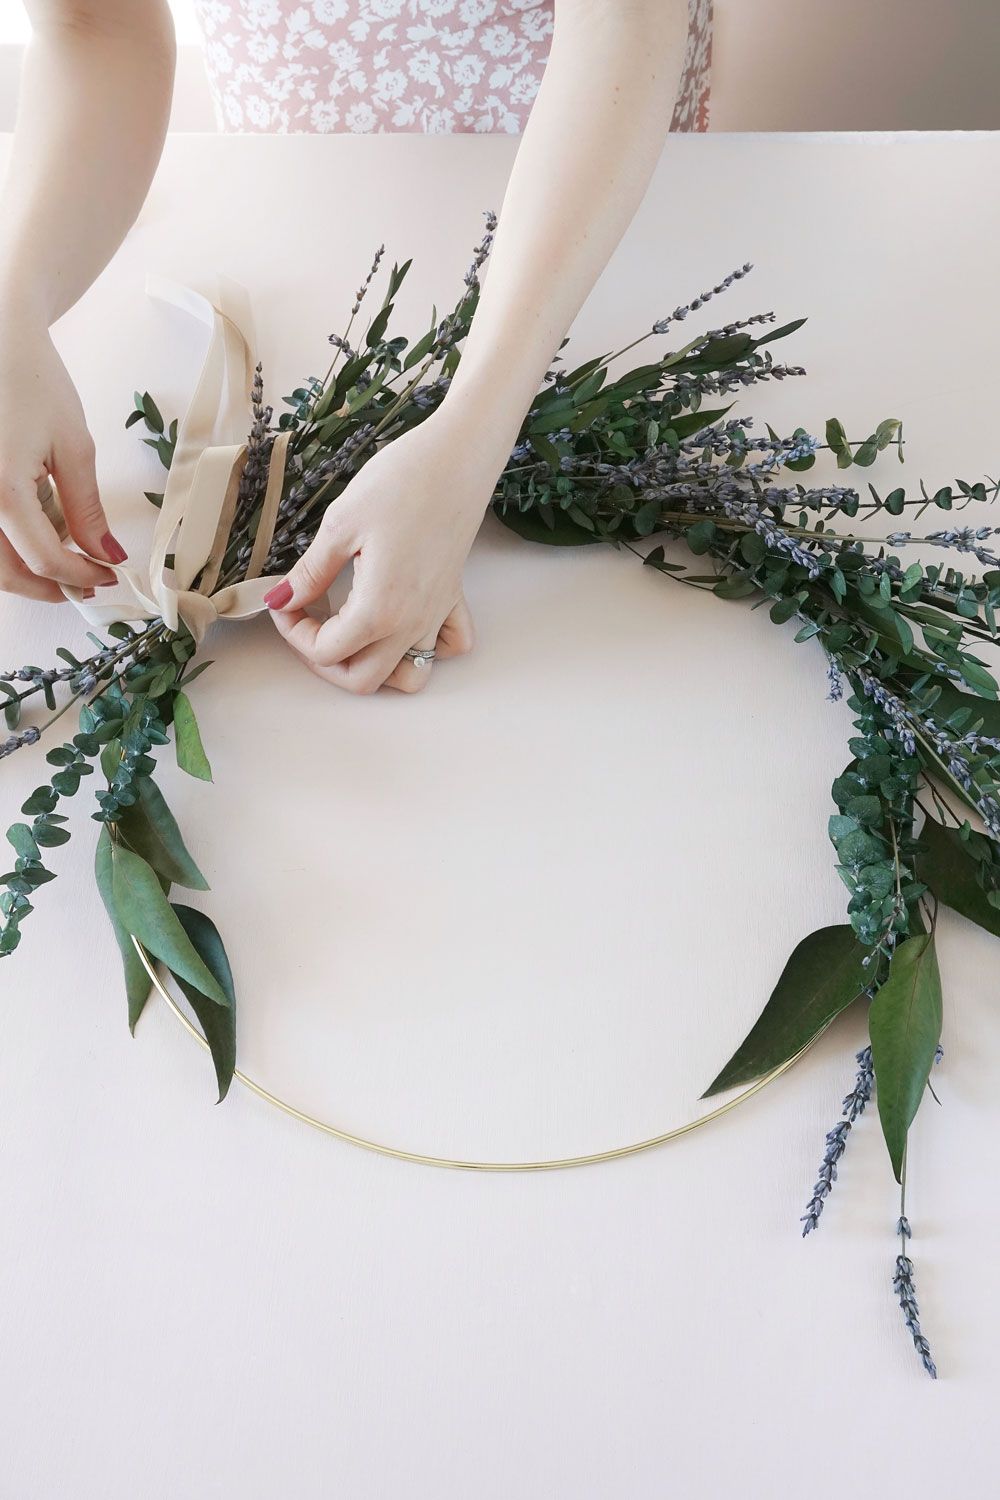
Lastly, tie your ribbon into place.
As my wreath wasn’t very heavy, I hung it up using a command adhesive hook. As the wreath is made from preserved foliage, unlike fresh foliage, it will last for agesssss … a year or more!