Details | The Kitchen
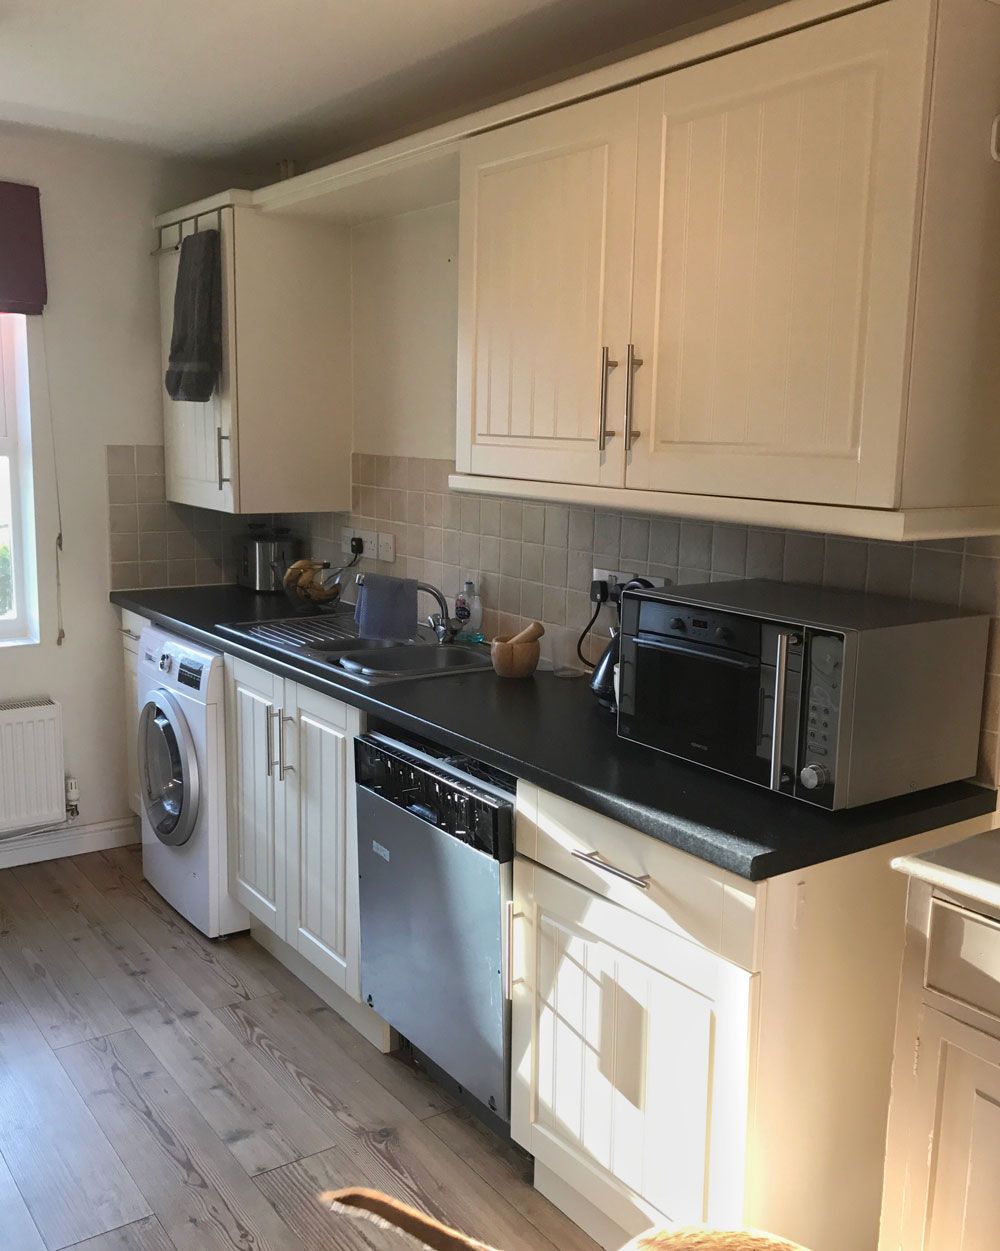
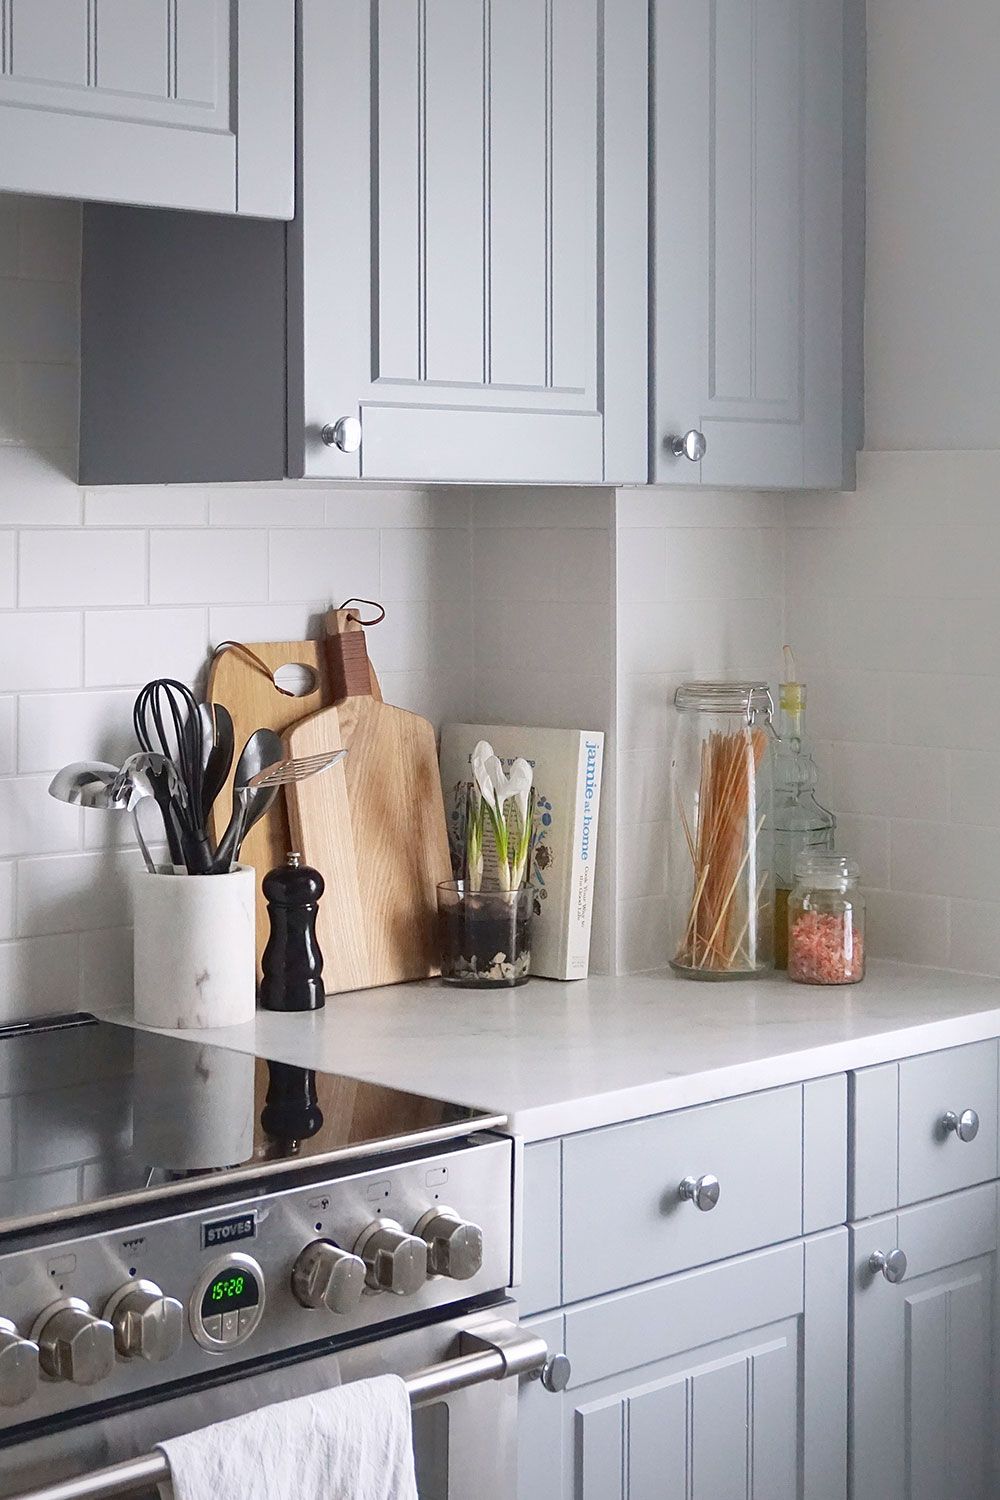
We knew from day one of living in the house that the kitchen would be the first room we decorated. The ground floor is all open plan so we were spending the majority of our time in the space; making this “our own” felt like an important step in making the house a home. There was nothing wrong with the kitchen as such, it just wasn’t to our taste. It was quite similar to the kitchens in past flats we’d rented and we wanted something that felt different … it needed to feel like our home, not another house we were renting.
Initially we had planned on ripping everything out and starting again; I got to work saving images on Pinterest and we ventured around a few kitchen showrooms. It soon became apparent that the style of cupboards we were drawn to, was in fact, the same style as our existing kitchen cupboards. (Can you see where this is going?) In addition, we realised we didn’t really want to change the existing layout … buying a new kitchen started to feel like a waste of money, we would basically be buying the same kitchen but in a different colour. The existing cupboards had been well looked after (and I actually really liked the shaker – linear detailing) so we formed a new plan – give it a massive make over.
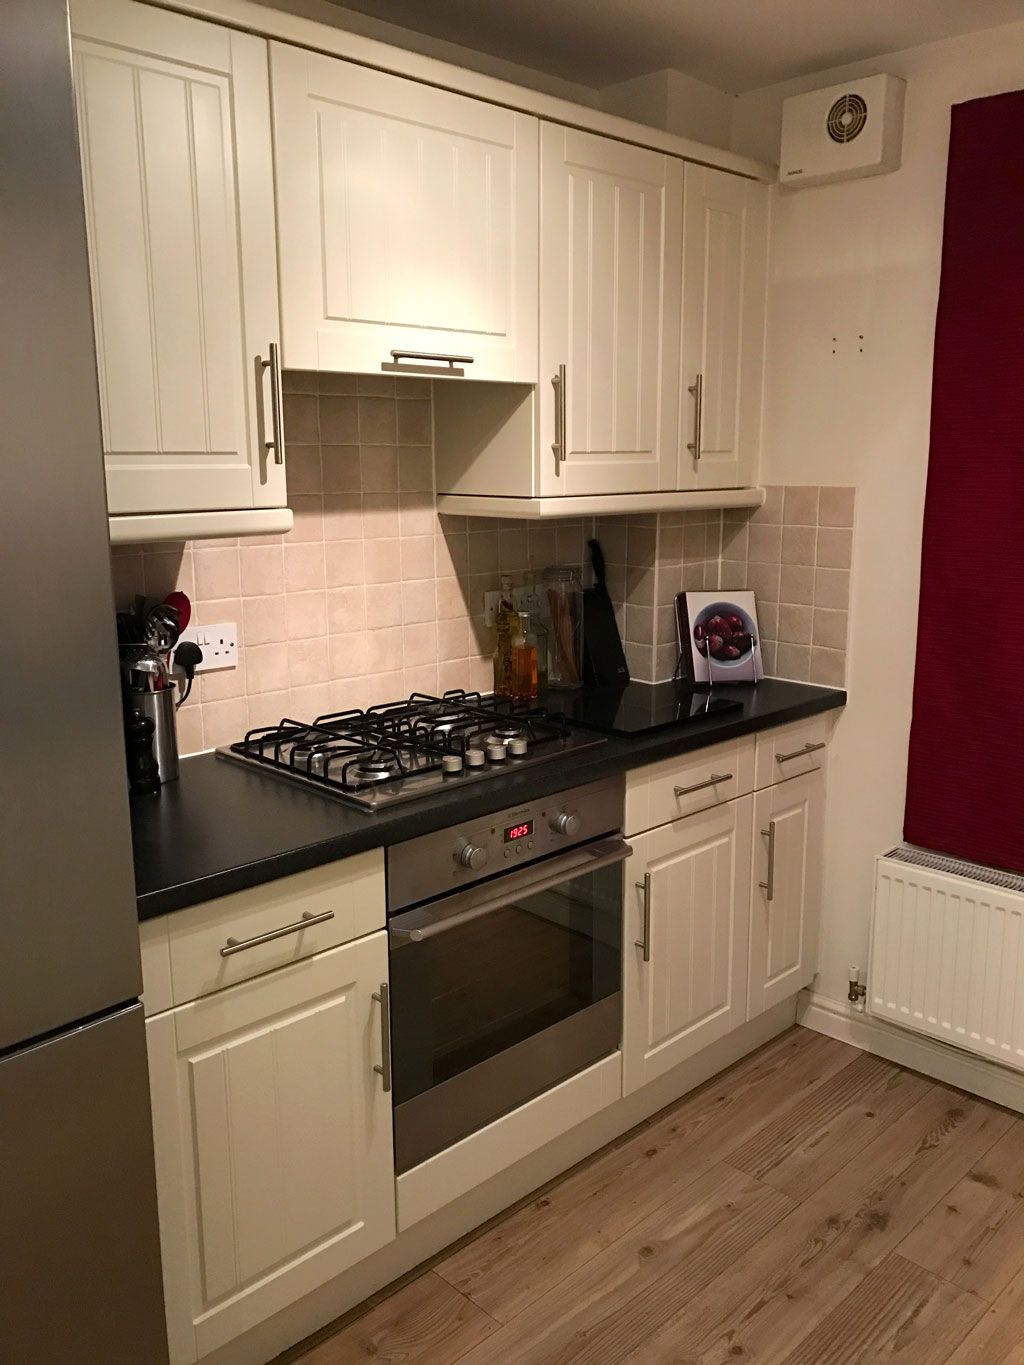
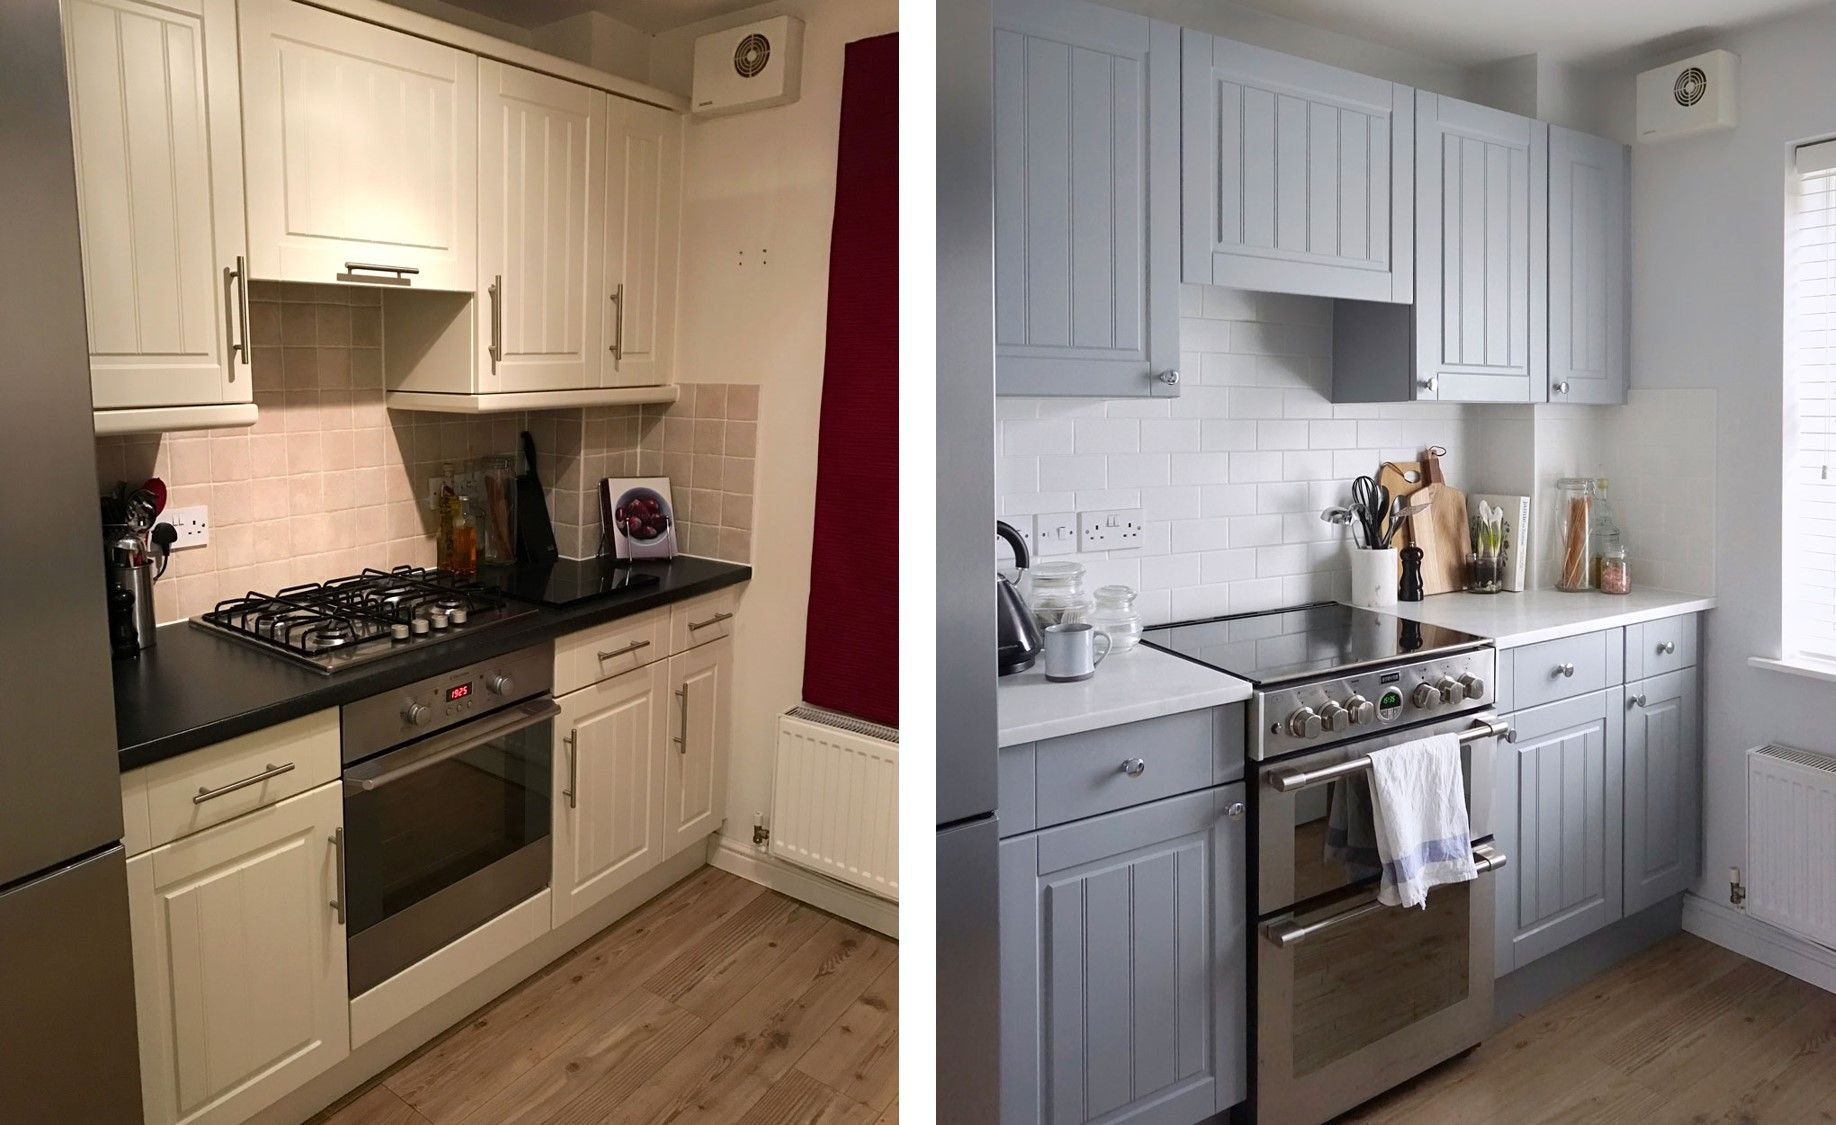
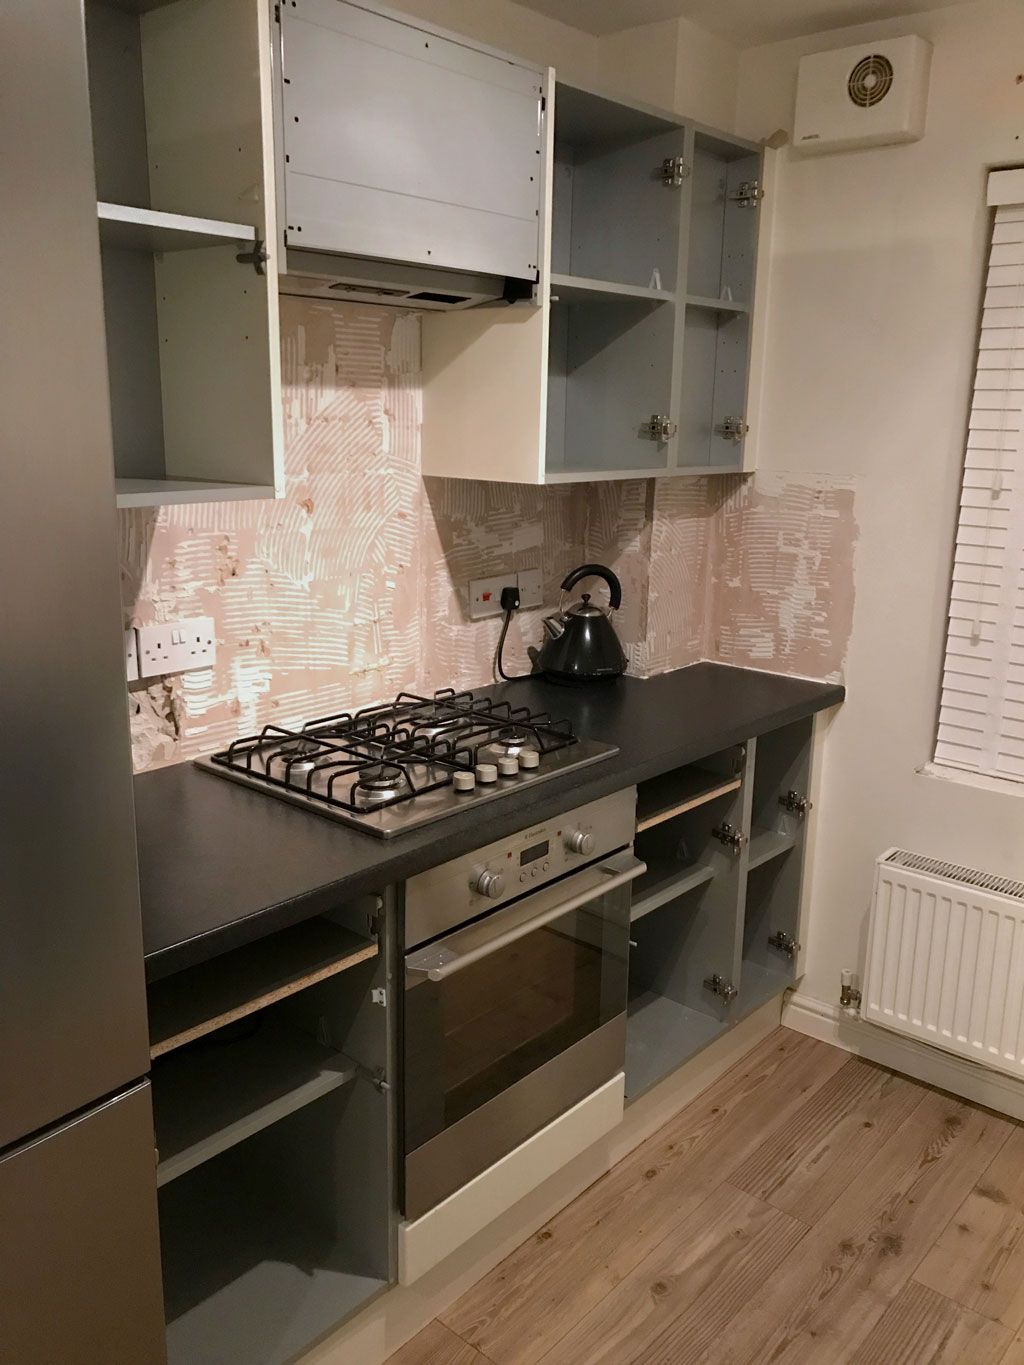
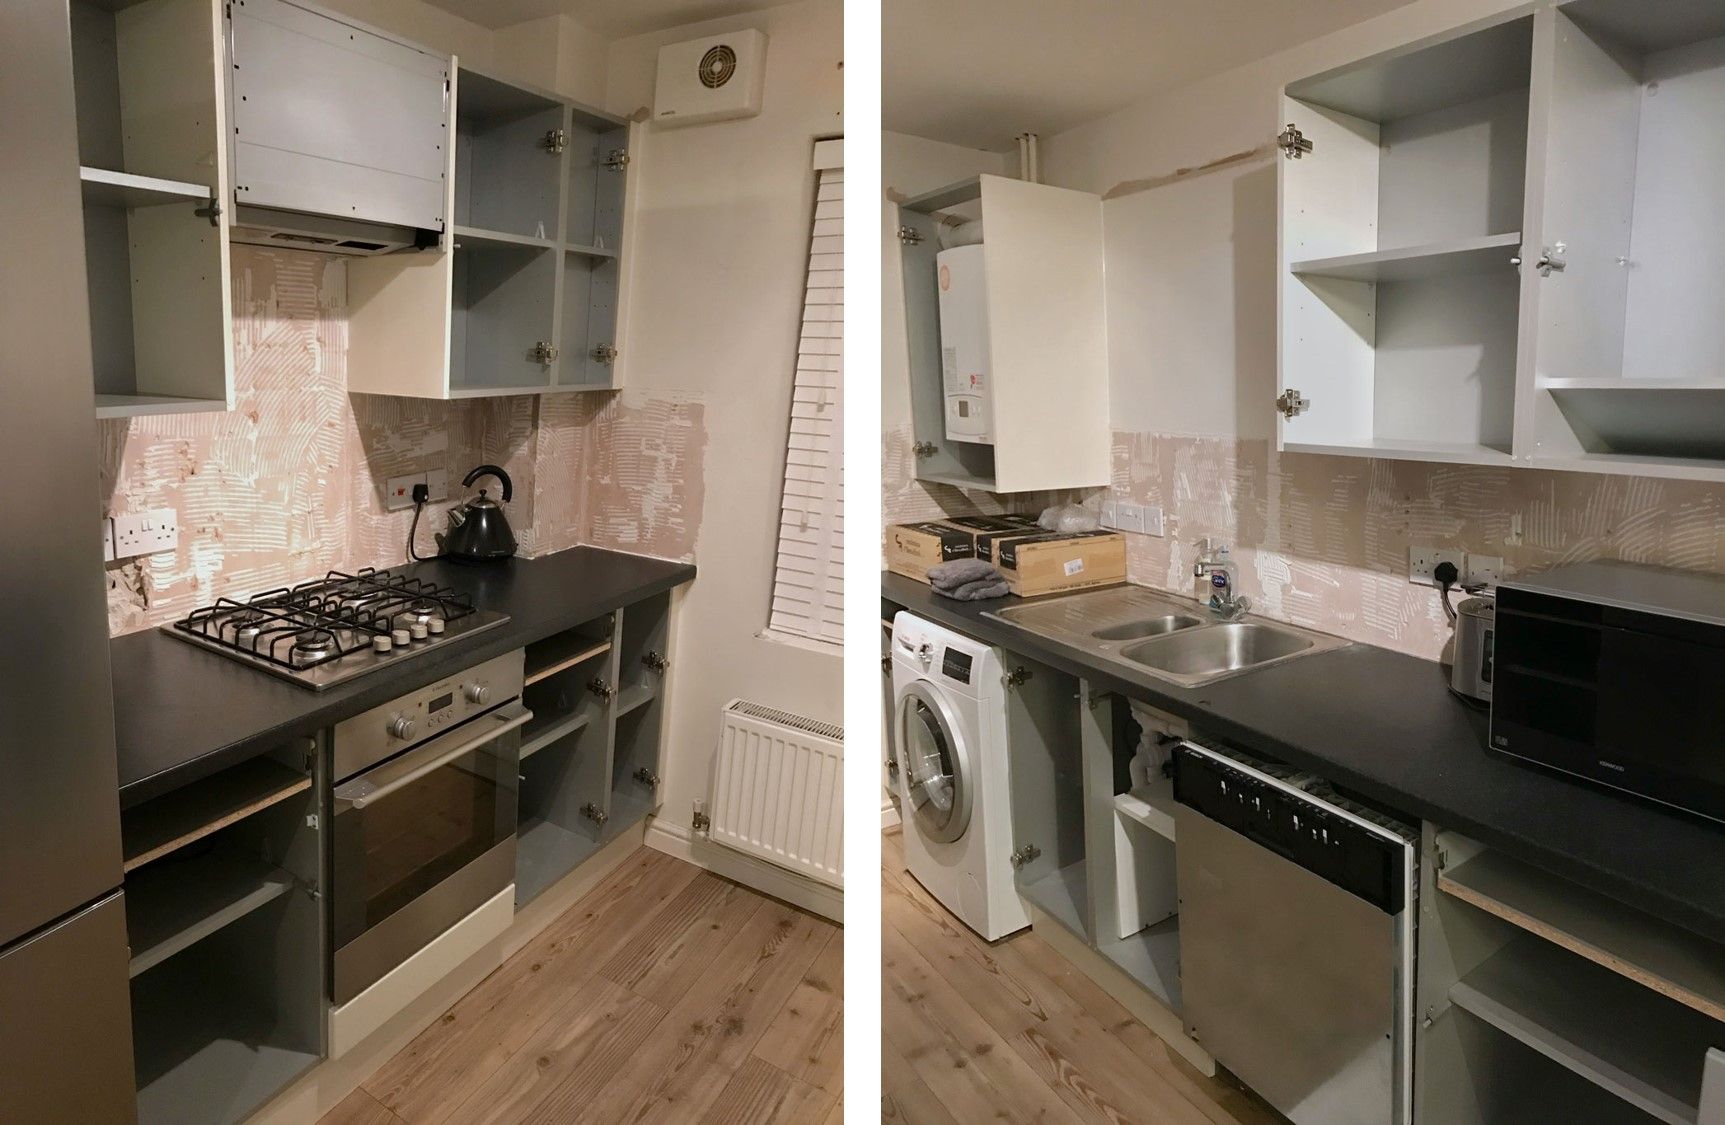
So the cupboards. The cream had to go. The handles had to go and the top cornice and base trim DEFINITELY had to go … I’m really not a fan of that chunky detailing! We debated painting the cupboards ourselves but they were faced in Melamine which made me very nervous - I had visions of it all going wrong; hours and hours spent prepping and painting only for the paint not to stick resulting in the cupboards being covered in scratches and chips. I needed to be confident that if we kept our existing cupboards that the new paint job would last; imagine if we ended up having to buy a new kitchen anyway! So we decided to get some quotes from the specialists. Using the existing kitchen was saving a lot of money so it felt justified.

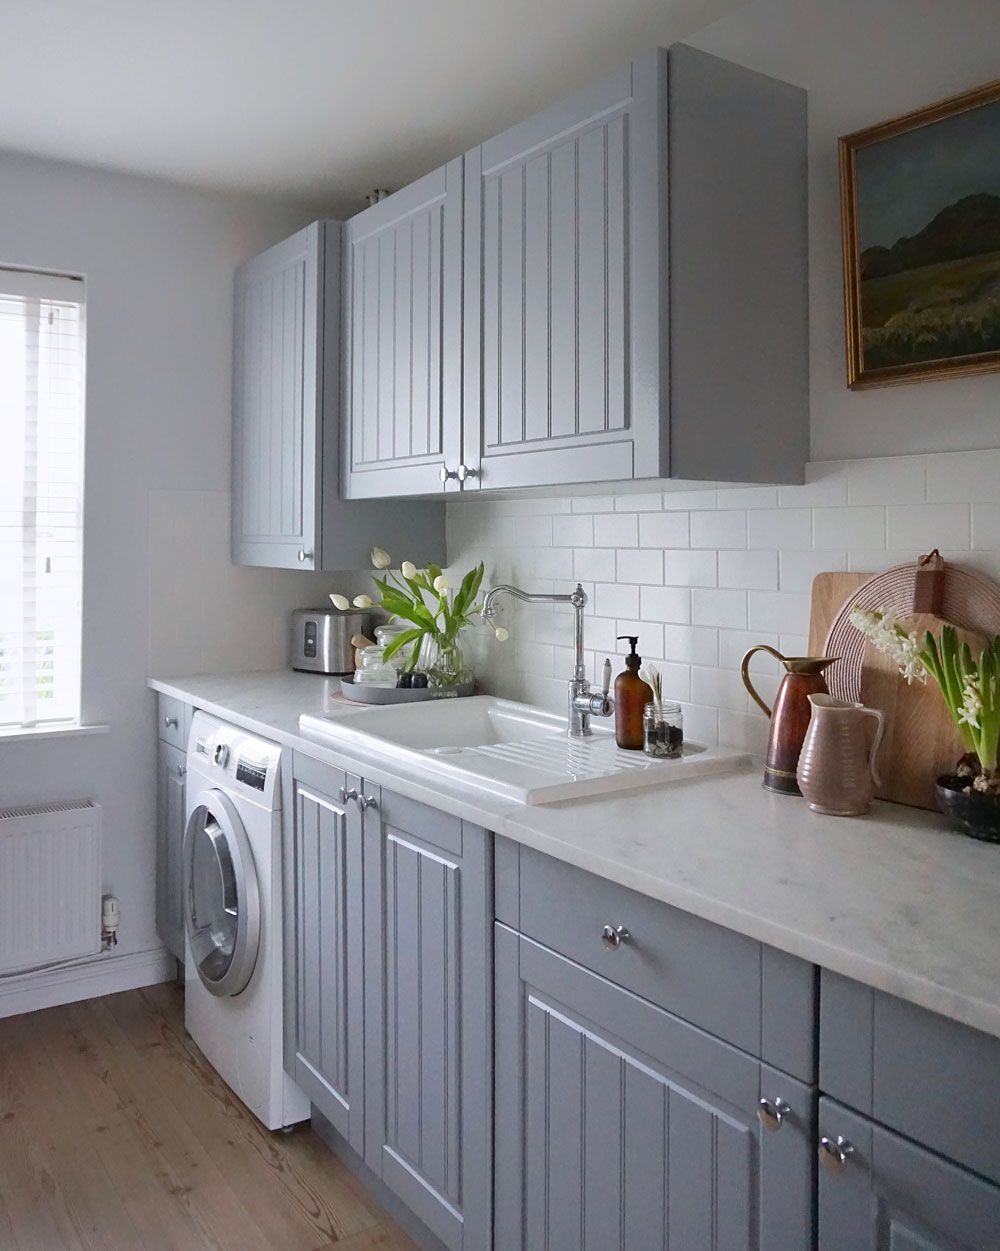
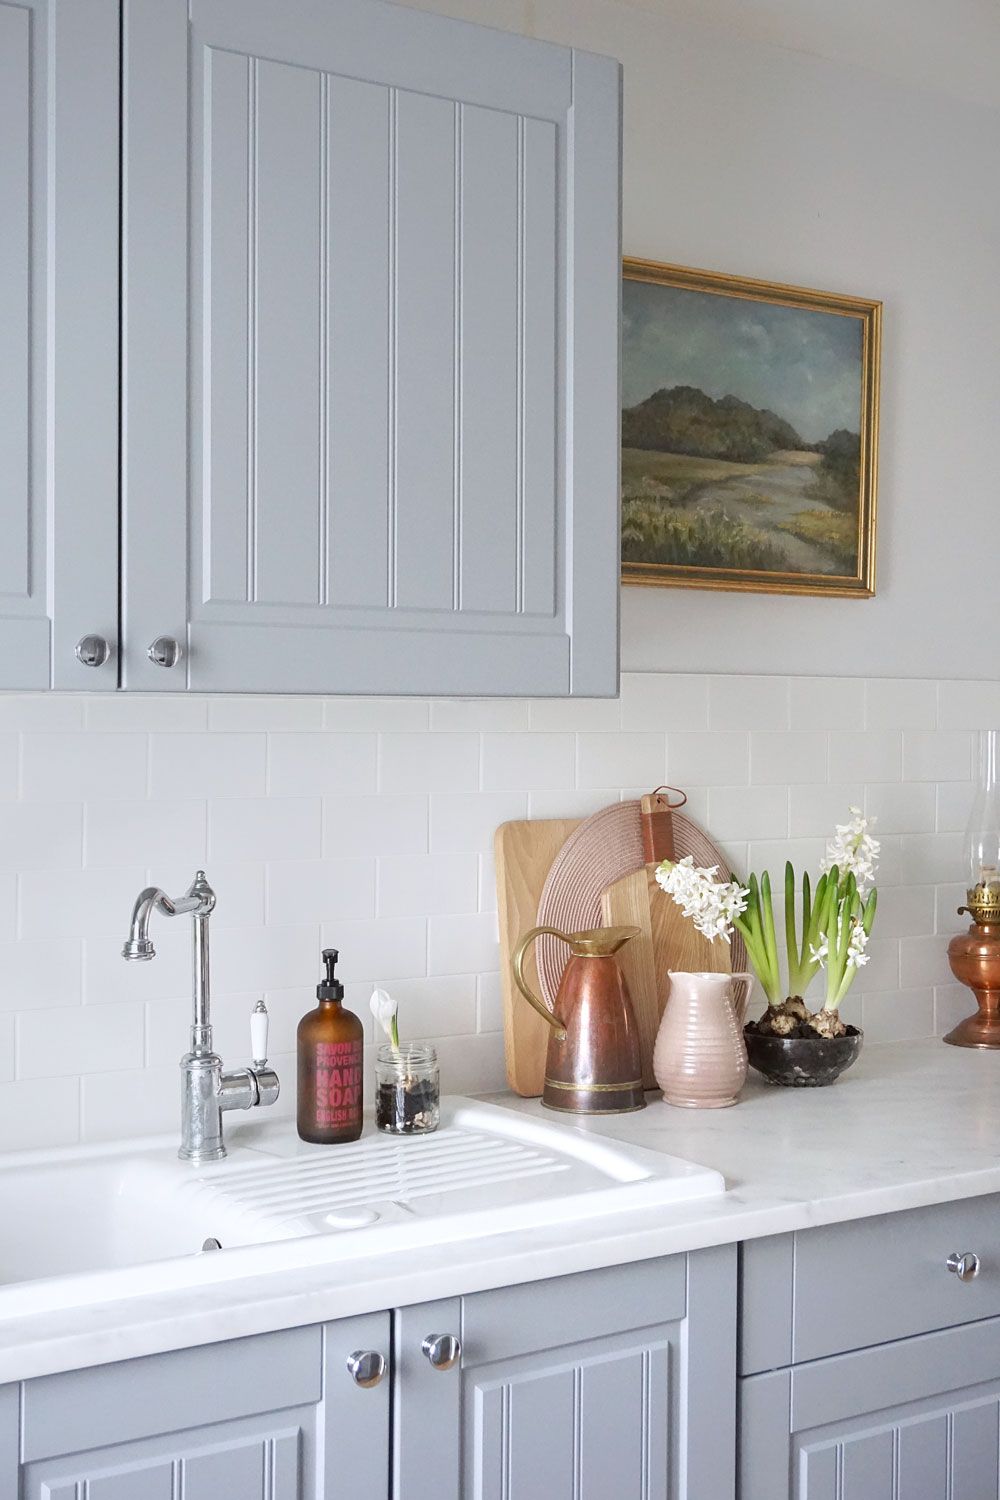
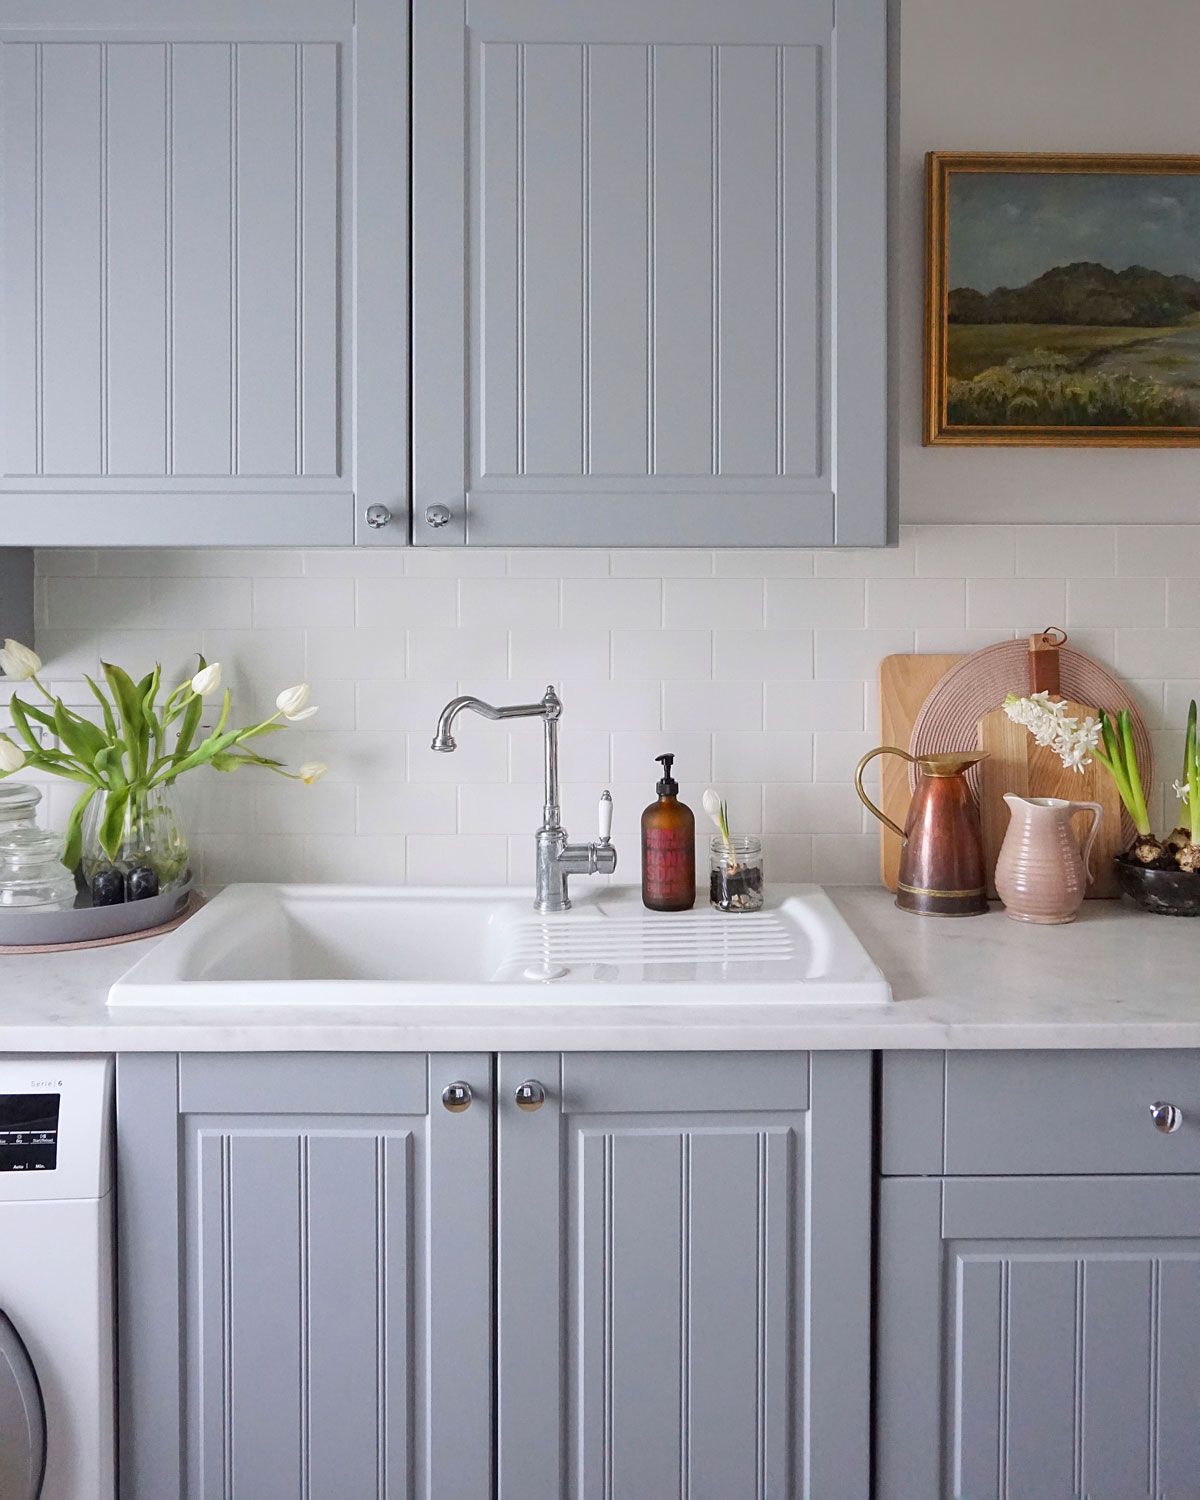
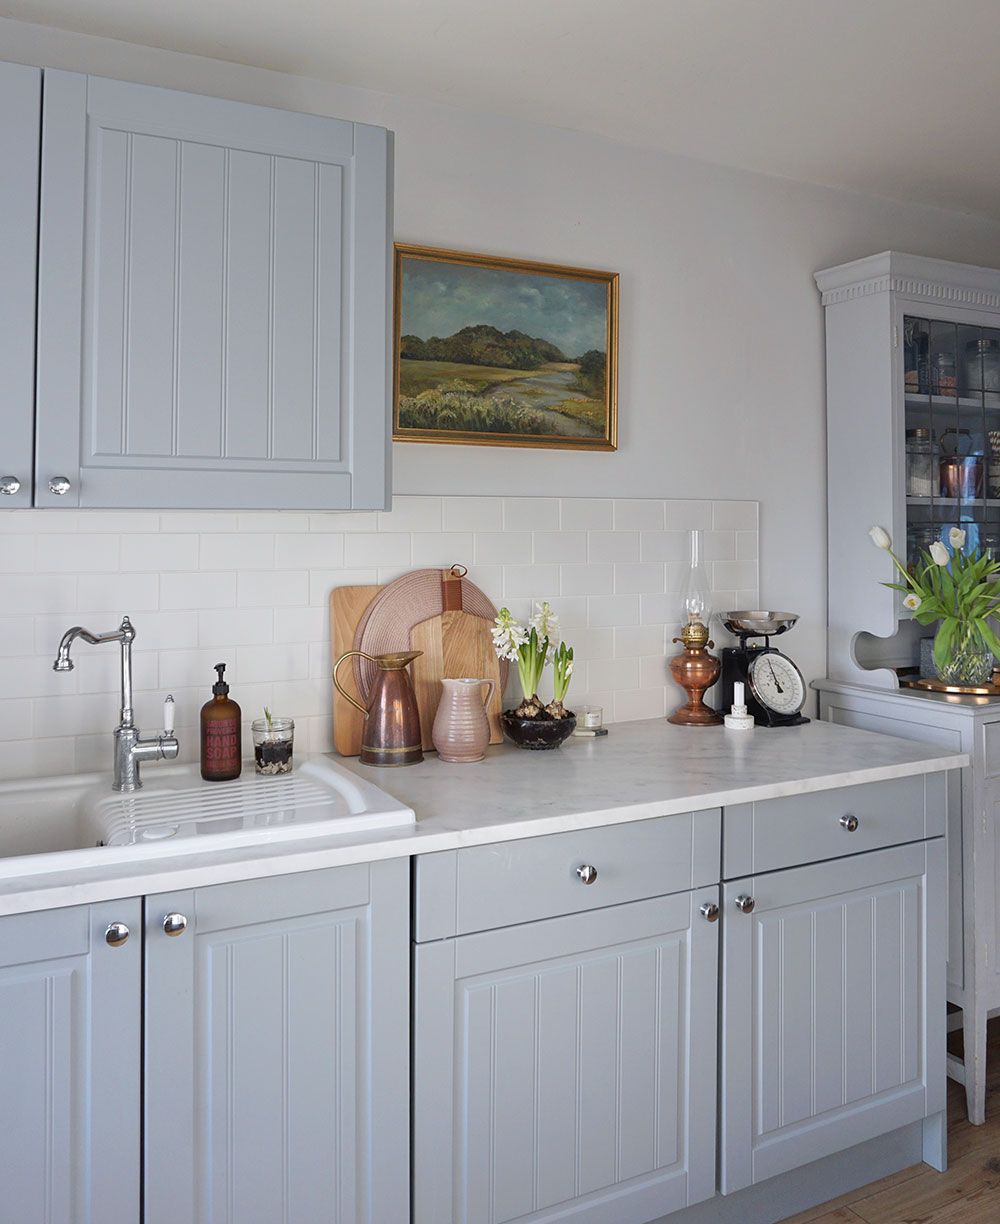
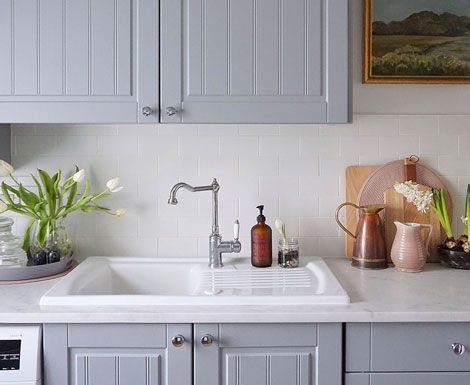
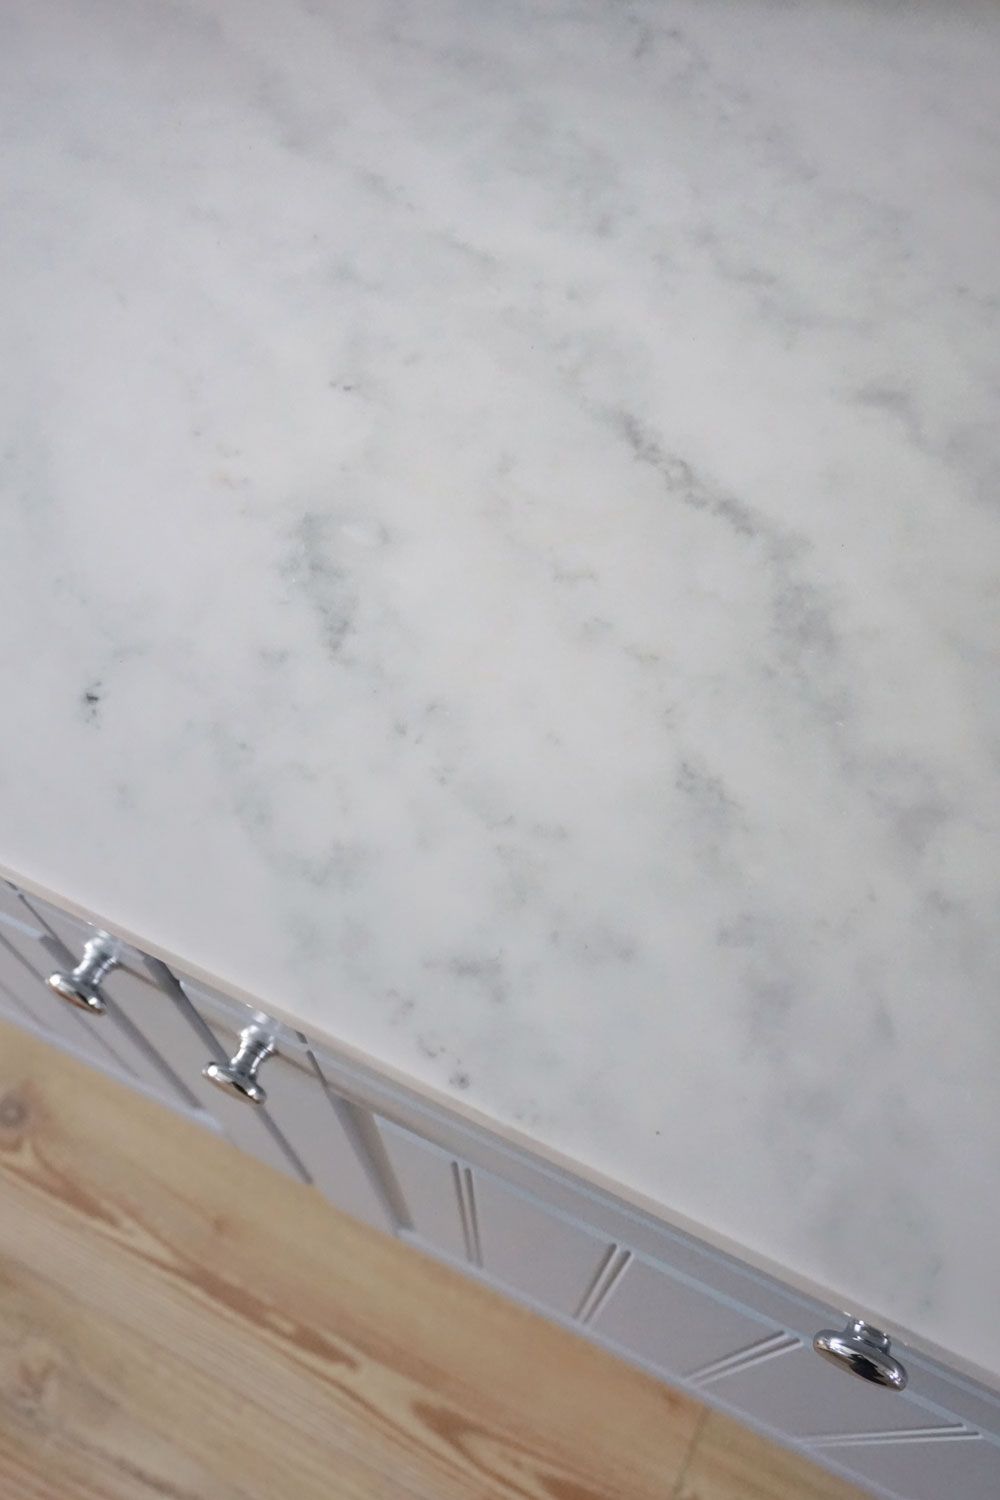
It surprised me how many companies we found and how much the quotes ranged; from a couple of hundred to a couple of thousand! Surprisingly, it was a local car spraying company that were the most helpful. From the first email nothing was too much trouble (we even had a factory tour – the invitation even extended to Stanley - he took it all very seriously.) and their quote was one of the most reasonable. In addition to changing the colour of the cupboards, we wanted to change the cupboard handles to knobs. I was concerned you’d see the old holes so we asked for a sample door to be completed. Seeing a sample first allowed us to check we liked the colour on a larger scale and it gave us the opportunity to view their work before agreeing to proceed. We were both really happy with the sample door; the holes had been filled and, once sprayed, couldn’t be seen at all! The colour was perfect and their service was faultless. The colour we picked was RAL 7040 which is a soft blue, not too light but not too dark. We decided to paint the walls in a paler colour and loved Dulux 00NN 72/000.
It surprised me how many companies we found and how much the quotes ranged; from a couple of hundred to a couple of thousand! Surprisingly, it was a local car spraying company that were the most helpful. From the first email nothing was too much trouble (we even had a factory tour – the invitation even extended to Stanley - he took it all very seriously.) and their quote was one of the most reasonable. In addition to changing the colour of the cupboards, we wanted to change the cupboard handles to knobs. I was concerned you’d see the old holes so we asked for a sample door to be completed. Seeing a sample first allowed us to check we liked the colour on a larger scale and it gave us the opportunity to view their work before agreeing to proceed. We were both really happy with the sample door; the holes had been filled and, once sprayed, couldn’t be seen at all! The colour was perfect and their service was faultless. The colour we picked was RAL 7040 which is a soft blue, not too light but not too dark. We decided to paint the walls in a paler colour and loved Dulux 00NN 72/000.
Once deciding on a kitchen colour, next on the list was picking the worktop and tiles. I am a big marble fan so it was no surprise that a common theme of my Pinterest images was Carrara marble worktops! But, as beautiful as they are, Carrara is high maintenance … some kitchen companies even refuse to install it! Carrara marble is soft and porous so it is naturally prone to scratches and staining. It needs to be sealed frequently, I didn’t trust myself to remember so Carrara was ruled out. I do think that Carrara marble gets better with age, the wear and tear adds a charm but the risk of stains was, well, too risky.
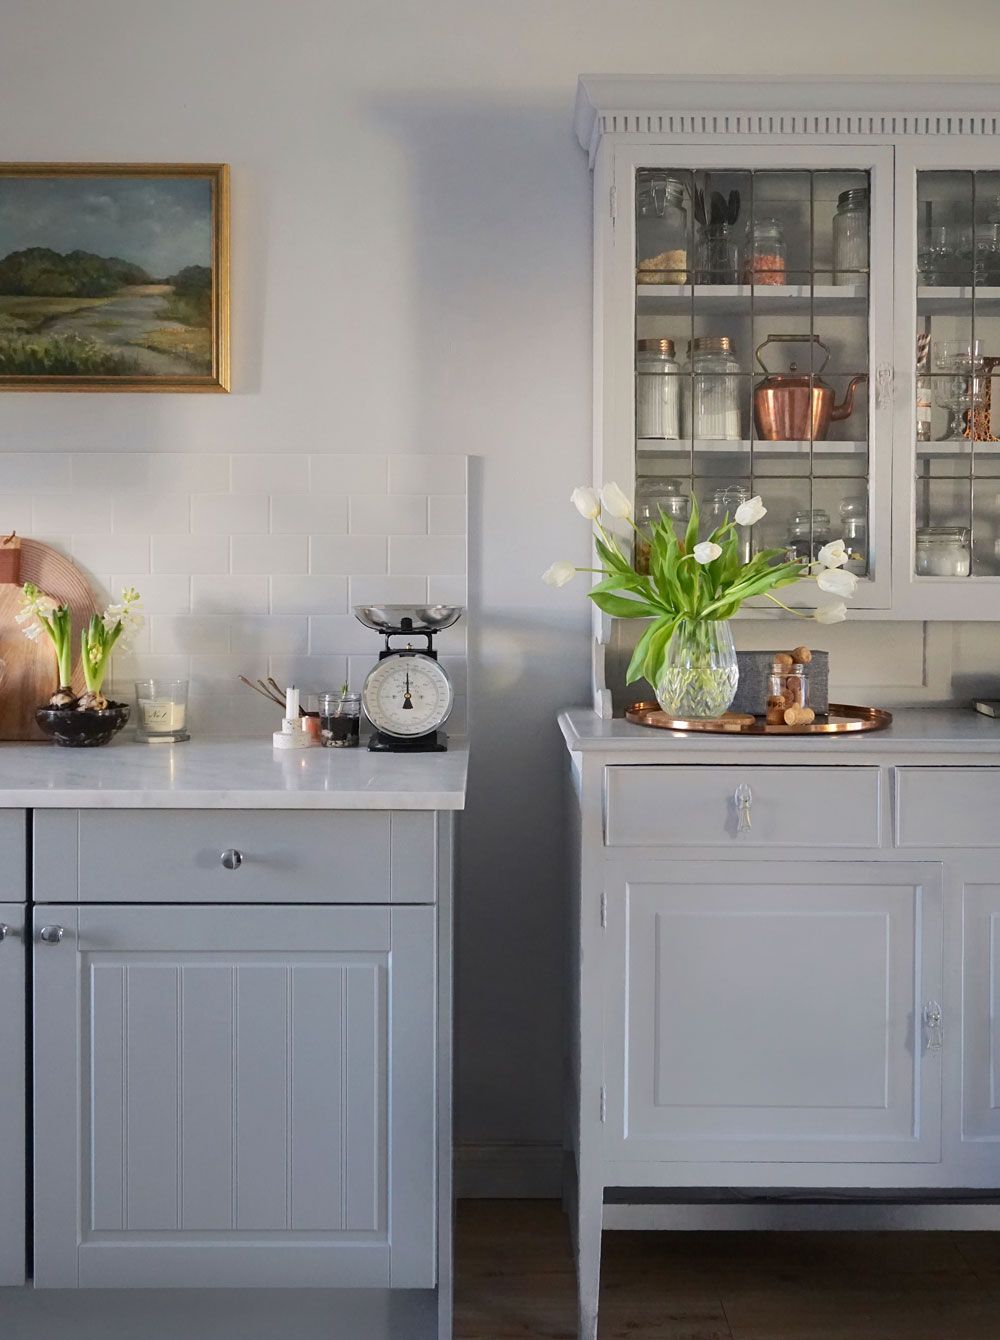
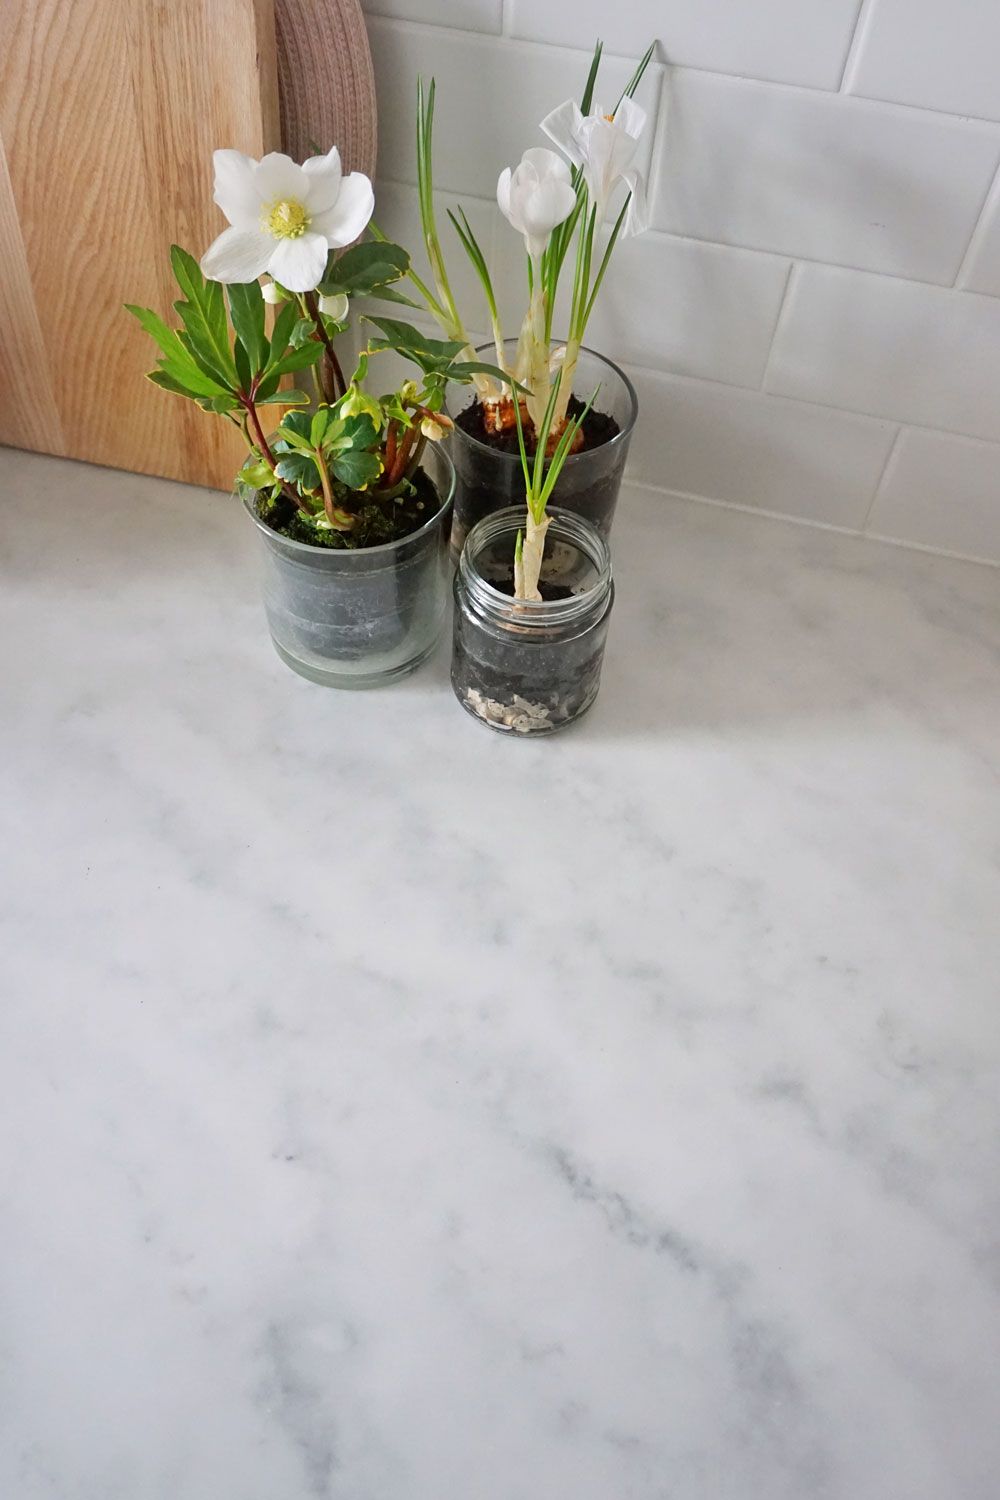
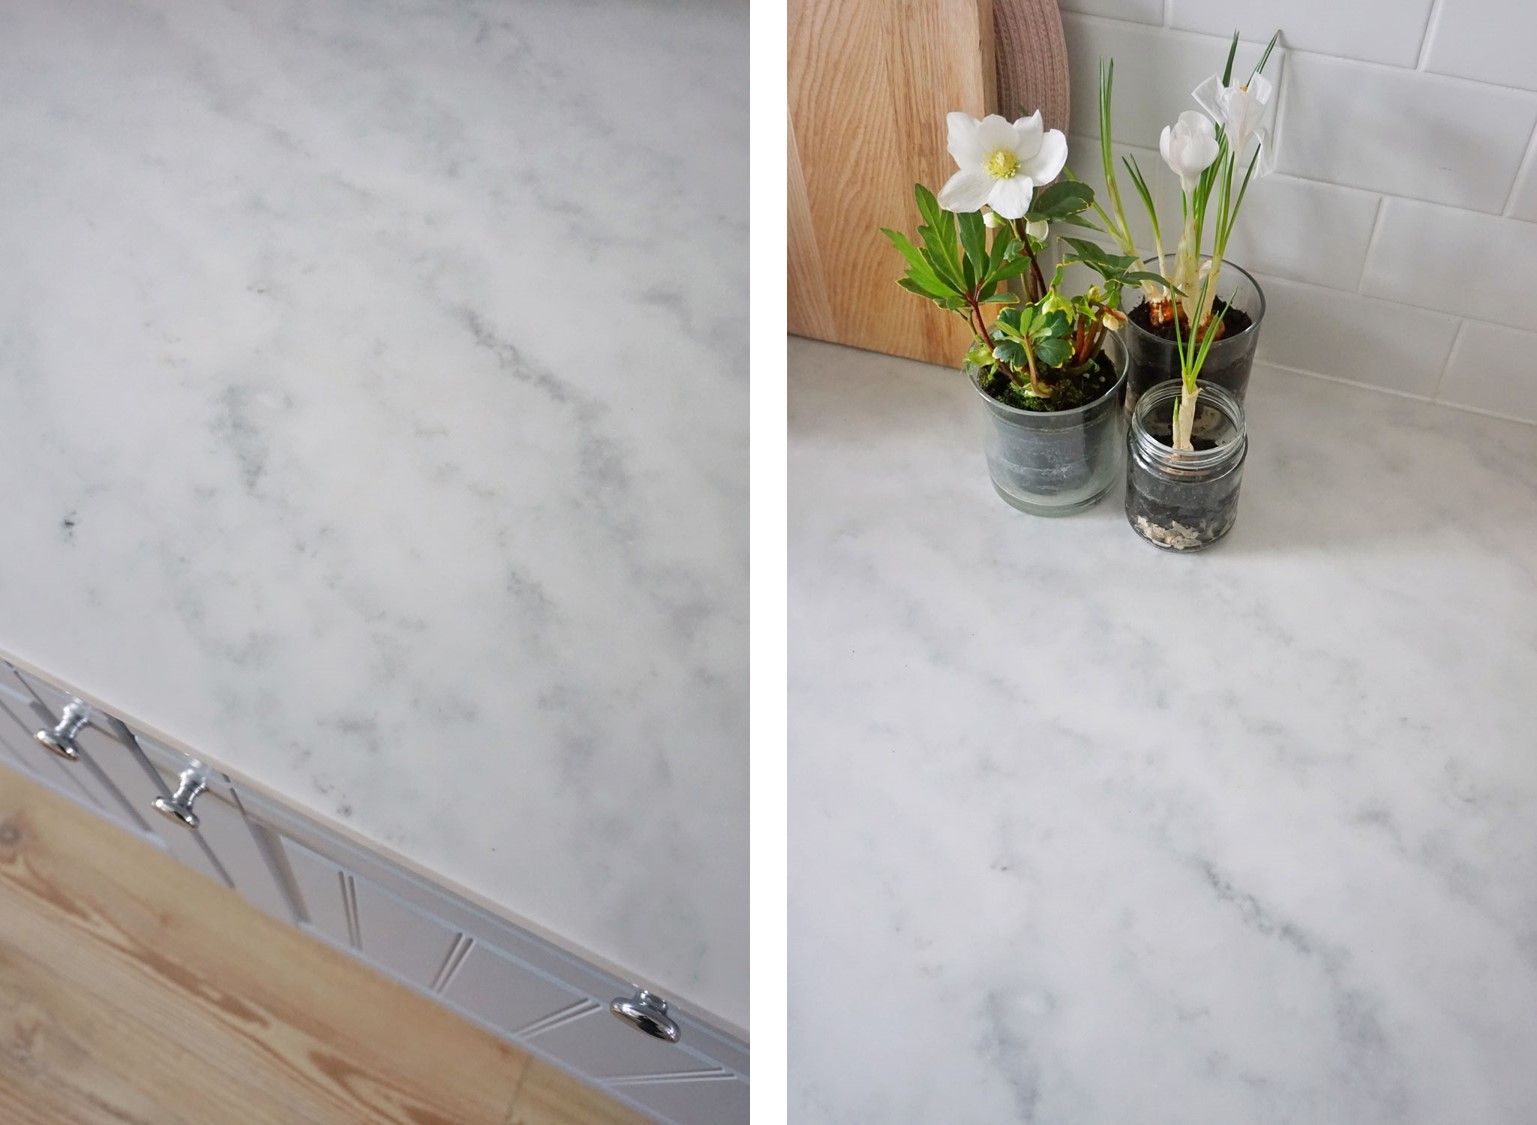
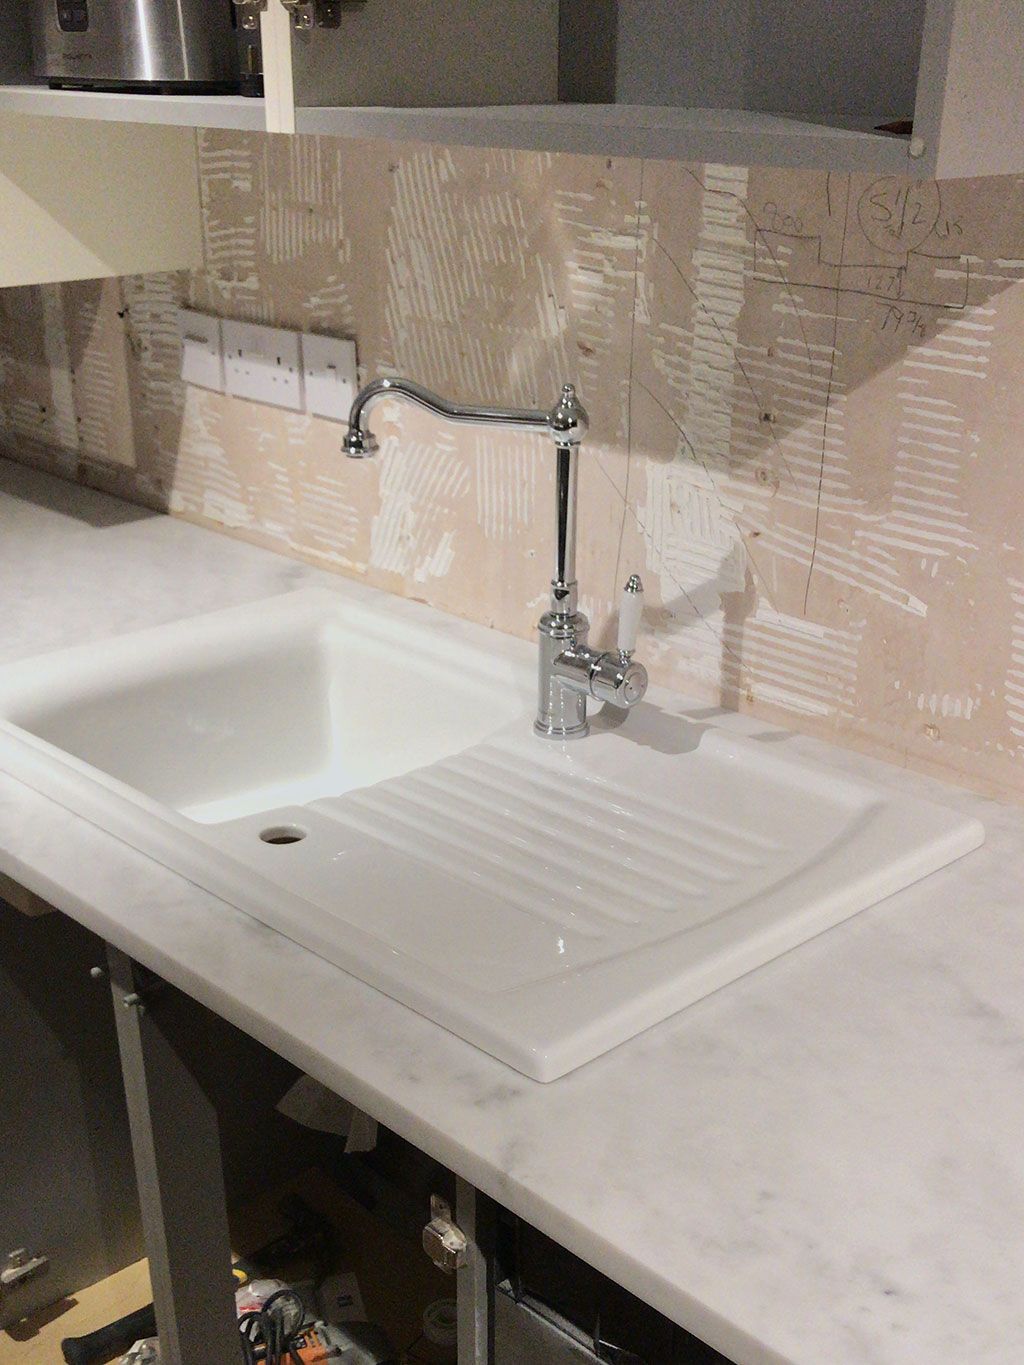
It took us a long time to find a worktop that we liked; we wanted to get as close to the Carrara look as possible but without a hefty price tag. Initially we looked at Silestone and Dekton but they were just too expensive. The only other option seemed to be laminate, which I know it has come a long way over recent years but I’m just not a fan. The best one we found was in Wickes but, for me, a laminate just isn’t the same – it doesn’t feel like stone. At this point we decided to change tack and go for a plain white laminate worktop with a square profile and spend the money on some marble tiles instead. I was a little disappointed to be honest, we were still incorporating the Carrara marble but I had set my heart on having some fancier worktops! Luckily, just in time, we discovered Minerva. We found it in John Lewis and it was love at first sight. Carrara white looked, well just like Carrara marble! The veining was beautiful and it was cool to the touch. It is made of acrylic and is low maintenance. Unlike real marble, it is non-porous so is largely stain resistant. It has a solid colour all the way through, so any scratches (and worse case stains) can easily be buffed out. Oh and it has a ten year guarantee. It ticked every single box and therefore I was convinced it would be out of our budget. But it wasn’t, halleluiah! After much googling, I ordered it from BBK direct as they were the most cost effective. (Since completing the kitchen, I have discovered Maia worktops. They are another cost effective but stylish mid spec product.)
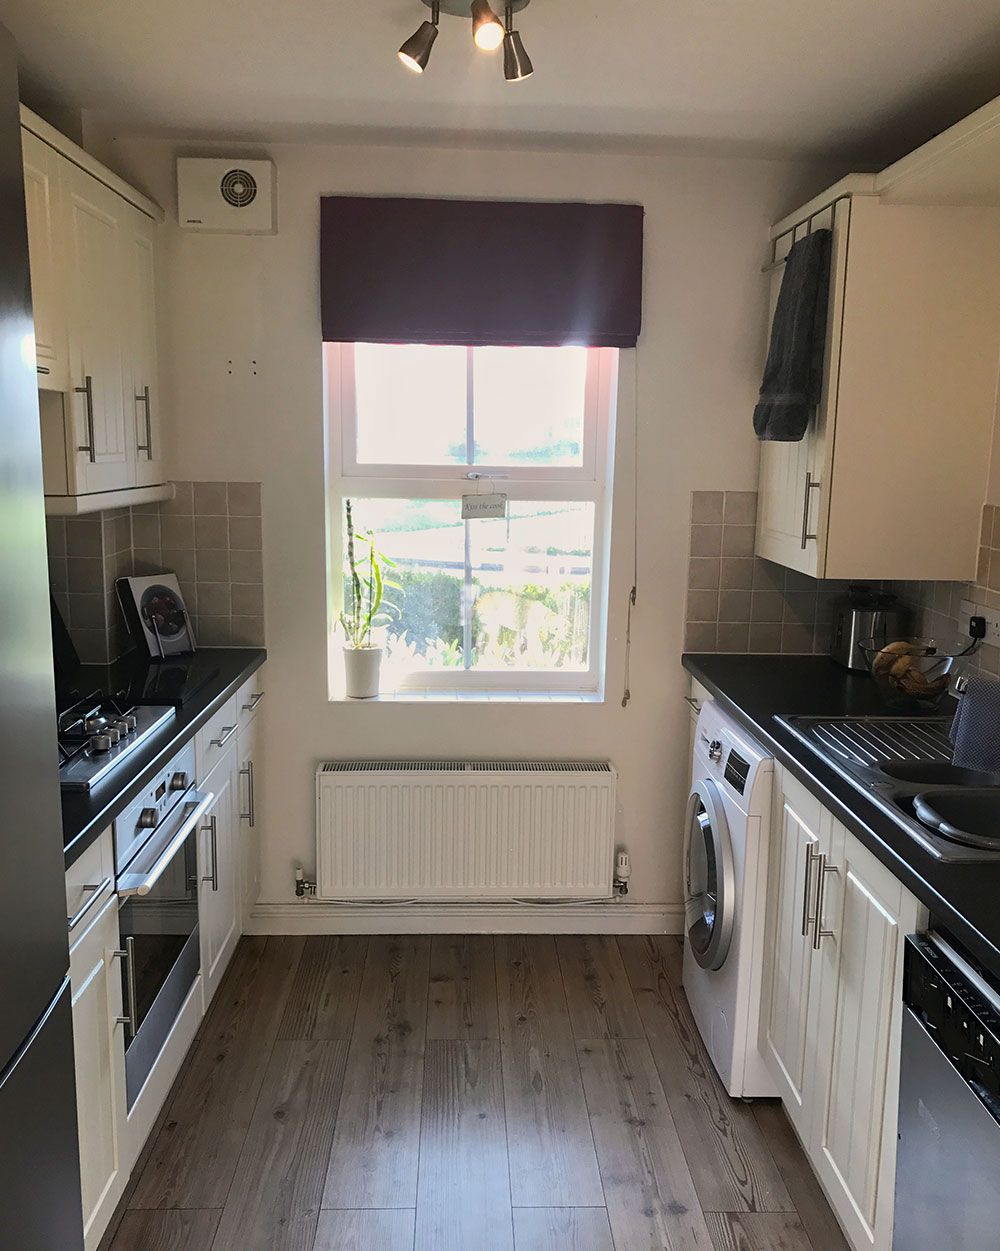
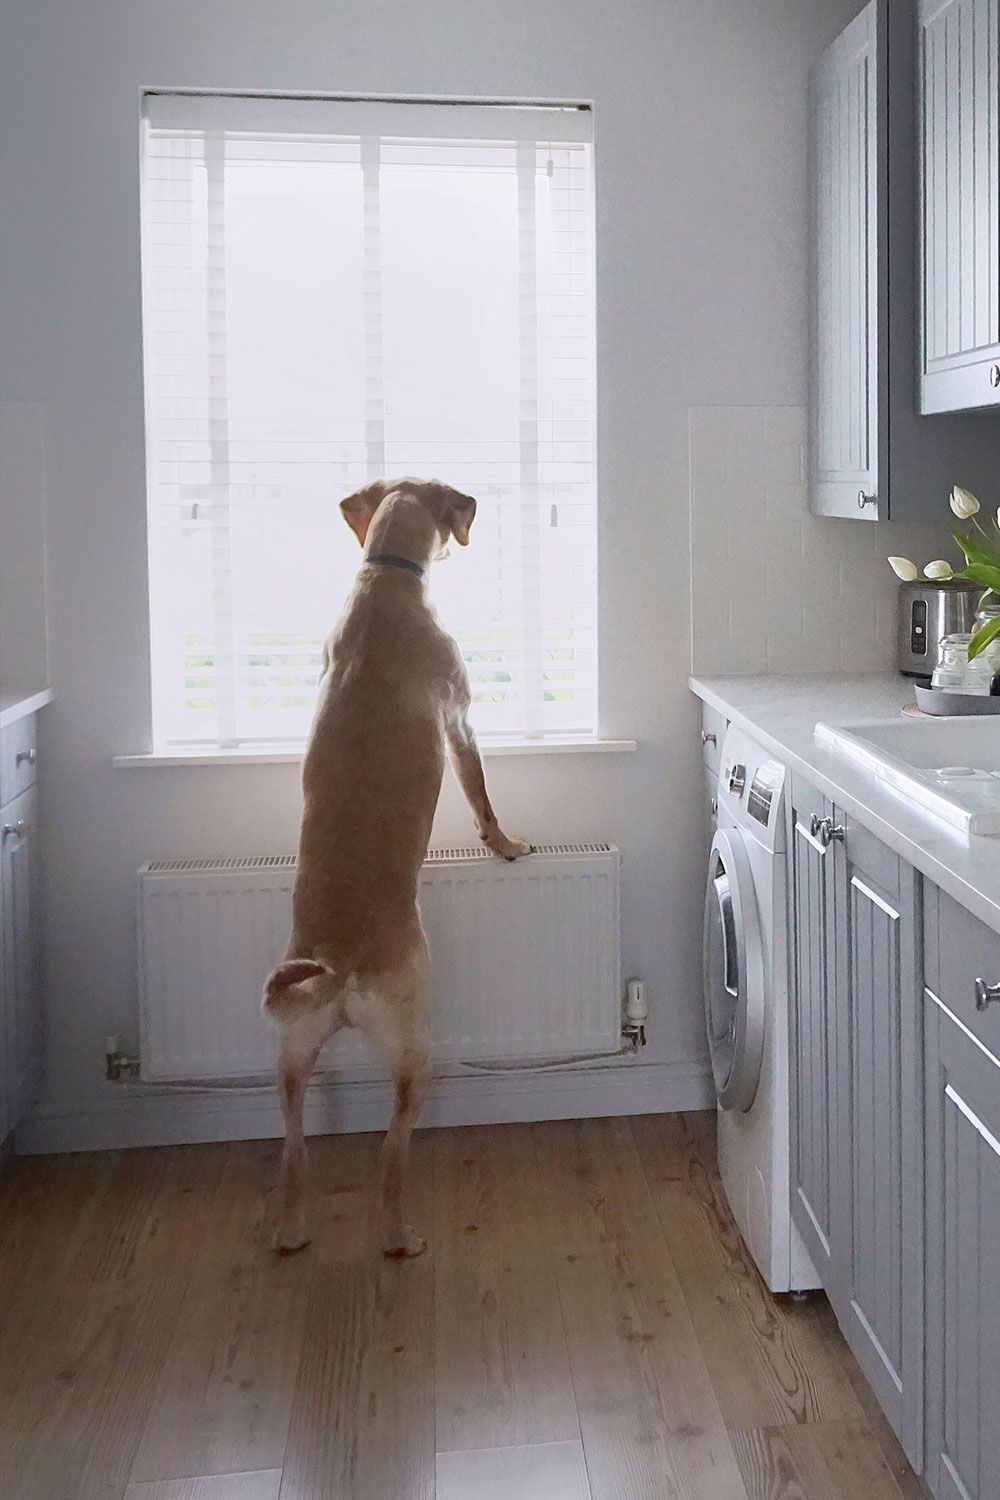
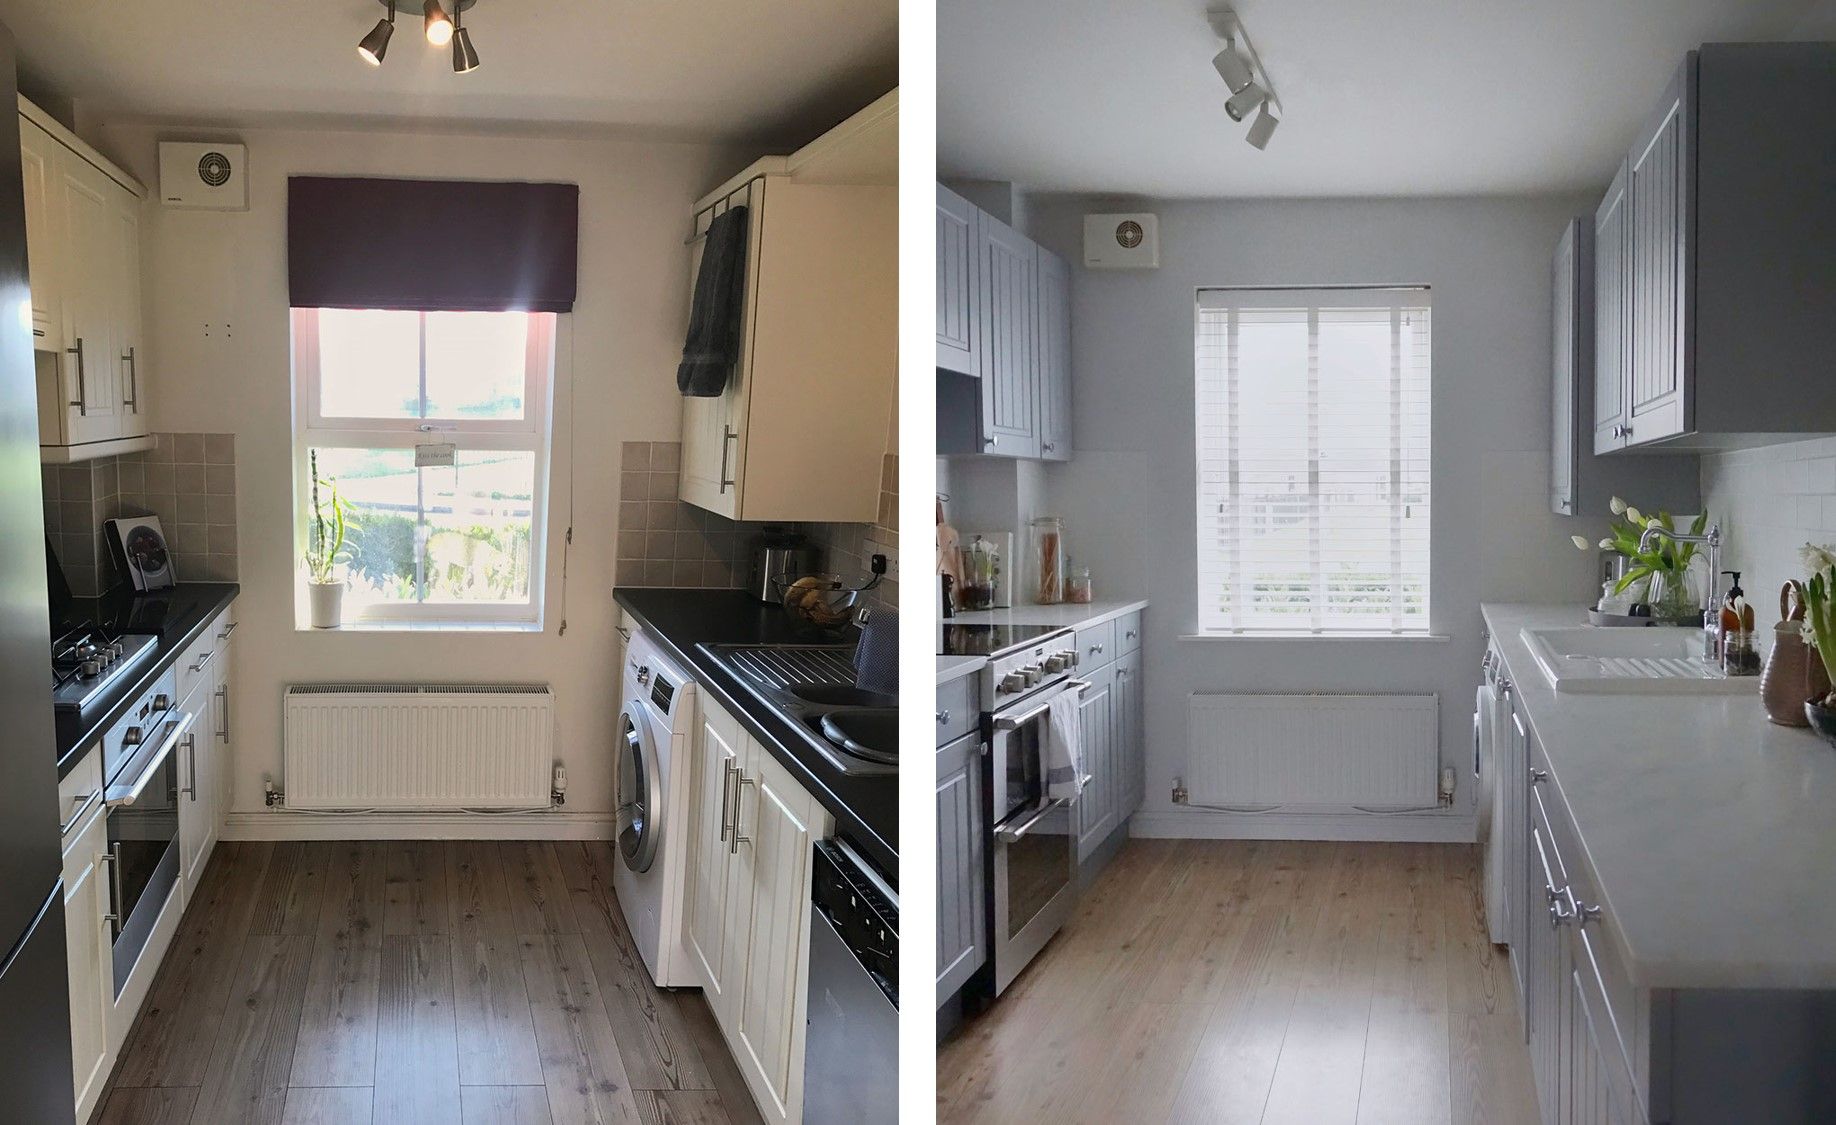
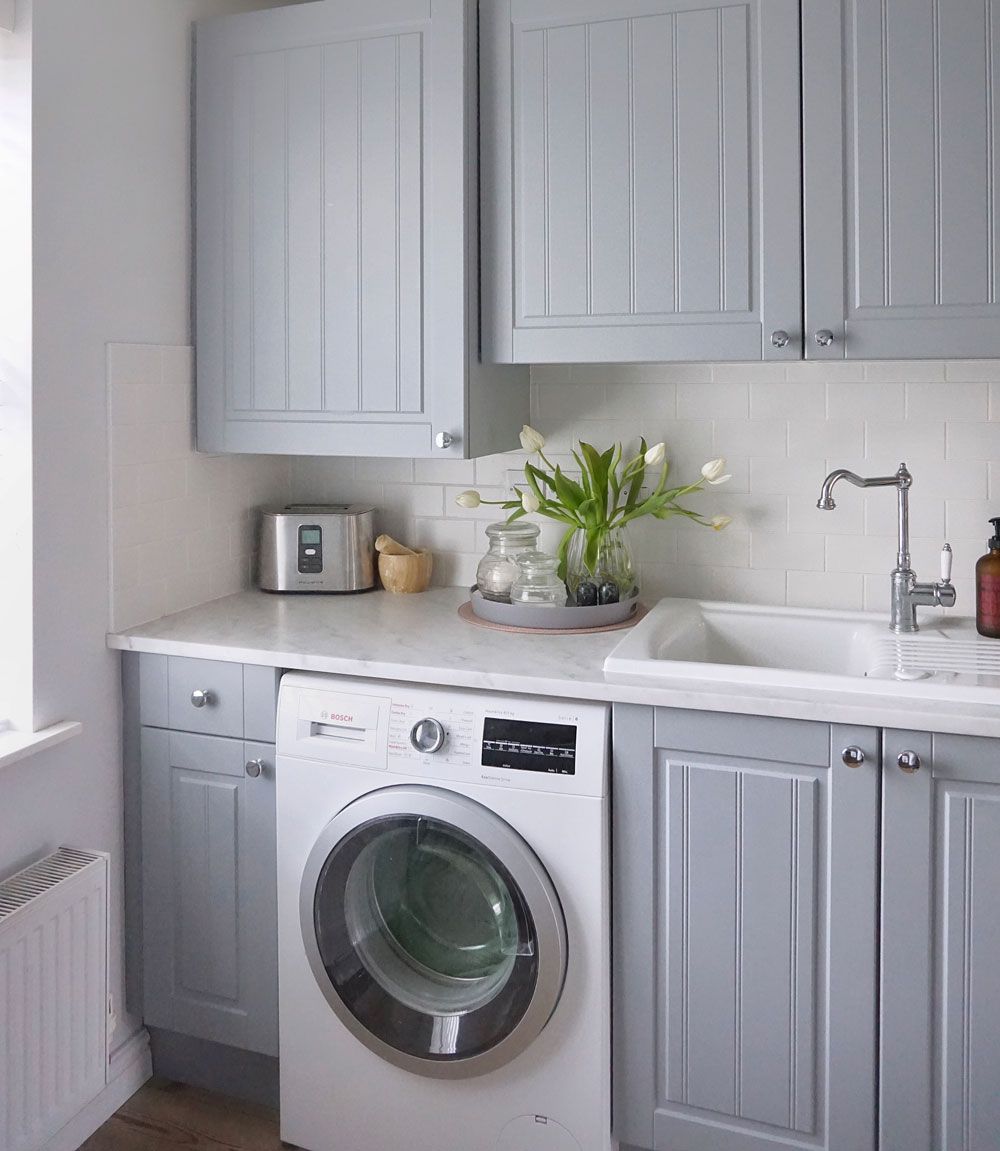
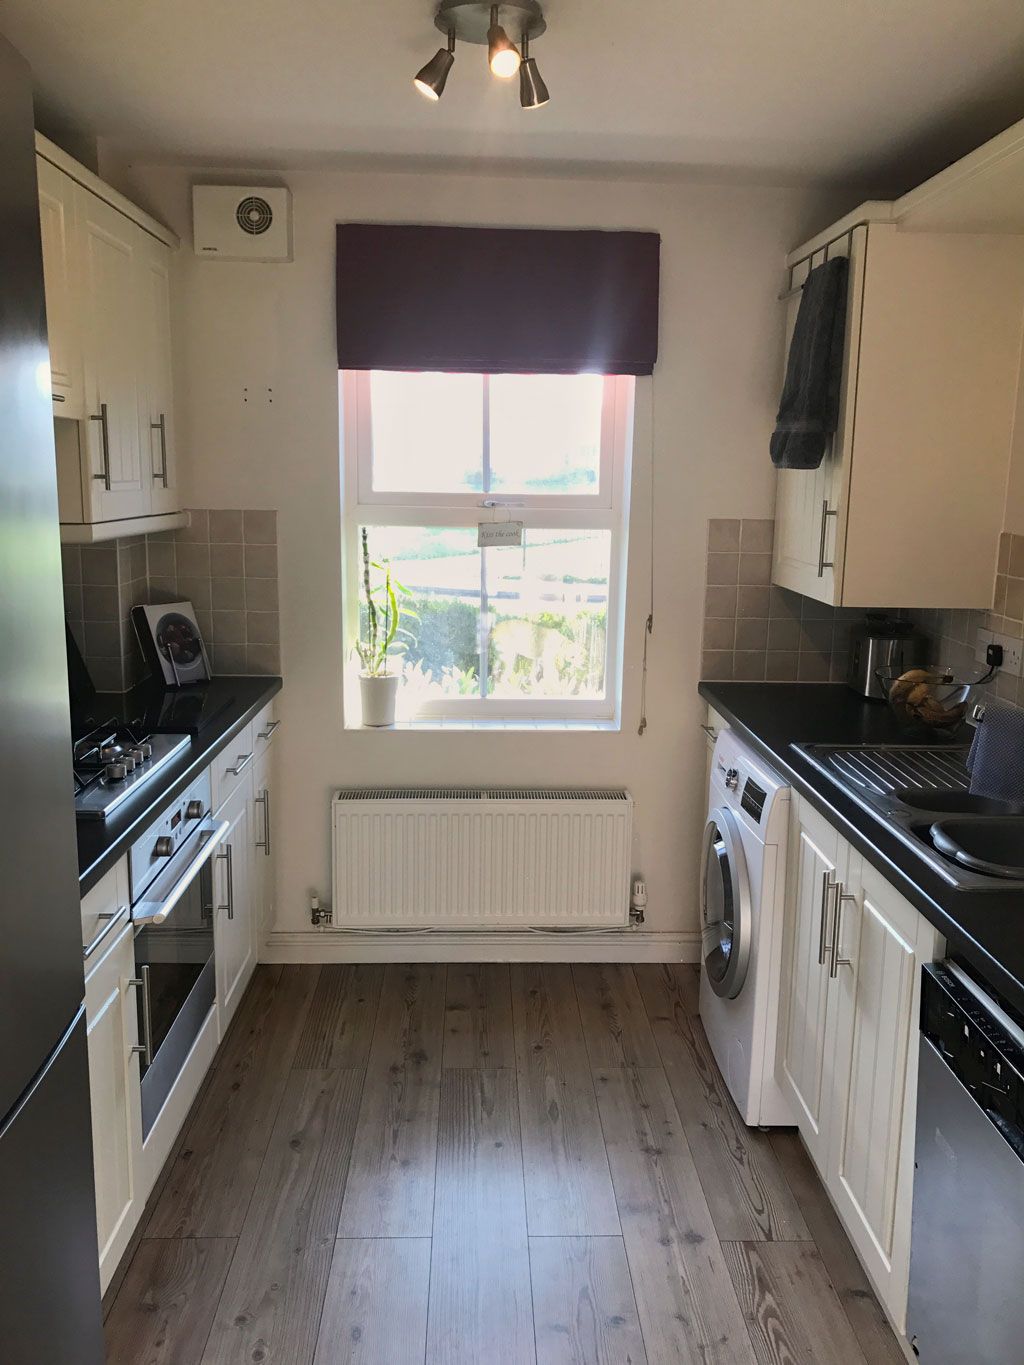
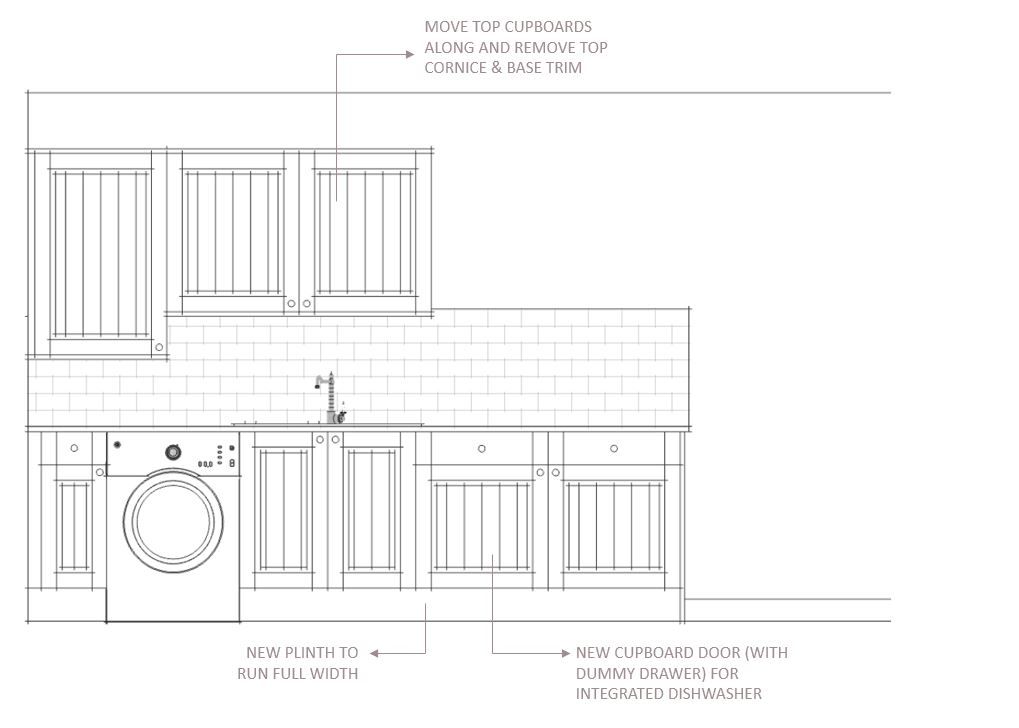
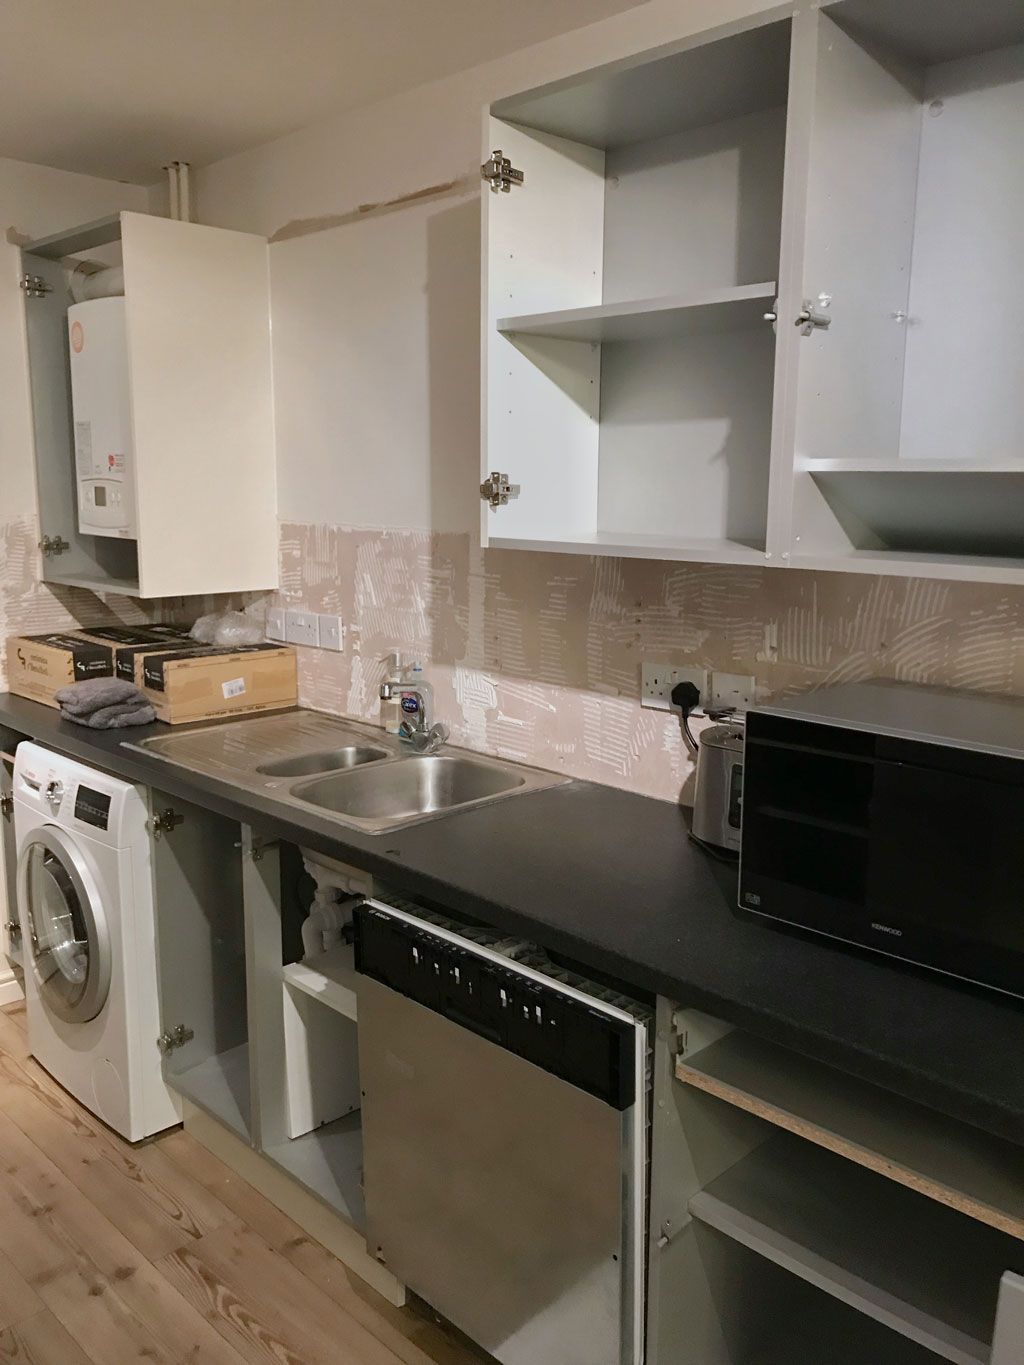
We ordered the worktop in the 650mm depth as one of the things that I hated about the original kitchen was that the washing machine protruded the other cupboards and worktop. We’d purchased the washing machine a few years ago and as much as I wanted an integrated one, there was no reason to replace. The existing worktop was 600mm deep so increasing this depth to 650mm meant the cupboards could all move forward slightly and the washing machine would be flush at least.
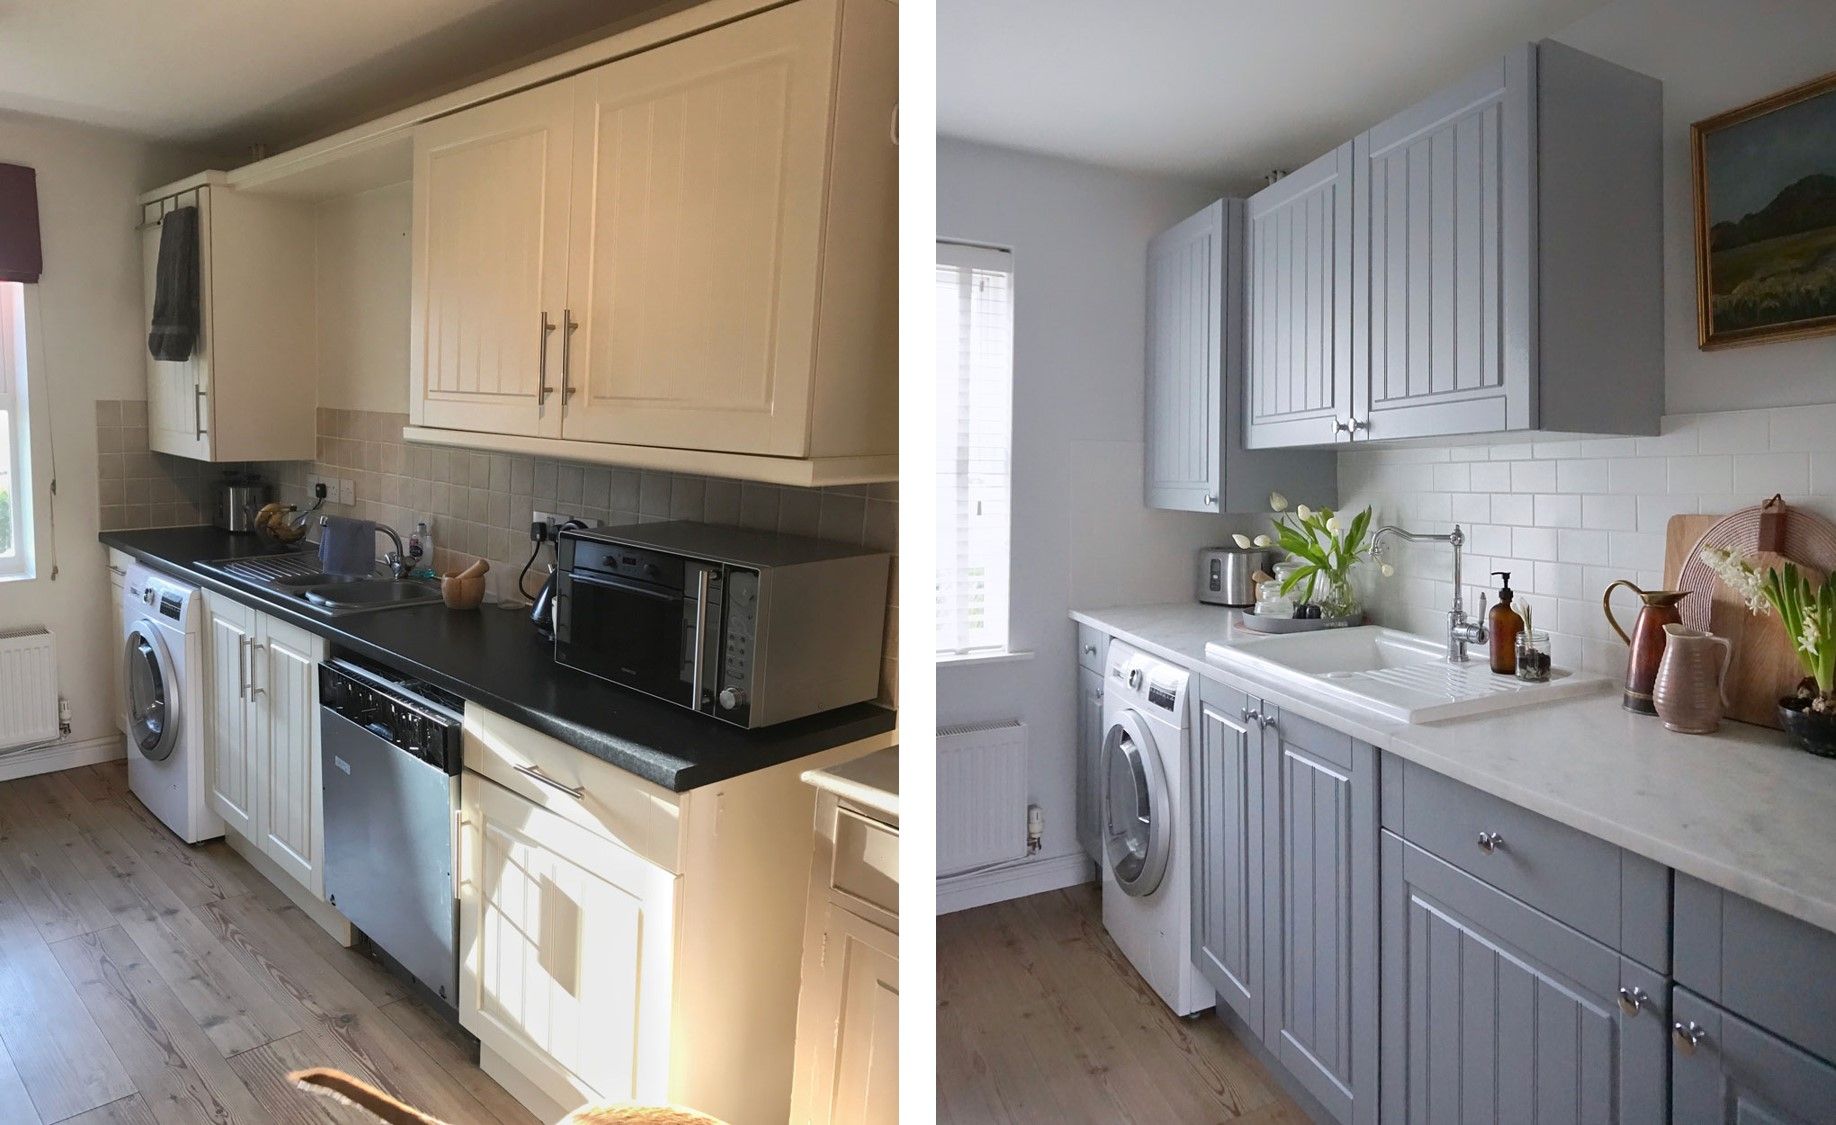
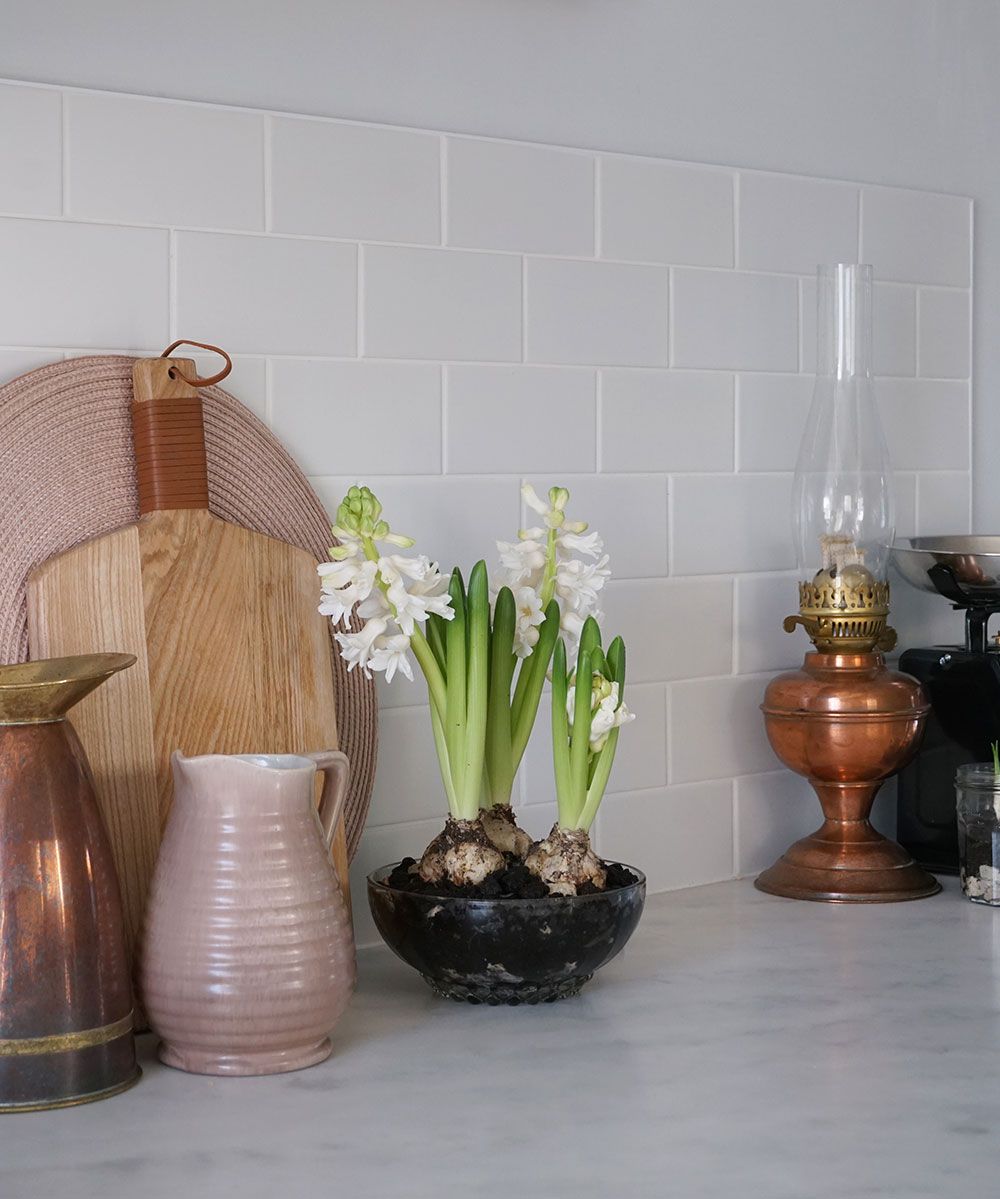
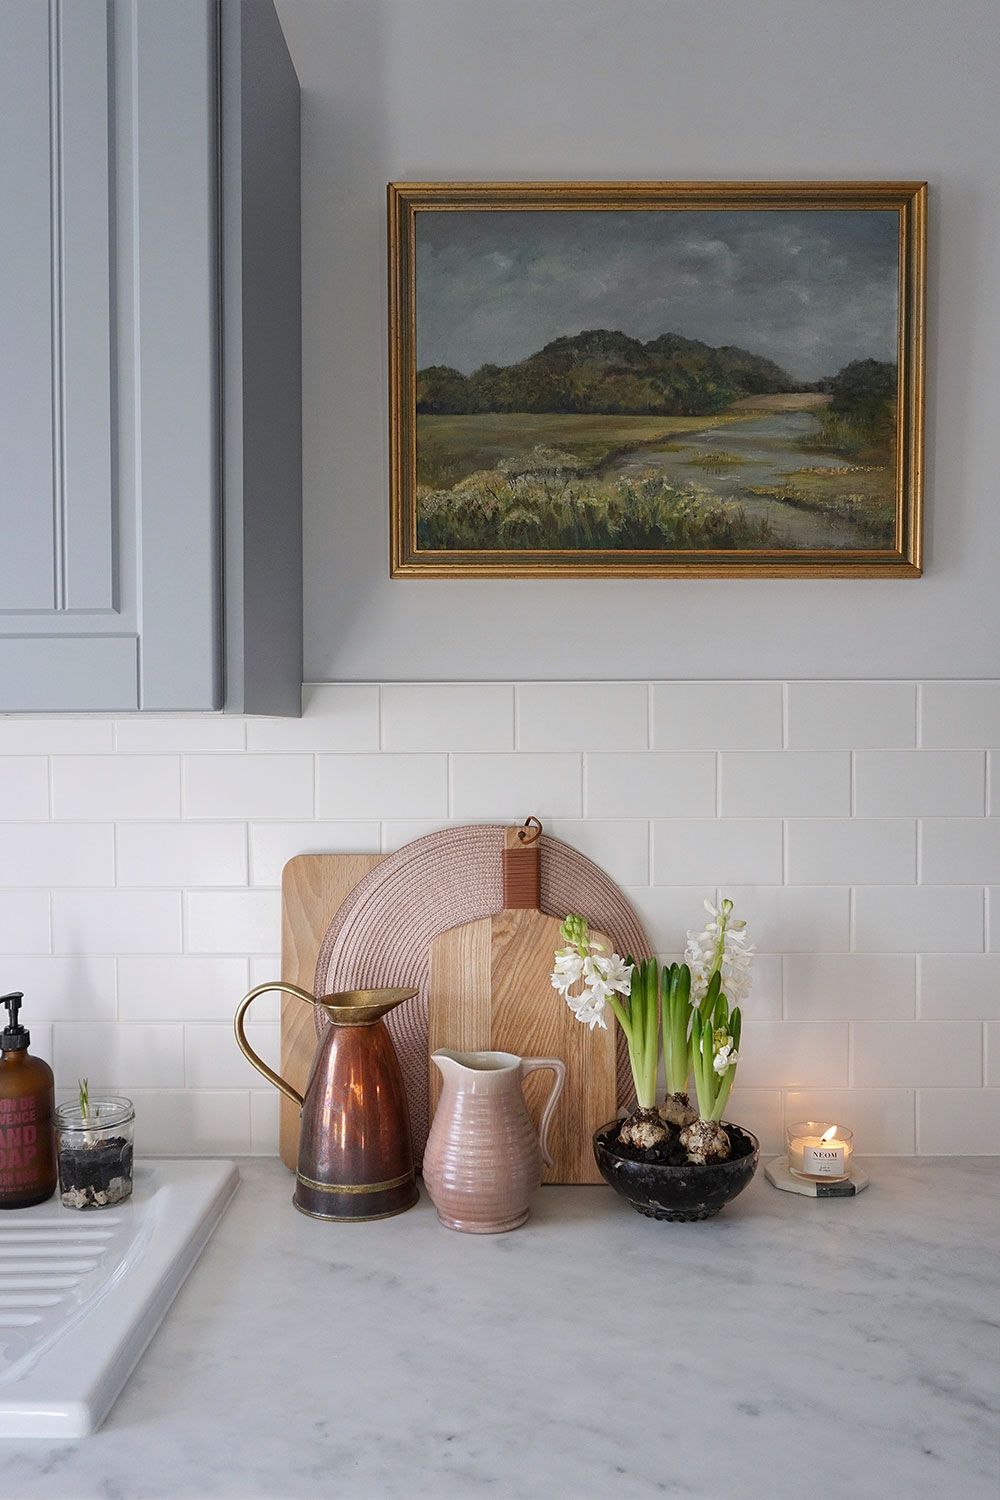
As the worktop would have the veining detail we picked plain white tiles. I ordered lots of samples as the shade of white does vary. We eventually found a tile in the perfect shade and luckily it was also super cheap – bonus. We kept the grout as narrow as possible and selected the most discreet trims.
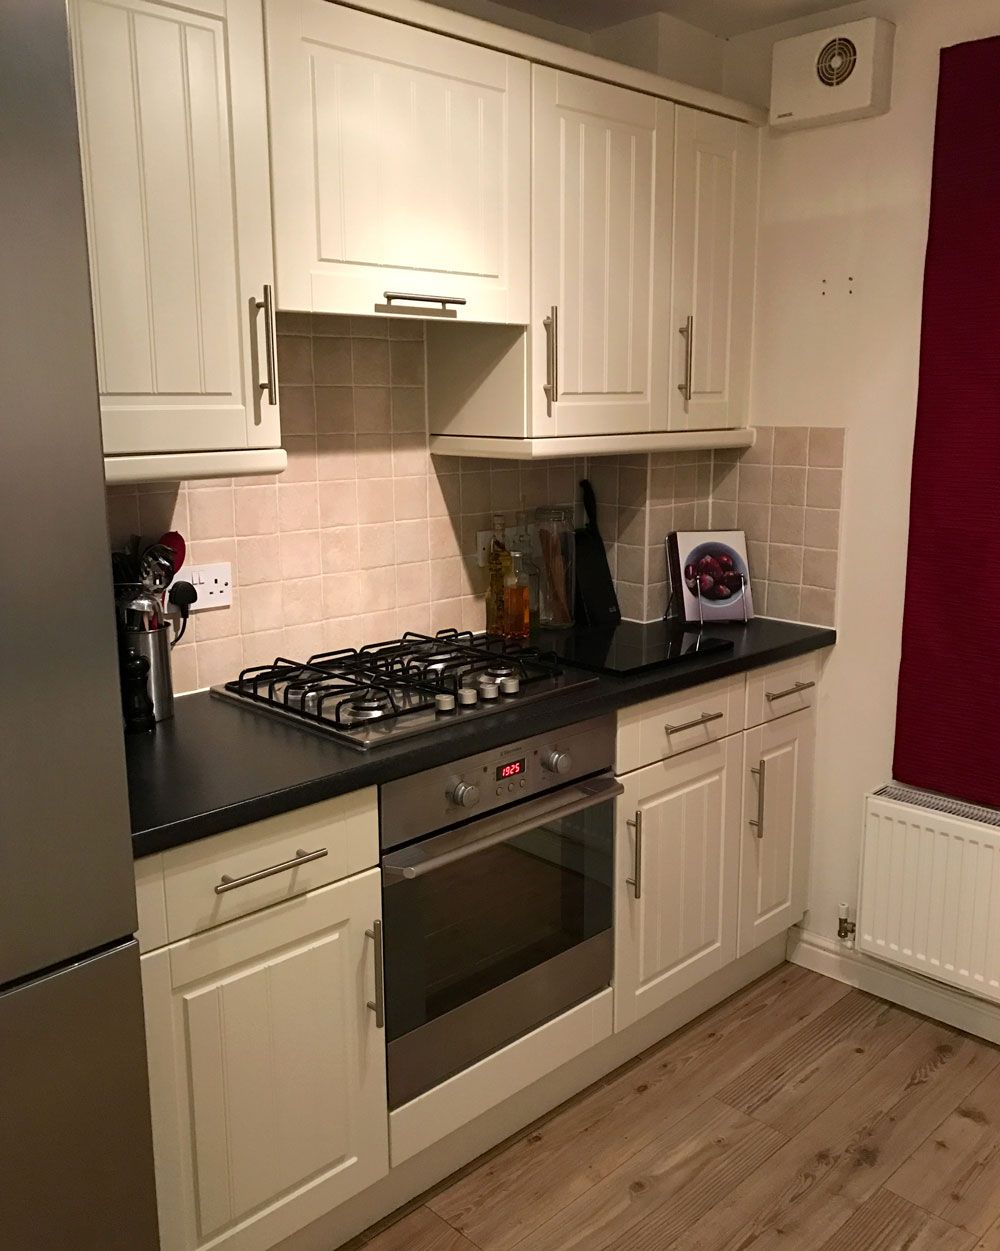
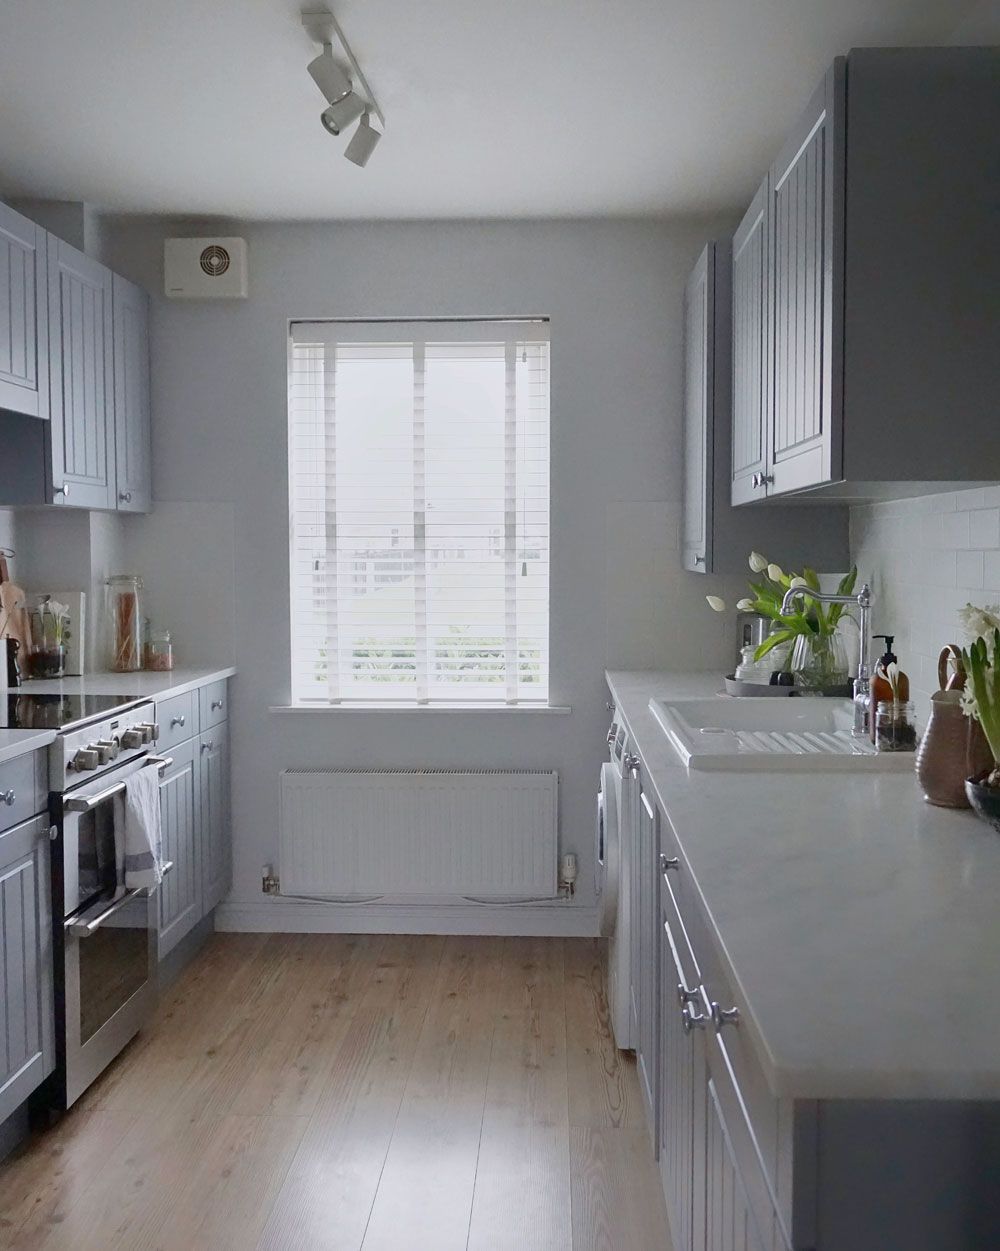
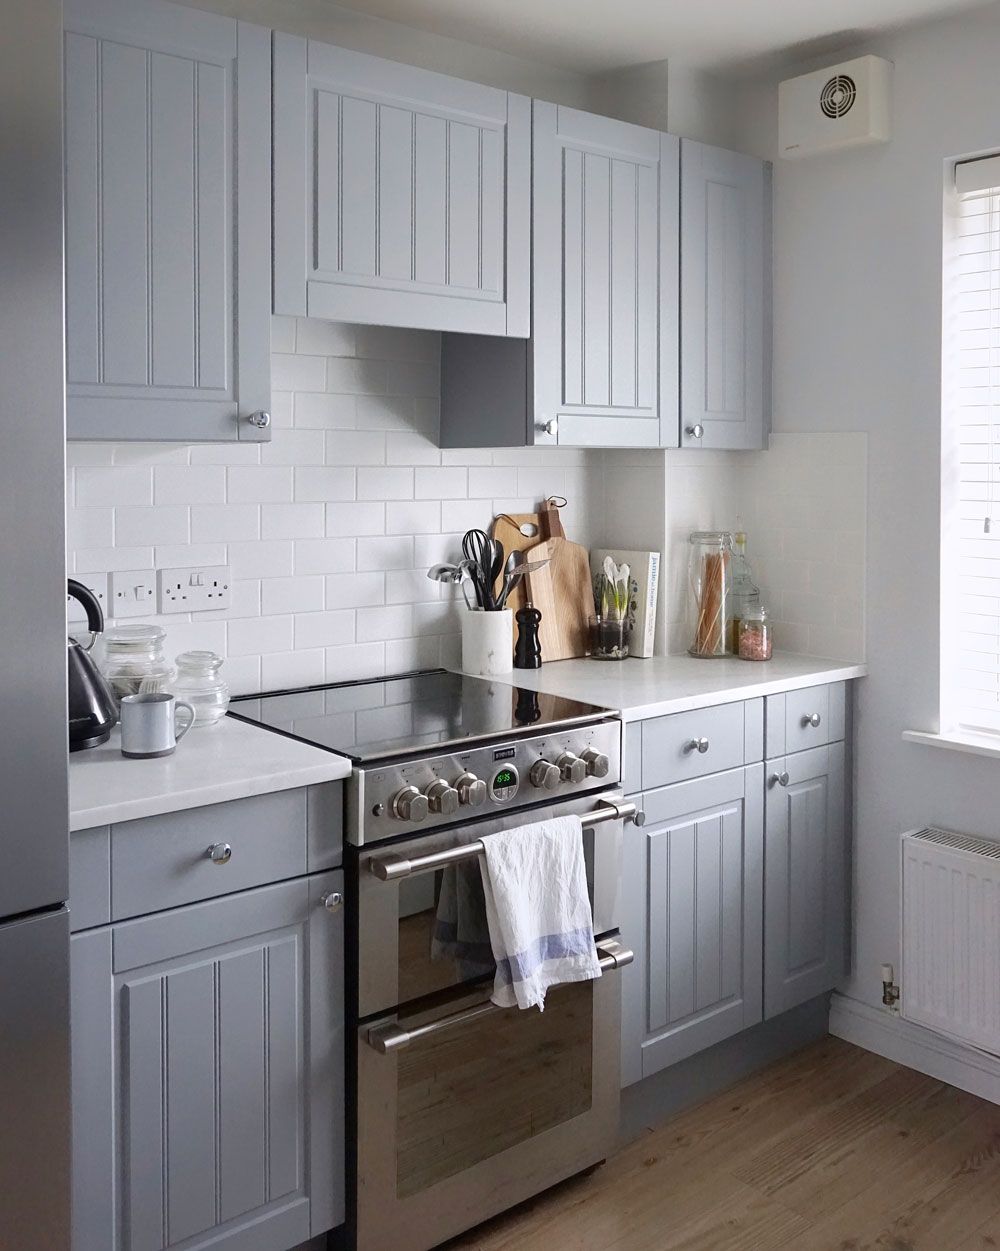
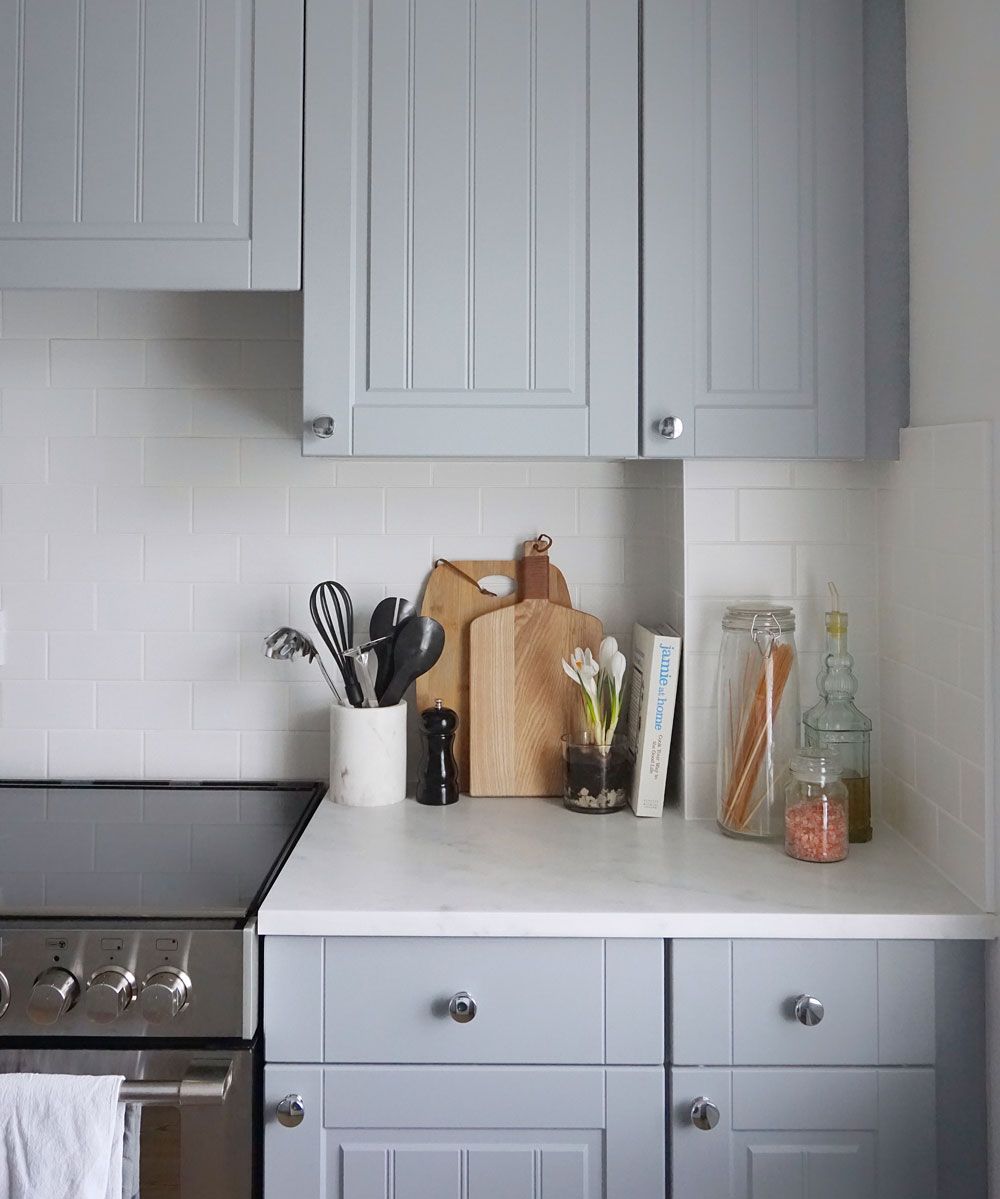
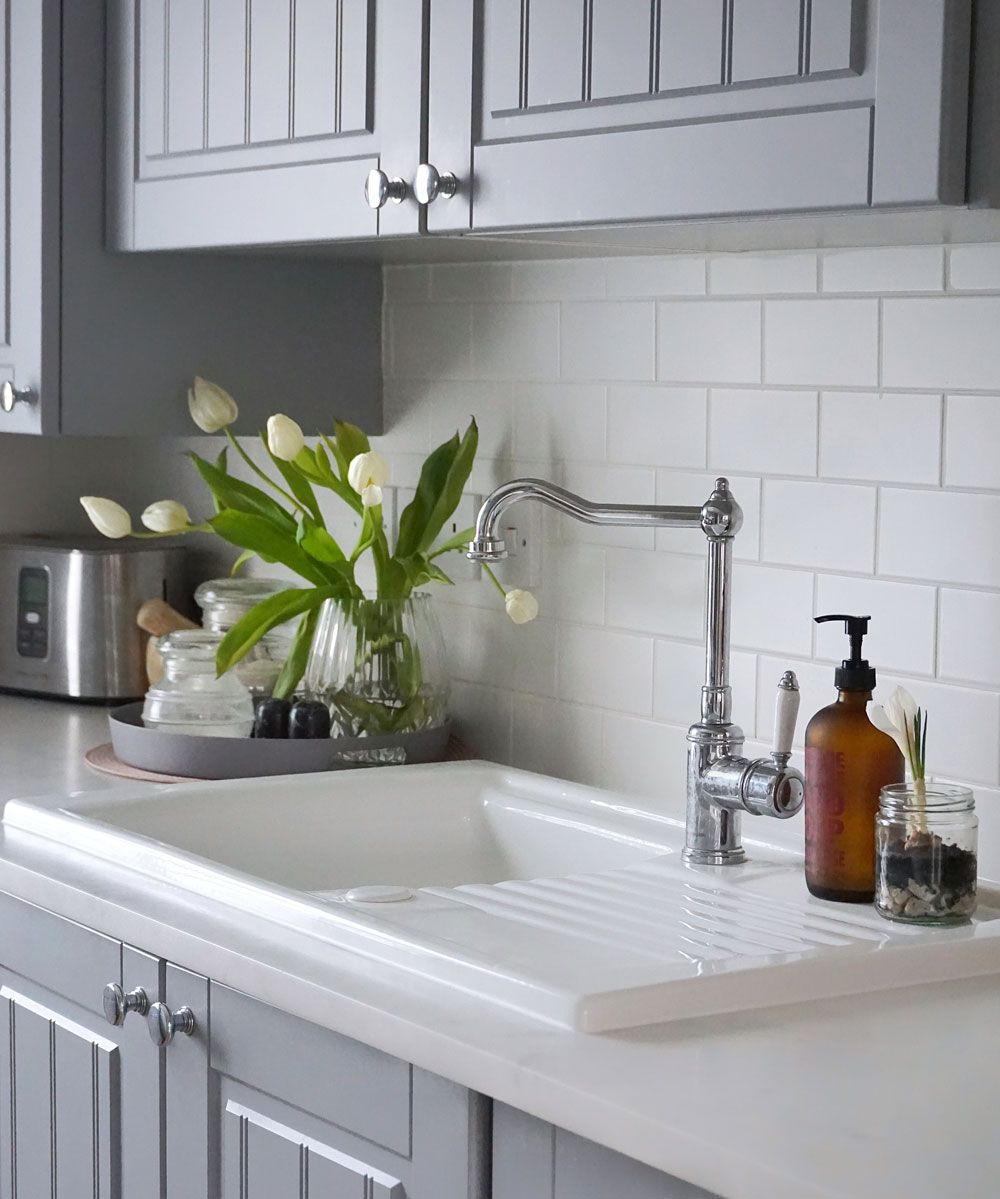
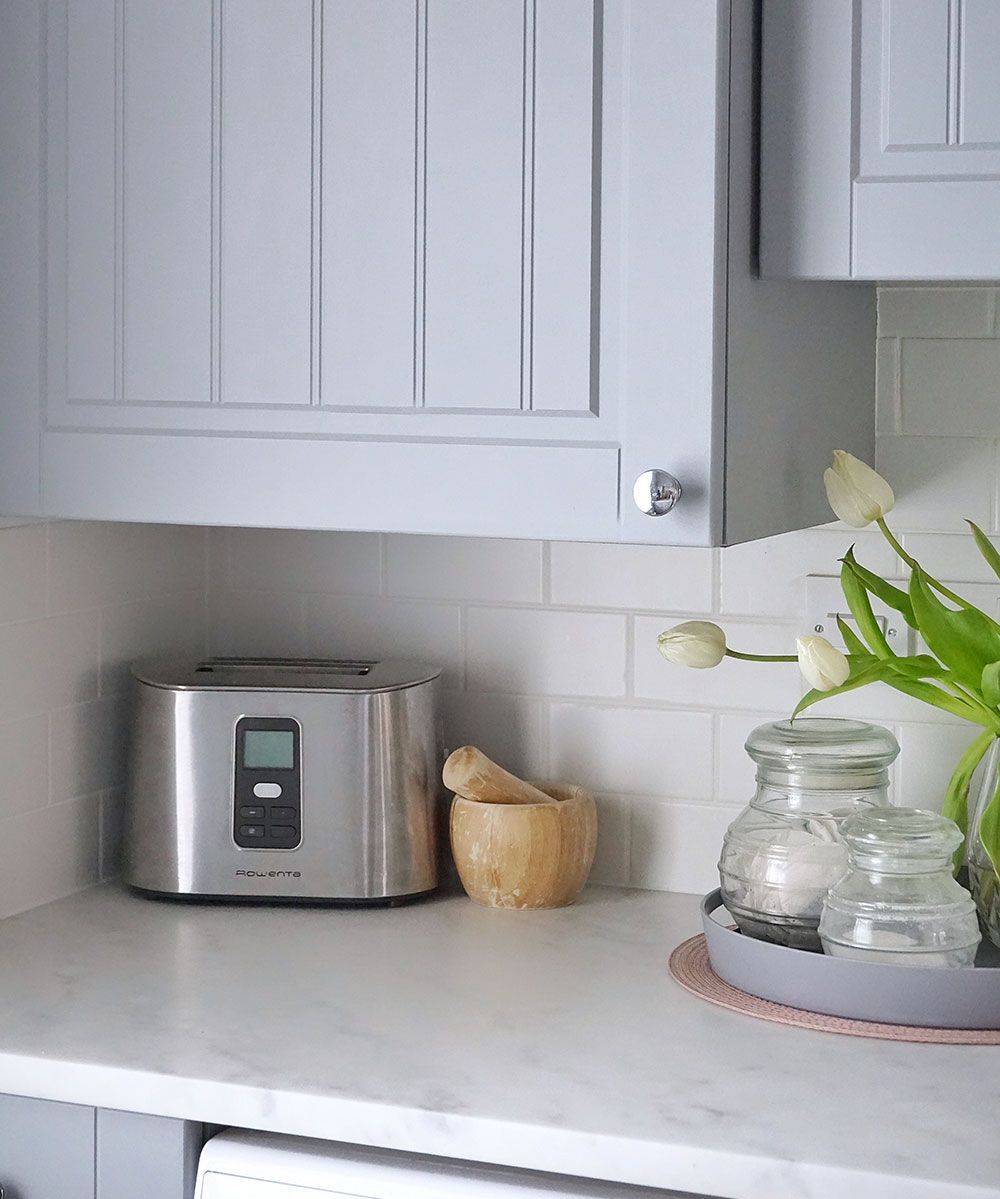
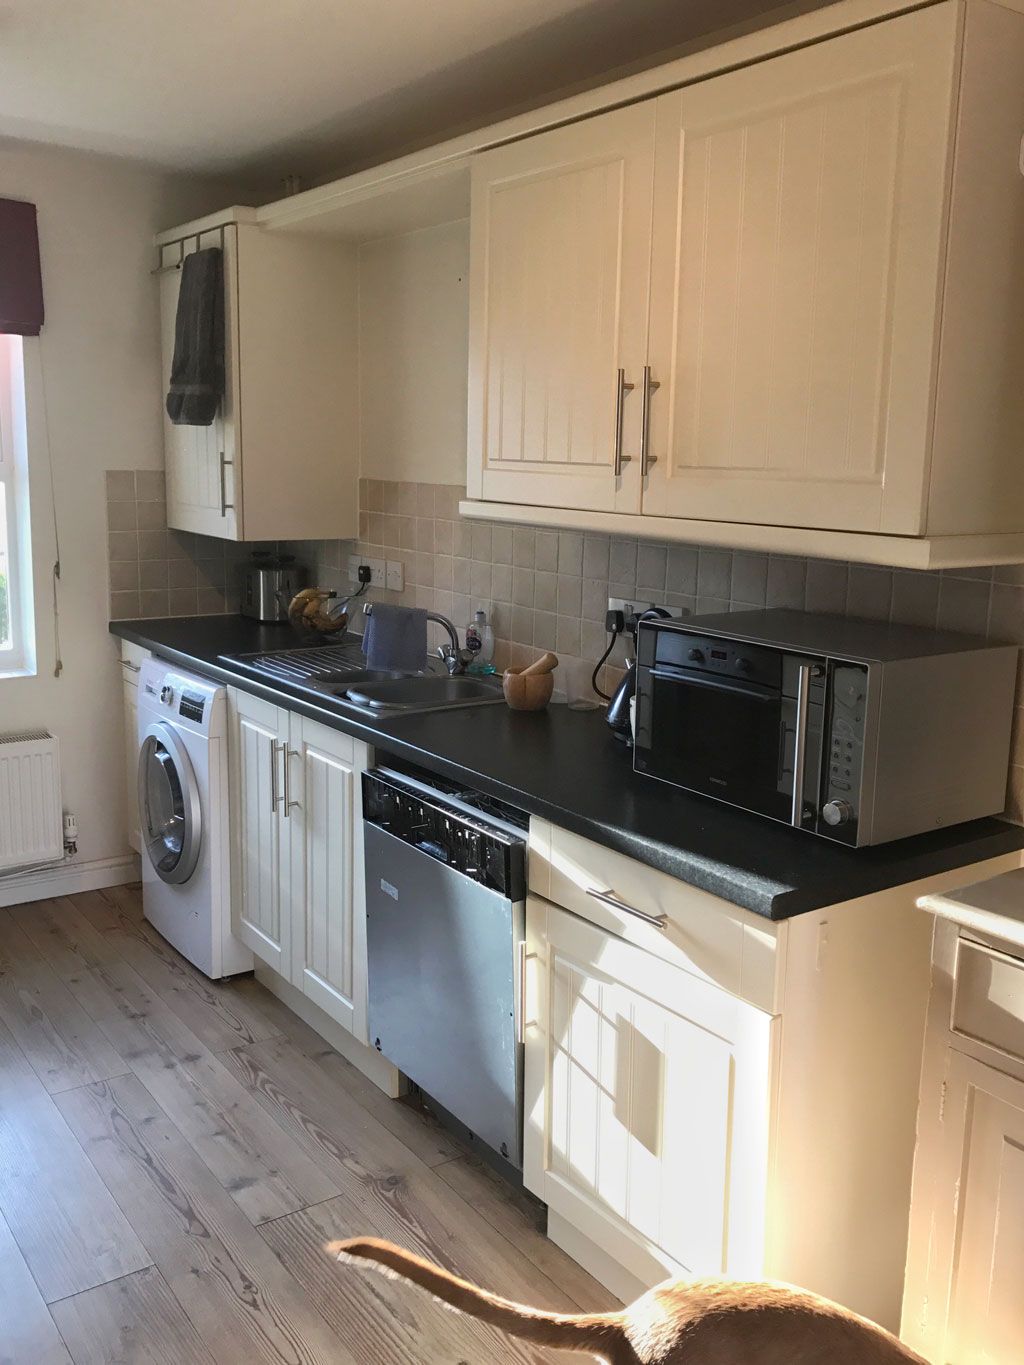
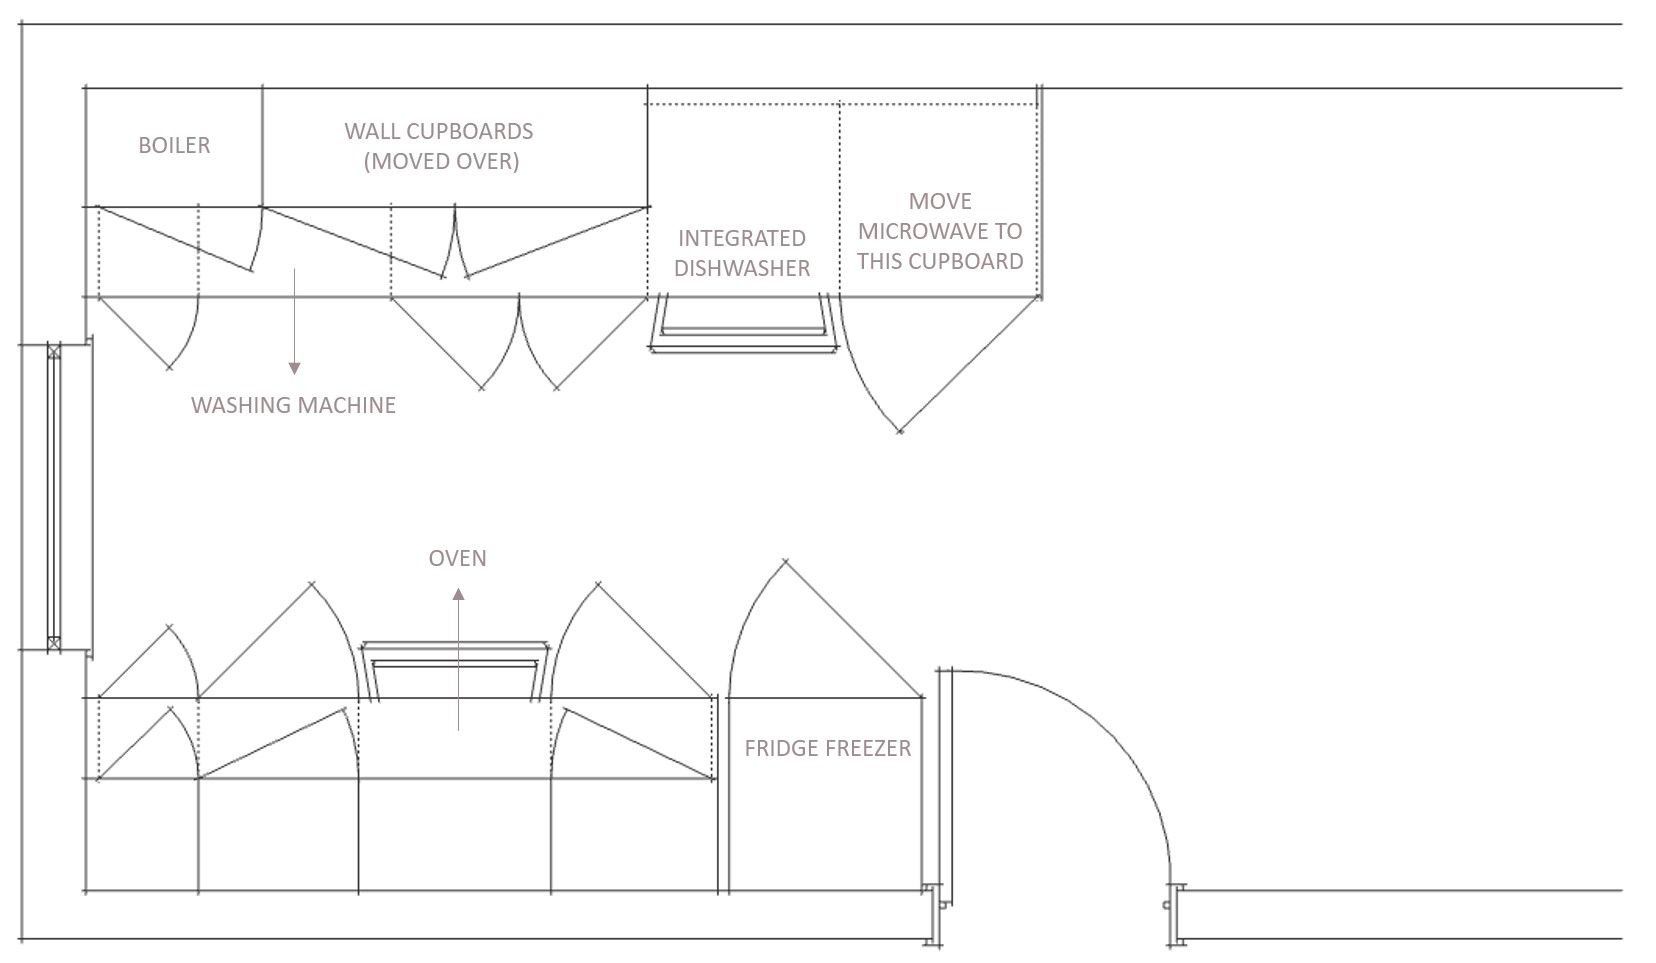
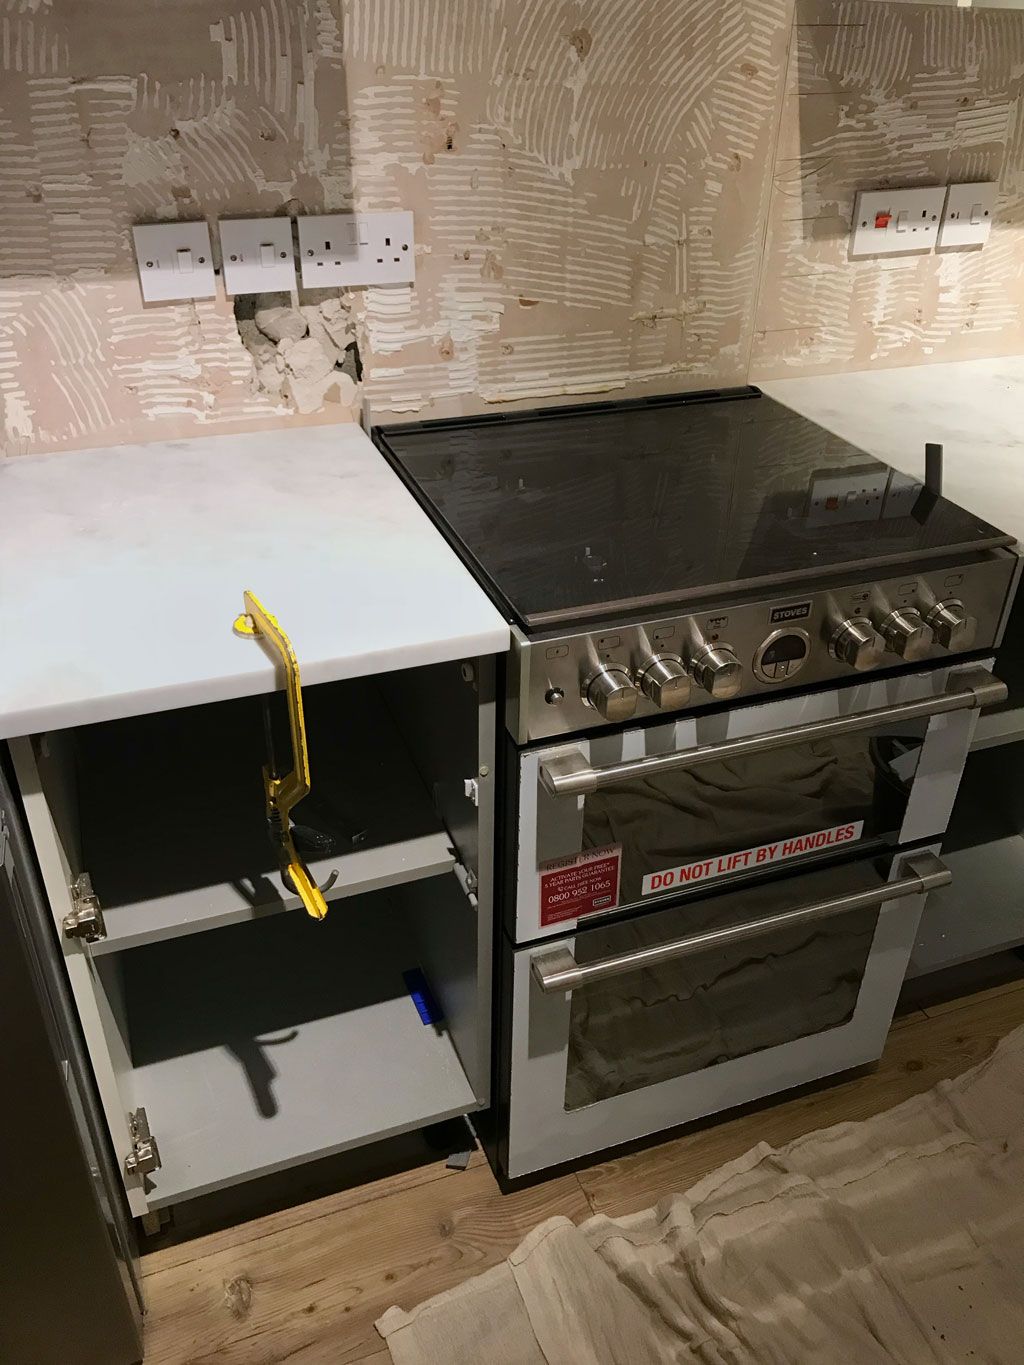
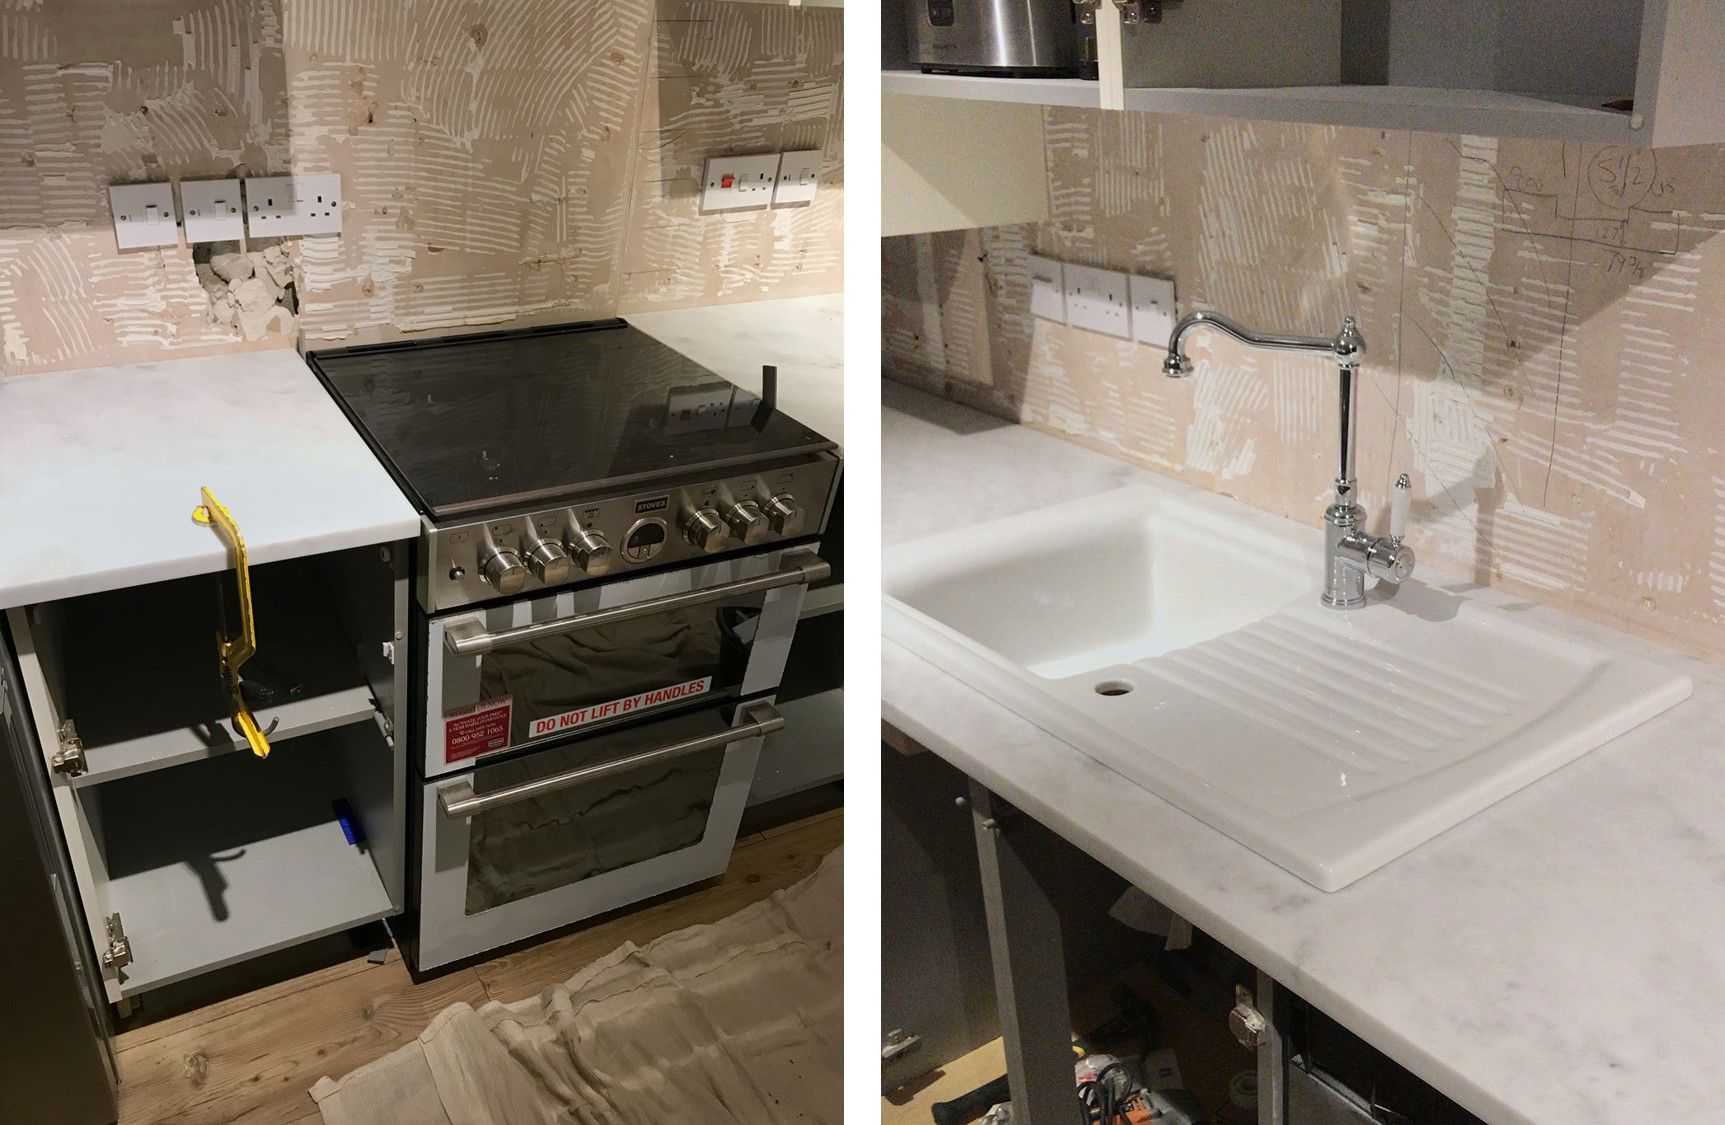
Regarding the appliances, we wanted to change the built in oven. We picked a freestanding double oven as it gave a lot more cooking space and I liked the industrial feel. We also selected one with a glass cover to the gas hob; this looks nice and neat and creates extra ‘temporary’ work top space while protecting the tiles from heat stains. The existing sink and tap were badly stained so they had to go. We picked a traditional style sink which was 800mm wide to align perfectly with the cupboard below , the existing sink over-shot the cupboard and it bothered me everyday. We already owned an integrated dishwasher (I would hide every appliance if I could!) but it needed a door. Thankfully, after a lot of emails, I managed to find out who originally supplied the kitchen and so purchased a new door from them which was sprayed to match the others. Our existing microwave was relocated into one the of the cupboards to free up worktop space. (and because it was ugly)

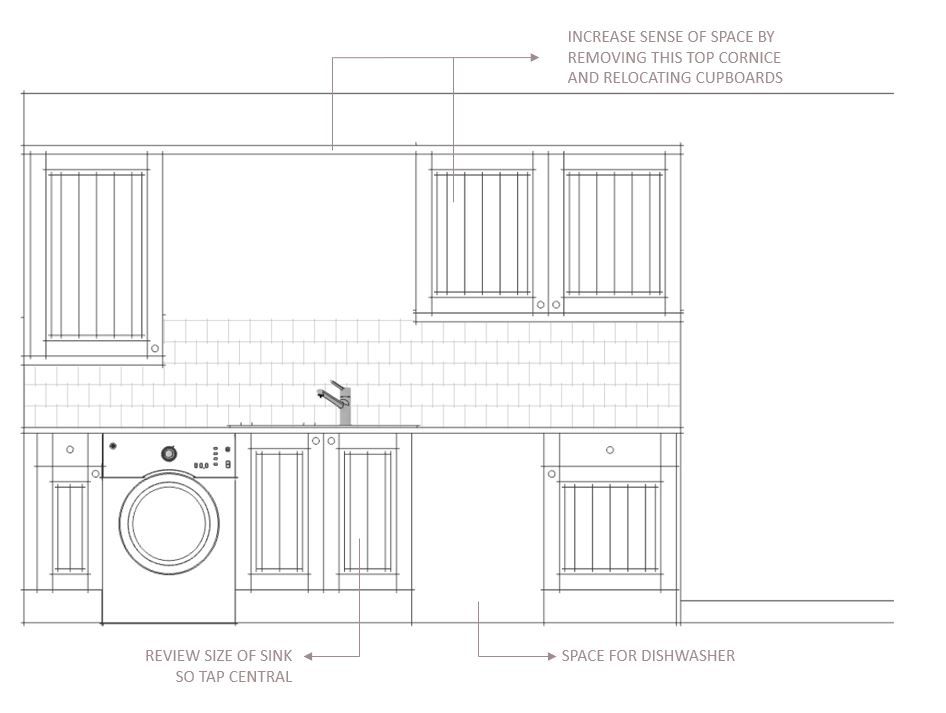
In terms of the kitchen layout, we made a few minor changes to the right hand side. The cupboards moving forward to sit in line with the washing machine meant we needed a kick board and end panel. We just used MDF and had it sprayed. The main change was moving the wall cupboards over. This made such a difference to the kitchen, it feels so much larger and creates a much nicer first view when you enter the room. I would love to remove the wall cupboards all together but we can’t be without the storage. Our kitchen is quite small so to help maximise storage, we planned out what each cupboard would store and installed additional shelves as needed.
EXISTING ELEVATION
PROPOSED ELEVATION
PROPOSED PLAN
With everything decided, it was time to plan the order of works. We wanted to complete the kitchen as quickly as possible to minimise disruption … and because I wanted it completed by Christmas! Our plan of action:
- Paint ceiling.
- Empty cupboards and remove cupboard doors (remove handles.)
- Cupboard doors, new kick boards and end panels collected for spraying.
- Remove decorative mouldings to top and bottom of cupboards.
- Remove existing wall tiles and make walls good ready for the new tiles.
- Move over wall cupboards.
- Remove built in oven / gas hob and replace with a freestanding duel fuel oven.
- Remove existing worktops and sink.
- Move cupboards forward on RHS so flush with washing machine, worktop depth 650mm.
- Cut worktops to size and cut outs for sink / tap.
- Install new worktops
- Plumb in the new sink and tap.
- Change kitchen light fittings. Make good ceiling and touch up painting.
- Complete wall tiling and all mastic as required.
- Any making good of walls. Paint walls.
- Re-install sprayed cupboard doors, end panels and kick boards.
- Fit new cupboard handles.

My biggest tip is to specify and plan every aspect of the design first. It ensures your scheme is coherent; everything is considered and it all works together, it also reduces the risk of mistakes / surprises when the project starts. You can also budget everything and tweak products if needed. Get everything ordered and delivered before work starts, especially if you’re using contractors. We were lucky that everything we picked was in stock but some products will be on a longer lead time – this could be 6-8 weeks, sometimes longer – the last thing you want is contractors waiting around for products to arrive, it will ultimately cost you money. The kitchen took a week to complete and planning everything first minimised disruption to our home. Two years on and so far so good! The kitchen cupboards still look like new; having them professionally sprayed was definitely the right decision for us. The worktops have a few minor scratches, we could buff them up but I personally quite like them looking a little bit worn. I love that we took something existing and recreated it, it feels like an achievement to see something transformed. In case you’re wondering, it was completed for Christmas … work started mid December so it was touch and go, but we made it! Which was just as well really as we were hosting Christmas lunch that year for the first time!